


Everything about this game amazed my young mind, particularly how the characters and levels looked more realistic and detailed than any game I'd played before. What I didn't know at the time was that it was indeed a landmark in video games, being one of the first to feature fully pre-rendered graphics and coming up with a new system from the digital technology that had previously been used in movies like Terminator 2: Judgement Day and, interestingly given
the strong connection to it I mentioned earlier, Jurassic Park that could create more detailed graphic and photorealistic lighting. Donkey Kong himself was particularly intriguing to me. The instruction booklet itself made it clear that this was a new Donkey Kong but I was aware of that even before I read it, as I remembered the look of the character in the original games. I liked his cool design, with the necktie (which I actually didn't remember from before), the curly point on the top of his head, the look of his face, etc, and anybody who's kept up with the series over the years knows that that has since become Donkey Kong's standard look. Of course, the game also introduced Diddy Kong, Donkey Kong's little sidekick, who I originally thought was meant to be Donkey Kong Jr., who I remembered from the original games and Super Mario Kart, but I soon learned was a completely different character (he was originally supposed to be Jr., but the developers had to make him a new character due to the vastly different design). That didn't stop my friends and I from debating about whether or not he was DK's son, which I knew wasn't right because of his long tail and because DK is clearly a gorilla, which don't have tails at any stage in their life. Initially, I didn't know what to think of Diddy and, for a while, I didn't really like him because I always wanted to be Donkey Kong when I was playing; when I would take a hit and would be forced to use Diddy, I'd get rather irritated. But, over the years I've grown to really like the little guy, as he not only provides you with an extra hit but is also faster and more agile than DK, able to jump much farther to grab items when you use his cartwheel attack beforehand (although when it comes to jumping straight up, dealing with certain enemies, and throwing barrels, it's best to have DK along). He's one cool monkey.


While dated by today's standards, the game's graphics and character animation, especially Donkey Kong and Diddy themselves, are still cutting edge and well-done for the time, as well as interesting to watch. I mean, you have to love seeing them clap hands together when you switch between them, like a real tag-team. Each of them has their own unique action for various instances, such as when you're letting them just stand around, doing nothing: Donkey beats his chest and hollers, while Diddy takes his cap off and scratches his head while looking right at you. When you play a bonus level that requires some guess-work, you can see them motioning about paying attention to what's going on, and if you lose at one, Donkey face-palms and groans before dropping his head and shaking it in defeat, while Diddy throws his cap down and stomps on it angrily. When you teeter on an edge, Donkey's eyes bulge like a cartoon character (as they do in the opening animation when Cranky throws a TNT barrel at him) and he then spins his arms backwards, trying to keep his balance, while Diddy fidgets around on one foot. The funniest ones, though, are when you lose a life: Donkey falls to the ground and sits up, rubbing the back of his head while give you a very annoyed look, while Diddy sits up, rubbing the side of his face, which now has a black eye, as stars spin above his head. You get so used to the limited number of animation cycles they go through that it's interesting to watch the roll call before the credits after you beat the game and see the two of them messing around with each other in different ways, like Diddy stomping Donkey's foot and biting his finger and Donkey whacking him to the ground, knocking his cap off, and kicking him to the ground.


The story is very simple, as is the gameplay: Donkey Kong's banana hoard has been stolen by the Kremlings, a race of villainous reptiles led by the evil King K. Rool, and he and Diddy have to journey across Donkey Kong Island in order to get it back. (The instruction booklet even says that they stole it during a stormy night and that they jumped Diddy while he was standing guard, which is why you find him in a DK barrel at the beginning of the first level.) It's your basic side-scroller: your goal is to reach the end of each level, traveling through a number in each area of the island until you reach and battle the area's boss, leading up to the final battle with K. Rool. You often alternate between having both Kongs at your disposal, controlling one while the other follows behind you and able to switch between them when the need arises, to having just one when the other takes a hit from an enemy. Needless to say, if you take a hit with only one Kong, you lose a life, but you can get your missing buddy back in each level by finding a DK barrel, which they end up contained inside. In addition to completing the game's story, you can also go for getting a perfect score of 101% by finding all of the bonus areas strewn throughout the levels, including one in a later area that can only be uncovered once a playthrough. The bonus areas themselves are little more than a chance to earn items and extra lives through various way; actually finding them is what gets you points (the sequels would really build on this concept and make the bonuses more vital in fully completing the game).


There are several different types of items that you come across which can help keep you in the game by replenishing your lives. The most common ones are the bananas you find strewn throughout the levels, either one at a time or in bunches made up of ten; you get an extra life for every one hundred you collect. Each level also contains letters that spell out the word "KONG," which also gives you an extra life when you do so. The most direct way to get extra lives are to grab one of the three, different-colored life-balloons that are shaped like Donkey Kong's
head: red, the most common, grants you one life, green gets you two, and the very elusive blue gets you three (this rule of thumb would remain common in the two following games). Being balloons, though, you have to get them as soon as you see them before they float out of reach. And finally, you have tokens shaped like the animal buddies you find that, whenever you collect three of one type, transport you to that particular animal's bonus level which, as I'll get into presently, are the best ways to get extra lives. All of these items are found in the bonus levels, either as the ultimate prize or simply strewn throughout them.


The Donkey Kong Country games have always had an odd barrel theme about them, probably stemming from how the original Donkey Kong used them as weapons against Mario, and this original game is no exception. There are a number of different kinds of barrels to be found throughout the game, with each level having at least two of each type, and they serve several different functions. Most commonly, they can be used as weapons to throw at enemies, although their effectiveness varies. Barrels with green, plant-like rims around them are weak and break upon impact, while steel-rimmed barrels roll through enemies and will only break when they hit a wall or fall down a pit. The most durable type of throwing barrel are the steel kegs, which can only be stopped by a pit and which you can also ride on by jumping on them when they're rolling (it serves no major function but it's a good way to keep from losing the keg so it can clear your path more effectively). TNT barrels' function should be pretty obvious and what's great about them is that they take out any type of enemy you come across. They also act like time-bombs when you put them down after picking them up, shaking and exploding a second later. Like I mentioned earlier, DK barrels contain one of the two Kongs if you happen to lose him at any given point, and Continue Barrels, which are the ones with glowing stars on their sides, act as halfway points and, after you smash them, are where you appear when you re-enter the level after losing a life. Two types of barrels are specific to their individual levels: Stop & Go Barrels appear in the level, Stop & Go Station, and temporarily put the invulnerable Rock Krocs to sleep so you can slip by them, while On and Off Barrels appear in the level, Loopy Lights, and you have to continuously hit them as you go through the level in order to keep this otherwise dark level lit. And finally, you have Barrel Cannons, which you have to get the hang of in order to make it through some of the game's trickier levels. Barrels with white explosions painted on their sides shoot you automatically when you jump into them, whereas unmarked ones allow you to do it yourself, although that isn't made any easier by how they tend to spin around and move up and down or back and forth at various speeds, forcing you to time your blasts.


The game also introduces other Kong family members who each provide you with a type of useful service when you come across their respective spots in the different areas of the island. Funky Kong is DK's cool, surfer dude cousin whose barrel planes can take you back to areas of the island you'd already visited in order to replenish your lives if you're running low (more than likely, you'd go to Jungle Hijinxs or one of the easy earlier levels), while Candy Kong is a curvy, female ape in a swimsuit who runs the save points where you can save your progress. But my favorite has always been Cranky Kong, DK's grumpy, very sarcastic grandfather (or father, who's also meant to be the Donkey Kong
from the previous games) who always complains about how the classic, more simple games of the 80's were much better than these new, over-complicated games that us "young whippersnappers" play nowadays. I would often stop by his cabin just to hear him complain and whack your lead character on the head with his cane every now and then, even though he did give useful advice after he was through ranting (although I personally never needed it since I got Nintendo Power's Player's Guide not too long after I got the game). He's so cool that he even pops up in the instruction booklet to chastise you for wasting your time reading it!


The animal buddies you come across in the levels are cool as well and, for the most part, rather helpful. Rambi the rhino is one of my favorites, as his ability to easily mow down enemies and smash open the entrances to bonus areas often makes getting through levels a whole lot easier (I say "often" because there are some levels where he's more of a handicap than anything else). By the way, watch how he pants like a dog when he's just standing around, and the silly expression and sound he makes when he does take a hit. Winky the frog is another favorite because of how high you can jump with him, allowing you to reach otherwise impossible to grab items, and also because he can kill those annoying Zingers by jumping on them, which you can't do yourself (I'll talk more about those bastards in a second). That said, though, when you're jumping with him, you have to really watch where you're going to land, especially when jumping on enemies as you'll lose him if you slam into the side of an enemy rather on his back. Enguarde the swordfish is also cool and, like Rambi in the normal levels, he makes getting through the underwater levels much easier, as he's easier to control than either of the Kongs, who are obviously out of their element underwater, and can spear just about every enemy you come across. That's very nice to have because, when Enguarde isn't around, you're completely defenseless in these levels and have to maneuver around the enemies. Even though he appears in only one level, Squawks the parrot is another one of my favorites because he made his otherwise typical cave level a little unique with how he lights the way through the very dark level by holding a flashlight as he flies behind you. Having read up on his gimmick in the instruction manual, I was looking forward to reaching his level. The only animal friend I never quite cared for is Expresso the ostrich. While he can run fast and fly for a short distance, to this day I almost always lose him when I come across him in a given level because it's so easy for him to get hit, even by the smaller enemies if you land on them (if you stand still, though, they just crawl around his feet without hurting him), and his pitiful flying isn't very helpful, even when it should be. Speaking of which, that's a common hazard among all of the animals that you can ride, as they fling you off when they get hit while you're riding them and can often send you into an enemy or a pit.


As I said earlier, if you get three of one of the animals' golden tokens, you're transported to a bonus level where you play as said animal and run around, racking up as many tokens as you can get before the timer runs out in order to earn some extra lives. Each one of these bonus levels also contains a large golden token hidden somewhere that, when you grab it, multiplies your score, and are different in design and difficulty in getting through. Enguarde's is the easiest, as all you have to do is swim around, going through fake walls in the four corners of the level to rack up a lot of tokens. The same goes for Expresso's, which is one of the few times he feels really useful to me, as his limited flying ability makes it easy enough to get over some walls to reach extra tokens and the big one. Winky's is a bit trickier, as you have to navigate through cramped tunnels in a cavern and jump across some platforms in order to reach the hidden spot where the big token is. You have to watch where you're jumping in order to make it to the token before you run out of time. Rambi's is the hardest, in that you have to jump across a bunch of snow-covered platforms, including a line of them across the top of the screen in order to reach the big token, which Rambi himself is simply not built for. This, coupled with his lack of speed, makes it very hard to grab a bunch of tokens floating in the middle of the level before heading to the big one to really increase your score. When I attempt that, I run out of time before I reach the big token. In all, while these bonus levels are useful when you're running low on lives, getting thrown into them when you least expect it can take you out of the game (in the later snow levels, for instance, it's jarring to suddenly get thrown into Expresso's jungle level), and it doesn't help that they tend to drop you back into the level a little bit before where you entered, including at the entrance sometimes. That's especially annoying if you're on a roll in a particularly hard level.


There are different classes of enemies you encounter throughout the game, with the most basic simply being called, "bad guys," who are little more than evil animals and are, for the most part, easy to deal, particularly Gnawtys, these beavers who do little more than walk in straight lines and are easily dispatched by jumping on them or rolling into them. However, there are a couple of levels where they start acting like hamsters and walk in the center of these big wheels that can crush you if you're unable to get around them or get to safety in time (they can't be killed in those instances) and others where they drop down on top of you from platforms above. Armies are armadillos that, when they see you, roll up into balls and try to hit you. Donkey Kong can take them out easily, even when they're rolling, but if you only have Diddy, you have to hit them once to stun them and again to take them out. Neckys are vultures that usually fly around in rows and are little more than mere obstacles to get around but, sometimes, they sit on platforms and toss nuts down at you or right at you, forcing you to time your attacks when dealing with them. Mini-Neckys are even worse, as they fly in place and spit nuts at you, sometimes hovering up and down while doing so; fortunately, steel-rimmed barrels go right through the nuts and hit him. Manky Kongs are orangutans that throw barrels at you, usually from on a hilltop, forcing you to run up towards them while dodging the barrels.. Slippas are snakes that, while not difficult to take out, often come at you in very cramped spaces where it's hard to get around them without getting bit. But, bar none, the worst of these enemies are Zingers, these incredibly annoying bees that you can't touch at all and can only kill either with a barrel or an animal friend (preferably Winky). They often show up in the absolute worst places, just waiting to screw you over by flying back and forth in place or, even worse, appearing in big swarms. And unfortunately, they're a mainstay of the series and get even worse in the sequels.


The aquatic bad guys are unique in that, unless you have Enguarde, you can't defeat them (some can't even be taken out by him) and instead, you have to maneuver around them. The most basic ones, which aren't even mentioned in the instruction booklet or player's guide, are Bite-Sizes, which are simple piranhas. Not too hard to avoid, as all they do is swim back and forth in small spaces, but large schools of them can get annoying. The same swimming pattern applies to Chomps, big sharks that can be a pain to get around because of their size, but Chomps Jrs, despite being much smaller, are even worse in some ways because they have an even bigger predilection to showing up in big schools. Clambos are clams that can spit pearls at you, often in many directions at once, and they're one of the enemies even Enguarde can't take out, so you have no choice but to maneuver around them and their pearls. Squidges are jellyfish that often come shooting out of nowhere, although I've never had that tough of a time getting around them, although they can get annoying if there's a bunch of them at once (case in point, the image of them here). And finally, Croctopusses are octopi that chase you when you swim by them and, like the Clambos, are completely invulnerable, so all you can do is outrun them through the twisting, turning passages they tend to chase you through. I often like to try to catch a look at them when they're just floating in place because they look really cool and are very well-designed and animated.


Klap-Traps are these little crocodiles that crawl back and forth, constantly snapping their jaws.
They tend to be annoying because they often slip up on you and, as you can probably guess, can only be taken out by jumping on them. One level features purple-colored Klap-Traps that jump when you do just for an added difficulty and there are also some bonus levels where you have to constantly jump on two or more of them in order to eventually get the prize. Get bit and you lose, which is likely to happen since they get faster with each hit. Krushas are these big, muscle-bound, Arnold Schwarzenegger wannabes that only Donkey Kong can take out by jumping on them (they literally laugh off roll
attacks). In addition to the regular blue ones, the very last level features these silver Krushas that can only be killed with a barrel. Even though they can be a pain, I've always liked them because of the funny grunts they make when you would kill them, a sound effect you hear in many
of these games. Finally, there are the creepy Rock Krocs that run back and forth in various
spots of their one level, are completely invulnerable, and can only be bypassed safely by unless hitting the Stop & Go barrel. Their glowing red eyes and sporadic movements always gave me the creeps when I was a kid, as did the supremely eerie music that plays in this particular level.


In addition to the enemies, there are several types of hazards, aside from the obvious instant death pits, that can hurt you as well. For my money, the worst are the spiked mincers that start appearing in the later areas of the game. Their large size and tendency to move back and forth at various speeds or be clumped together in big groups make them hard to get around, and the added presence of regular enemies doesn't help matters either. Burning oil drums, while not quite as difficult since they don't ever move, can also be a pain in the ass to deal with, and there are some levels later on where you have to jump across a series of them continually flame up and then cool down. And finally, there are dumb drums, which are introduced early on in the game's second area and constantly spew small enemies, like Gnawties, Klap-Traps, Armies, and Slippas, at you. They can be destroyed by TNT barrels but you have to time when you throw them because you'll otherwise uselessly kill whatever enemy it spewed at you.
One of my absolute favorite aspects of Donkey Kong Country is the music score. All of these games have really good music to them but the themes and pieces here, composed by David Wise, with contributions by Eveline Fischer and Robin Beanland, are my favorites of the series, as well as some of my favorite video game music period. The main theme is just a classic, with how it starts out in 8-bit like the classic Nintendo games and then transitions into a more modern, rocking tune with a nice beat to it, which goes along well with the opening animation that starts with Cranky Kong playing an old-fashioned phonograph and then, Donkey Kong knocks him off the screen and starts jamming to his stereo. What's great about the music is how the composers made the various themes and pieces not only wonderfully atmospheric but also reflective of the screens and levels they appear in. When you're traveling across the map, you hear a mellow, traveling theme with a melody that goes, "Doo, doo-doo, doo-doo-doo," as it heads into the meat of the piece; Cranky's cabin has an old-timey, creaky theme to it that perfectly reflects his nature and is evocative of the stereotypical scenario of having to listen to an old person drone on and on as they sit in their rocking chair, which is exactly what he does (when he's not whacking you with his cane for no reason, that is); Funky's theme is, as you'd expect, a big, surfer dude piece of music with voices going, "Aah, yeah!" every now and then; Candy's theme is an old-time, suggestive romantic piece that's reminiscent of what you'd hear back then when a sexy woman appeared onscreen; the bonus levels have a very upbeat, infectiously bouncy theme that you just can't help but smile at when you hear it; and the boss battles have a driving, exciting theme that becomes rock guitar-oriented in the middle before going on to become more percussive and urgent as the battle draws on longer. There are also pieces of music that accentuate whether you win or lose a bonus level or finish a level itself. When you win a bonus level, you get a nice, triumphant piece as Donkey Kong and Diddy celebrate, which has a shorter, more sped up version when you complete a level, but when you lose, you get a shameful, defeated piece as your Kong laments his loss. The funniest piece of music is when you lose a life by getting hit by an enemy: as your Kong falls, you get a short, rolling, silly piece that almost sounds like the game is making fun of you. And the music for the game over screen is a short, very sad piece that almost sounds like something you'd hear at a funeral (when it's accompanied by the image of Donkey Kong and Diddy with the crap beaten out of them on the screen, it's actually rather scary).
The best aspects of the music score is how each type of level has its own, individual theme. The jungle levels have a piece that's become sort of the signature Donkey Kong Country music: it starts with some rhythmic drums, builds up faster and faster to an energetic, strong melody, and then becomes downright jazzy, with rolling piano keys and an electronic beat that's impossible not to like, before settling down into a more mellow, quieter section that fits well with the levels going from day to night and the sight of the setting sun and darkening sky in the background. The theme for the cave levels is interesting, in that it starts out with a type of quiet beat that goes well with the subterranean nature of the place (it's accompanied by sounds that's very akin to dripping water and rustling) when, before you know it, it transitions into an eerie, echoing piece that builds and builds until it becomes like a howling moan. The music afterward becomes lower and more ominous, accompanied by percussive sounds in the background that sound like something's moving around in the nearby caverns. It's pretty freaking unsettling, and as a kid, I would always try to find a bonus level so I wouldn't have to hear it. Probably my favorite theme is the one for the underwater levels, which is so beautiful and relaxing, perfectly capturing the mystery of the ocean and the calming feeling of being underwater. It's music I like to think of during the summer, especially when I'm by the beach in Florida, and is great to meditate to because it's so relaxing, especially the latter half of it. In fact, it might be a little too calming, as it lulls you into this state when you're supposed to be swimming around enemies! There are three different types of mine levels and each one has its own theme. In the levels where you're walking along scaffolding or riding a moving platform, you get this slow, steady piece with a melody that goes, "Doo-doo-doo, di-di-di," accompanied by more water-dripping sounds and plinking that sounds like pickaxes hitting rock way in the distance. The mine-cart levels have a very fast, urgent, and nerve-wracking that goes along well with the frantic nature of those particular challenges. And finally, the music for the ones where you're literally walking around in a mine-shaft is nothing short of nightmarish and haunting, sounding more appropriate for something like Silent Hill. When it starts out, it doesn't even sound like music but rather as just an eerie, reverberating sound that is eventually accompanied by soft, tinkling sounds and distant, "Bom, bom, baum, baum," noises. It finally does become music but it's soft, low, and unsettling, accompanied by those sounds I just mentioned before transitioning back into that reverberating noise, now joined by the distant sounds of tools clanking, as if you're walking through a mine that's haunted. The music is slowly faded out and replaced by more unsettling noises and more pronounced sounds of tools clanking, making you pray for the EXIT sign. Trust me, listen to this theme, which is called Misty Menace, in the dark by yourself and tell me you're not creeped out of your mind.
Another favorite theme of mine is for the two temple levels, mainly because I always like that kind of mysterious, Aztec-like music anyway and I think it goes well with the notion of roaming around the ruins of a now lost civilization. The two forest levels have a simple and quaint theme that's accompanied now and then by a wind-pipe playing a very memorable, "Doo-doo-doo, doo-doo-doo-doo," melody. The two treetop village levels have a memorable quick, sort of mischievous, beat to them that goes well with the constant tire-bouncing and barrel cannon-blasting you have to do there. Snow levels have an atmospheric theme that starts out very calm and subdued and slowly builds as it goes on, with little melodies here and there, and becomes more bold and upfront, albeit still very calm, surprisingly. It works the best with the first snow level, Snow Barrel Blast, where the scene starts out as a clear, sunny winter day and then becomes gradually overcast before developing into a full-blown blizzard, feeling like it's evolving with the visuals. The latter part of the music is just beautiful to listen to, especially with the visual of the snow falling around your characters, and I like to just sit back and listen to it a little bit before going on. There's only one ice cave level, and it's considered by many to be among the game's hardest. And yet, the music that goes along with it is this very gentle, playful tinkling piece that sounds like something you'd hear around Christmas. The two factory levels have a cool, mechanized, percussive theme with a really nice, memorable beat to it that you could almost get up and dance to. It would actually make good workout music! And finally, the theme for the final battle with King K. Rool on his ship starts out with a typical, harmonica pirate piece that transitions into a driving, rhythmic bit accentuated by a melody that has that same pirate flavor to it.


Ropey Rampage: Another jungle level, this one takes place at night during a heavy rainstorm. The heavy rain can obscure your vision if you let it (although I myself have never found it to be that much of a problem, mainly because of how much I've played this game) and that's a problem, because this is also the first level where you need to put your swinging skills to the test. You not only need to swing across a number of gaps and chasms but you also need to swing up into the treetops in certain spots to find items, such as a Rambi token early on, and land on certain, fragile spots in the ground to unearth others, like a tire that you can use to find a hidden Winky token. Enemy-wise, this is where you're introduced to both the Armies, which are hard to see due to the rain, the darkness, and how they blend into the ground, and the Zingers, which you need to swing around, including a row of them near the end of the level. The two bonus levels here each require a leap of faith to find, with the former being found in-between two treetops just out of view and the latter down a pit right before the exit. The first bonus level is easy enough, in that all you do is jump across some ropes suspended above a chasm, collecting the bananas on them, until you reach the "N" in KONG, but the second one is the first of many guessing games where you have to keep your eye on the item as it rapidly goes from barrel to barrel until it stops in one.


Bouncy Bonanza: This cave level is a rather lengthy one, full of tricky enemies like Zingers and bouncing Kritters, as well as a lot of bouncy tires, hence the name. There's also a spot where you have to push a tire through a cramped passage in order to bounce up and smash the Continue Barrel, and then push it onto a platform that rises up and down in order to reach a ledge up above that eventually leads to a bonus room where the prize is actually Winky himself. Needless to say, he comes in handy during the level's latter quarter, where the Zingers are out in full force, hovering around tire platforms that you need to use in order to cross some pits, although you have to watch where you're jumping or you might flung off of him and down to your doom. As for the other bonus levels, the first near the beginning isn't difficult to find, although it's best to use Diddy to throw the barrel to break open the entrance because with Donkey Kong, you might hit one of the Zingers buzzing above the gap where the bonus can be found or hit the upper edge of the small wall you need to smash open (said bonus is a guessing game where you have to get three of one item). As for the last bonus, which is right before the exit and involves you getting blasted into a spot at the ceiling where you bounce along some tires to grab bananas, it's best to have Winky so you can bounce up to the barrel cannon without having to push a tire on the moving platform below it.


Millstone Mayhem: The first temple level introduces a couple of new hazards: the Krushas, which can only be taken out by Donkey Kong or a barrel, and the Gnawty-powered millstones, which require timing to get around without getting squashed. Significantly, all three of the bonus levels here are before the Continue Barrel, with the first one hidden right above the entrance (it's another one requiring to choose a line of bananas to shoot yourself up, one of which contains the "K"), the second behind a wall that has to be blown open by a TNT barrel found a few feet before the spot (you have to carry it around two millstones and two Krushas; the bonus itself is worth it, though, as it's a guessing game where the prize is a green, 2-Up balloon), and the third right above a millstone (this bonus has you hit four rotating letters in order to spell out RARE to win an Enguarde token; if you hit one of the crocodile heads in-between the letters, they'll spin in the opposite direction). Winky can be found shortly after the Continue Barrel but he ends up being more of a hindrance, especially when trying to get around the last millstone as, no matter how low it is at the time, I can't jump over it with him without him taking a hit and flinging me off. I don't think I've ever cleared that last hurdle with him, in fact, unless it was so long ago that I don't remember.


Forest Frenzy: While it may at first seem like a repeat of Vulture Culture, it quickly becomes clear that's not the case with this level, as you find yourself grabbing onto ropes that move you across gaps and often through long stretches full of Zingers and Neckies, forcing you to climb back and forth on the rope to avoid taking a hit. Sometimes, the enemies hover in place but other times, they move around or come at you from various altitudes, making them harder to dodge. Right before the last swarm of Neckies you have to go through, there are two Zingers hovering around the letter "G", which is easy enough to get as they're moving fairly slow, and then, a single one rapidly buzzing around a 1-Up balloon, which is best to avoid if you don't have both Kongs as it's nearly impossible to grab it without taking a hit. Both of this level's bonuses are located during this last part and they're both easy to miss: if you look closely at the bottom of the screen during that last Necky swarm, you'll just barely see the rim of the barrel cannon that blasts you to the bonus (it's a guessing game where the prize is a Rambi token) and when you're blasted out of it, you unearth a DK barrel that you have to carry up and down a series of six steps while avoiding jumping Kritters in order to smash through the wall under the last step on the right. It's best to use Diddy while doing this since he holds it out in front of him (the bonus is just you climbing up and down a slow-moving rope while gathering a lot of bananas before jumping down to grab an Enguarde token before you leave).


Orang-Utan Gang: This level is a pain in the ass and for several reasons: it's long as crap, there are a lot of enemies, including bouncing Kritters, Armies, Klap-Traps, and the newly introduced Manky Kongs, and you have to backtrack a lot in order to find everything, including five bonus levels (it's a good thing Candy's Save Point is right before this level on the map). Most of the level consists of you running across treetops connected by long vines that are full of enemies, particularly those Manky Kongs, whose barrels come rolling in from off-camera before you actually see them. You get a break at the beginning when you're presented with a steel keg that you can ride across the treetops, mowing down enemies that get in your way, but you eventually have to abandon it in order to avoid falling to your death. The first bonus level requires you to journey through a little over a third of the way into the level until

you find Expresso, ride him back to the beginning (it's a good idea to clear out the enemies leading up to him), and then flapping him across a gap underneath the treetops you started on to find a hidden ledge with the entrance (the bonus itself is merely spelling out WINKY to get a token of the frog). Speaking of Expresso, the letter "O" can be found on the bottom ledge on the hill his crate's sitting on and it's hard to get to it because you have to jump so precisely in order to avoid landing on the ledge above it and falling down the gap. The other four bonus levels are in the home stretch after the Continue Barrel, with the latter three being one after the other, but the level doesn't get any easier, as you have to either ride Expresso or cartwheel jump with Diddy underneath some treetops to reach a couple of ledges leading to the second (in order of appearance) bonus level. The bonus itself is very easy, in that you just have to bounce off a tire to unearth three buried items, but getting to it without Expresso is really difficult and impossible without Diddy. The last three bonuses only require you to smash open their entrances but you have to get the barrels around some enemies in order to do it successfully. The first two of these remaining bonuses have you again unearthing items by bouncing off a tire (reducing the number of items by one with each bonus) and the last has you fly across a long gap with Expresso in order to reach a ledge with a 1-Up balloon.


Bumble B Rumble: Queen B, a massive Zinger who's the only confirmed female baddie in the whole game and also seems to have the biggest portion of the banana hoard than any of the other bosses, takes a little more strategy to defeat than the two previous ones did. First off, her attack pattern is to fly straight across the top of the screen and then come right at you from the sides, meaning that it's best to let Diddy Kong take the lead as all you have to do is stand there and let her crash into the barrel you're holding, whereas Donkey would have to actually throw it (not that it's that much of a handicap but you'd have to time your throws). Second, every time Queen B takes a hit, she becomes enraged, turning red and becoming invulnerable for a short period of time, and flies up and down towards you until she calms down, forcing you to dodge until that happens. And third, as you might expect, her movements become faster and more erratic with each hit she takes, so you really have to watch it. But, as with all the bosses, if you keep a cool head, you can beat her without much trouble.


 Snow Barrel Blast: Gorilla Glacier wastes no time in cranking up the difficulty from what you've been through before with its first level. At first, this level may not seem too difficult, especially since the first of its three bonus levels is right at the start and only requires bouncing off a Necky that flies towards you from the right to find it (it's a guessing game where the prize is a Winky token), but as it goes on and the raging blizzard starts to gather in the background while you slip around on the ice and blast yourself across the ledges while dealing with Neckies, Gnawties, and Klap-Traps, it'll soon become apparent what you're in for. The blizzard comes at you full force once you're blasted into the Continue Barrel (the second bonus level can be found in a gap to the left of the barrel, past a Krusha who has to be freezing his ass off; you shoot yourself upwards to grab the letter "O"), obscuring your vision and adding to the difficulty. After the third and final bonus, whose barrel cannon can be found on an icy platform underneath the main path of barrel cannons (it's another one where you shoot yourself through a line of barrel cannons, grabbing items along the
 way), and an extremely hard to get Rambi token (you have to shoot yourself in-between two Zingers from a barrel cannon that rotates very fast), the home stretch is a long and challenging series of rapidly and erratically moving and rotating barrel cannons with equally erratic Zingers who act as virtually impossible obstacles. The odd thing about this stretch, though, is that there's a way to bypass it through a series of automatic barrel cannons beneath the main path that I almost always end up getting blasted into by accident. In fact, it happens so often, partly also because I know that it's down there, that I have to try to take the main path, often getting killed whenever I do. As you might expect, that shortcut is a godsend to those who've lost countless lives on the main path, which ends with several icy platforms guarded by more Zingers, but the thing is, the first of said platforms is an elusive blue, 3-Up balloon, which is almost worth the headache if you're desperate for lives.


Slipslide Ride: If you hate the slippery nature of snow and ice levels in video games, you will absolutely despise this level, as that's its biggest gimmick. Not only is there not one path of ground where you don't slide around but you also have to jump across gaps, bounce upwards through shafts, deal with slopes in a lot of these spots (those are pain, believe you me), and jump across and climb ropes that, depending on the color, make you automatically slide up or down, forcing you to fight them while you do so, all while, of course, dodging Zingers. In short, if you have problems with your hands, this level is likely to give you carpal tunnel syndrome! The first two bonus levels aren't that hard to find or get into, all things considered (and all you have to do in them is spell out "KONG" and "NINTENDO" respectively to win prizes), but the third is a pain to get into because you have to jump across two upward-slipping vines with Zingers around them (the bonus itself is also a bit tricky, as you have to jump across ropes that alternate between sliding you up or down as you grab bananas and jump for the Expresso token on the other side of the gap). Even the last two letters in "KONG" are hard to get, especially the "N," which is impossible if you only have one Kong because you have to ride up an upward-sliding rope past three fast-moving Zingers that will always sting you, and the "G" forces you to fight your way up a downward-sliding rope, hurting your joints even more, to grab it. The fact that it comes right at the exit makes it feel like little more than a personal insult on the part of the game designers.


Ice Age Alley: This is like the other half of the area where Snow Barrel Blast was set, as you come out into the ongoing blizzard and it slowly dissipates as you go through the level. Fortunately, this one isn't nearly as difficult. It actually has some leniency to it from the start, as just to the left from where you begin is a ledge with the letter "K" and a crate containing Expresso, whose help you need in finding the two bonus levels. The first one, you have to fly up to a hanging platform with a barrel cannon and jump off of Expresso in order to reach it (the bonus has you blasting around a room full of cannons while grabbing an Expresso token and allowing you to get him back before you leave; if you activate his bonus level when you grab the token while doing this, though, you won't be able to reenter the actual bonus to get him back), and the second, you have to fly off a ledge to reach another platform (in this bonus, you can choose between the three different extra life balloons; best thing to do is go for the elusive blue). The level's actual challenges aren't as bad either, as it's mainly working your way up and down slopes and swinging across vines while dealing with pretty basic enemies, although there are a few Manky Kongs to deal with who can cause you to lose Expresso if you're not careful. But, all in all, it's a nice change of pace after the levels that came before it.


Rope Bridge Rumble: This is basically a repeat of the Tree Top Town level, only much longer, with an icy-blue, frozen look to it (fortunately, you don't slip around here), and the main challenge being bouncing tires and small platforms instead of barrel cannons. The enemies consist of bouncing Kritters, Armies, and, of course, Zingers that you have to jump over while clearing gaps (personally, I think the game designers got very carried away with using the Zingers as obstacles in levels), with the last obstacle before the exit being three of them stacked on top of each other, forcing you to really time your bounce over them so you can get around and land on the moving platform on the other side. Oddly enough, as long as this level is, there are only two bonuses but they're both very easy to miss, as there's no indication of the first one's presence at all (you just have to take a leap of faith between two trees) and the second has a single, floating banana that's just very visible and hard to miss when you're trying to concentrate on getting across a gap. The first bonus level has you jumping across a bunch of tire platforms to find Winky on the other side of the gap (it's nice to have him when dealing with the Zingers, especially those three at the end, but if you're not careful, you'll get flung off him into oblivion) and the second is a guessing game where you choose one of the various animal tokens to match three of. Plus, it's worth trying to find them since they both allow you to bypass considerable chunks of the level.


Oil Drum Alley: The first half of this level seems simply enough, as the main challenges are jumping Kritters and burning oil drums that you have to avoid, often with the help of bouncy tires, but after the Continue Barrel, things really start to get hard. Not only do you run into Manky Kongs but the last stretch has you timing your jumps across floating oil drums that are constantly flaming on and off. You really have to watch and memorize their sometimes erratic patterns to get across safely, because there are moments where it looks like the flames are about to recede when they flare back up. You can find Rambi after the Continue Barrel as well but this is an instance where he's something of a detriment due to his lack of agility and jumping skills, particularly during that last stretch. As for the bonus levels, this level has a secret that's the key to getting the 101% completion rating: a bonus within a bonus. The level's second bonus is easy enough to find but, when you play the guessing game inside, you have to go for the single banana prize and, when you do, a barrel drops down that you can use to smash open the right wall in the room (the right-pointing arrows in the background give you a hint as to what you're supposed to do), revealing another bonus. However, you have to be using Diddy Kong and run straight through the wall while holding the barrel to get in because you don't get a chance to play it otherwise and, what's more, you can only uncover this secret once during a playthrough; screw up, and you'll have to start a whole new game in order to get another chance. This secret bonus is worth going for anyway because you can earn six extra lives by spelling out, "DONKEY" for a 1-Up balloon, "KONG," for a 2-Up Balloon," and finally, "COUNTRY," for a 3-Up. The other two bonuses are nice enough as well and easy to find but this is probably the most rewarding in the entire game.


Trick Track Trek: A variation on the scaffolding mine level that was introduced way back in Winky's Walkway, this level has you riding a platform for most of it while dealing with enemies like Neckies, Mini-Neckies, Gnawties, and Zingers. There are two long stretches where you have to ride this platform and each has its own set of challenges: the first consists of those former two enemies acting as obstacles, while the second, which starts after the bit of scaffolding that leads to the Continue Barrel, involves Zingers and enemies dropping down onto your platform from above. These enemies range from innocuous ones like Gnawties to much more serious ones like Klumps and Krushas, so it's a good idea to try to keep both Kongs in play. The three bonus levels can be tricky to find if you don't know where to look. The first one, which is simply you riding a platform around a room full of bananas, is located underneath the scaffolding before the Continue Barrel and requires you to roll-jump from your platform as soon as you come up to it; the second requires you to jump onto a bit of scaffolding with two Gnawties in order to jump to the barrel cannon but you have to do it while you're on a high enough part of the track to reach it (the bonus is another Klap-Trap bashing one but this one is the purple kind that hops when you do, a taste of what's to come in one of the game's last levels); and the third is underneath the exit and guarded by a Manky Kong you have to take out with a spin attack (it's worth the risk, though, because it's one of those guessing games where you can choose one of three different types of extra life balloons).


Elevator Antics: This level was the bane of my existence for the longest time when I was a kid. For a good long while, I was stuck on this one due to its many challenges, the worst of which are the elevators you have to jump across during the second half after the Continue Barrel. You have to be so precise in your jumping in order to get across these spots, which are made all the more complicated by how you often have two or more sets of elevator platforms going in opposite directions and the ever-annoying Zingers hovering around them. The last bit after the arrow sign pointing towards the exit is particularly difficult in terms of timing and getting around Zingers. The half before the Continue Barrel is no picnic, either, as it involves a lot of rope-climbing and squeezing through narrow passages with Zingers and dumb drums that throw Slippas at you. Shortly before the Continue Barrel, there's a pit containing a DK barrel that also has a dumb drum, meaning you have to do whatever you're going to do and climb out of there very quickly before you get overwhelmed with Slippas. The first two of the three bonuses aren't very easy to get into, with the first requiring you to use Diddy Kong's cartwheel-jump to reach the rope you have to climb to it (it's spelling out KONG to get a 1-Up) and the second forcing you to jump across ropes guarded by Zingers to get to the barrel cannon (it's best not to try this if you're stuck with only one Kong). The third bonus is underneath the exit and is simple enough to reach in that all you have to do is ride the last elevator down to it but, by this point, you're probably so desperate to get out of this level that you'd bypass it even if you knew about it (the bonus has you blasting yourself through a line of rotating barrel cannons while grabbing items, one of which is a 2-Up balloon).


Mine Cart Madness: This level takes the relentless, fast-paced nature of Mine Cart Carnage earlier in the game and multiplies it ten-fold, as you now have to make tricky and precise jumps across gaps in the roller-coaster-like tracks, often into other mine carts waiting on the opposite sides, and over and onto enemies like Neckies and Zingers. There are very few spots where you can stop to catch your breath, as the few stable platforms you can leap onto have bouncy tires on them, and during the home stretch, you have to worry about jumping over Krashes in addition to the Zingers and gaps. In short, you're in danger's way almost 90% of the time here, and it's a long level, too. The three bonus levels are also tricky to get into, as they require you to jump at the right moment and into spots you normally wouldn't, like jumping from a rope onto a mine cart on an upper set of tracks into a hidden barrel cannon, quickly jumping onto a floating tire into another barrel cannon, and at the end of the level, you have to jump through the tracks to reach a series of tires leading to the cannon. The bonuses themselves are nothing you haven't seen before, though: blasting through barrel cannons, a guessing game where you choose one of the animal tokens, and bouncing on a tire on a moving platform to grab a bunch of bananas. Even getting some regular items, like an Enguarde token on a hidden, lower track and the letter "N," which hangs in the middle of a gap in the tracks, take quick timing and craziness. By the time you come out of this insane level, you'll probably feel like you've been through a war!


Tanked Up Trouble: This is a lot like Trick Track Trek in the previous area, only here the trick is that you have to keep grabbing the fuel tanks that are strewn across the level in order to keep your platform moving. Your platform's remaining amount of fuel is indicated by the five lights on its side: they're all lit and green when you're full up, turn an amber color when the first one goes out and then slowly diminish one by one, and the last one turns red before it goes out. You really have to grab as many of the tanks (which show how much fuel they replenish by the number of red dots on their sides) as you possibly can; you can miss one or two but there's not much room for error. You don't even have to fall with the platform to your death to lose a life. If you get caught on one of the bits of scaffolding and the platform falls, your character reacts the way he does when you lose a bonus level and you have to start over again. And, of course, while grabbing the fuel tanks, you have to get around enemies on the scaffolding like Kritters and Gnawties and hovering enemies like Neckies and Zingers (there are spots where you have to use hovering tires to bounce around them), and there are also some sections where you have to push a rolling tire onto the platform in order to bounce off it in order to reach some higher-placed tanks and time blasts out of barrel cannons. Knowing how stressful this level's challenges are (especially during the last stretch where many of the tanks only have one dot on their sides) and that you have very few opportunities to catch your breath, it was very merciful of the game designers to put in only one bonus and place it right after the first fuel tank (it's another one 1-Up guessing game).


Misty Mine: I always loved the idea and look of this stage when I was a little kid and saw images of it in the Nintendo Power Player's Guide, which is why I so badly wanted to reach this area so I can play it. Looking at it now, I still think it's a cool level, with the fog giving it an eerie, ghostly quality that's enhanced by the creepy Misty Menace music. Personally, I've never found this level to be that difficult, as most of the enemies are small ones that are launched out of the many dumb drums, like Gnawties, Slippas, Klap-Traps, and Armies, and clearing the gaps with the slow-moving ropes isn't hard at all, but it is rather long and drawn out. The two bonus levels, which both come after the Continue Barrel, are easy enough to find, with the first's location being fairly obvious due to how the rope you use to cross a gap suspiciously hangs down off-screen (this bonus has all four of the "KONG" letters inside, as well as a crate that contains Expresso) and the second's being hidden behind a wall, like usual (it's another animal token guessing game), and there are even spots where you can bounce across seven enemies in a row, which earn you an extra life for every one you hit starting with the seventh. Really, the only parts that are kind of tough are the drums that spit Armies before the last gap and the final row of them that spit out Slippas but, considering some of the previous challenges, it's hardly that tough.


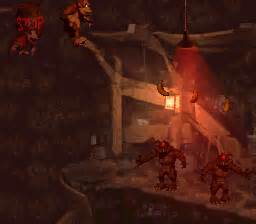
Loopy Lights: This is kind of like a cross between Stop & Go Station and Blackout Basement, as you have to constantly hit special barrels to keep the lights on as you progress through this very dark mineshaft. It's also a very tough level, with purple Klap-Traps that jump when you do, forcing you to time your jumps carefully in order to avoid being bit, narrow, rock platforms that you have to jump and bounce across quickly but carefully in order to clear the gaps before the lights go out, and a lot of Zingers during the last stretch, which remind me a lot of the nest of Rock Krocs during the last bit of Stop & Go Station, as well as a Manky Kong and one last Klap-Trap right at the exit. The first of the two bonuses is right after the start but is quite easy to find (it's a barrel-blaster one) but the second, which is a ways after the Continue Barrel, is a bit trickier, as you have to carry a barrel around some baddies in order to smash through the wall leading to it (it has you jumping across some platforms in the dark to grab some items like an Expresso token and a 1-Up). For me personally, this is the creepiest level in the entire game, as the creepy Misty Menace music, the constant deep darkness, and all of those torches in the background, which look like pairs of eyes watching you, give off a very eerie atmosphere.


Platform Perils: The final actual level is, fittingly, one of the hardest in the entire game. It puts your platforming skills to the ultimate test, with tricky jump after tricky jump across those platforms that fall as soon as you step on them, a lot of hovering Zingers to get around (figures they'd be abundant in the very last level, doesn't it?), enemies often occupying the platforms you need to jump on, and, worst of all, special silver Krushas that can only be taken out with barrels. For this reason, it's best to let Donkey Kong take the lead since his greater throwing power makes it easier to hit the Krushas, whereas Diddy has to jump and throw them, which you sometimes don't have time to do if you're going to make it to the next, falling platform. The games final two bonus levels are located right at the beginning and end of the level and they're both tricky to get into. With the first, you have to walk off the first platform to the left in order to land on one you can't see that'll take you over to the barrel cannon so you can play one last "KONG" spelling game; with the second, you have to stay on the last platform as it drops in order to reach a lower piece of scaffolding from which you can jump to the barrel cannon and play one last guessing game where the prize is an Enguarde token.


Gangplank Galleon: Fittingly, the final battle with King K. Rool on his pirate ship is the hardest and longest boss battle, as he has many phases to his attacks. You really need to memorize his attack patterns as best as you can or you will die and die fast (the first few times I tried to beat him when I was a kid, he clobbered each time). The only time you can safely land a hit on his hand is when he throws his pointy crown at you, which he does at the beginning of the fight. This first phase of the battle is pretty simple, as all you have to do is bounce on his head, jump over him when he charges at you to the other side of the ship, and repeat this process two more times (the number of times he charges at you increases by one with each hit). After the third hit and leaping over his three charges, he leaps to the opposite side of the ship, after which cannonballs begin raining down on you from left to right. You have to jump over the one that comes down closest to you while avoiding the next one and then whack K. Rool again when he removes his crown. He repeats this attack two more times, with the number of waves of falling cannonballs increasing by one with each hit, requiring you to stay on your toes and anticipate from what direction the next wave will come at you from (the first wave always comes from whichever side of the ship K. Rool happens to be on). The worst part of this battle is when you bonk him for the third time during this phase and it looks like you've defeated him, as credits start rolling, but then, before you know it, the game starts again and he gets back up. I fell for this the first time. I put my controller down and watched the credits but then, before I knew what happened, K. Rool suddenly got back up and squashed me. I almost broke the TV, I was so angry. Eventually, I did beat him, but damn, that was infuriating! Beating him after this fake-out isn't easy because he starts bouncing across the ship's deck, forcing you to run under him and then follow him in order to hit him when he removes his crown. As you might expect, he repeats this jump attack twice more afterward, increasing the number of passes by one after each hit, with the distance he covers with his jumps becoming smaller and harder to avoid each time. But, if you're patient enough, you can wait him out and bounce on his head to put him down for the count and win the game, earning back the entire banana hoard.

No comments:
Post a Comment