
For those who don't know, Shadows of the Empire takes place in-between The Empire Strikes Back and Return of the Jedi, although the game begins with the famous Battle of Hoth from the former. You play as Dash Rendar, a mercenary and old acquaintance of Han Solo who arrives on the planet to deliver some supplies to Echo Base when he gets caught up in the Empire's attack. Han puts in a good word for him and Luke Skywalker allows him to join Rogue Squadron to defend the base but, after the ice battle, Dash has to make his way through the base, which has now been invaded by the Imperials, in order to reach his ship and escape. After that fiasco, the main story begins, with Dash helping Luke and Princess Leia in their attempt to save the frozen Han from Boba Fett, while Prince Xizor of the Black Sun crime syndicate plots to replace Darth Vader at the Emperor's right hand, ensuring his grip on the galaxy, by having Luke murdered. With the emergence of this new threat, Dash helps in defending Luke from the assassins and then joining the rebels in a plan to destroy Black Sun altogether.
Although it introduced me to the Star Wars universe, Shadows of the Empire furthered my confusion because I didn't understand that this story isn't directly based on one of the movies. Like I said, I didn't know at the time if Star Wars was a series of movies, a TV show, or both and the little clips that I had seen of various incarnations of it, including brief glimpses of those Ewoks movies when I was very young, only added to my bewilderment. I was especially confused when, during the demonstration of the Hoth battle on that promotional video, the person said that you could tie up the AT-AT's legs, "just like in the movie." Now, I know that he was talking about the scene in The Empire Strikes Back but, at the time, I couldn't figure out where the Shadows of the Empire movie was, especially when I added up the episode numbers of the actual movies (the fact that they were actually called "episodes," which made me think of television, and that the first movie, which I had always heard referred to as just Star Wars, was called Episode IV: A New Hope by the time I saw it about caused my head to explode). By the time the prequels came out, I was old enough to finally understand how everything worked but, my God, I was one confused kid before then! But, my confusion aside, 1997 was the right time for me to be introduced to Star Wars, with the combination of both this game and the release of the special editions of the movies, which I got on video that Christmas along with the game. In fact, looking back on it, I must say that I really miss that time period in the franchise's history before the release of the prequels when the stories of Luke, Han, Leia, and Chewie were the focus of everything that entailed the expanded universe. Back then, Star Wars felt more like it was truly about adventure serial escapism, action, and fun; once the prequels came out, though, everything kind of... changed. I'm not referring to the actual quality of those movies (check back on those reviews if you want my opinion there) but how the entire dynamic of the franchise shifted once those they were released and became set in stone canon. Not to get off-topic since this review is about Shadows of the Empire but I just wanted to get across how, after playing this game again for the first time in years, Star Wars is simply not the same now as it was back then.


 |
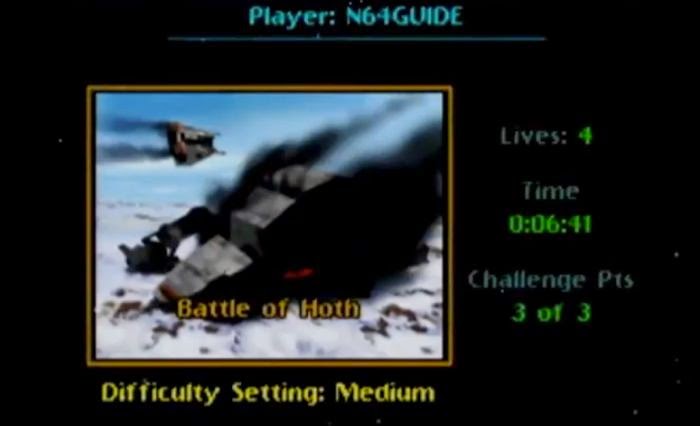
| The thing on the left is a Challenge Point. |


%2B%2Bsnap0061.jpg)


I've waited until now to talk about the controls and graphics of the game because this is where I, and a lot of other people, take issue with it. While the control mechanics of the other types of gameplay, save for the Swoop Bike level, are pretty smooth, the third-person shooter levels are a bit clunky. For one, in order to make Dash run as fast as he can, you really have to press on the Control Stick, which feels a little stiff in this game anyway, and that can wear your thumb out if you're not careful. Jumping also feels much more difficult than it should. It's really hard to explain but when you try to jump to a ledge, the way Dash maneuvers himself towards it, especially if you jump at an angle, makes it feel like you're not going to stick your landing and slip off the ledge instead. This makes jumping off of something that's moving, like the train in the Ord Mantell level, really difficult. While strafing makes it easier to get around corners that have enemies hiding behind them, it's still tricky to do since you have to angle yourself towards the corner in a certain way before strafing to ensure that you round out with the enemy in your sights. This makes me want to just wait for the enemies to come to me, which they do but they will often use the corner to their advantage and make it hard for you to get a fix on them. As far as aiming is concerned, Dash automatically targets an enemy when it comes into view but on the higher difficulties, your aim goes down, forcing you to use the Aim Button to lock onto your target. Even then, you can still miss, with it sometimes feeling like your laser blasts are veering right by the enemy, which is frustrating. Speaking of enemies, whenever you come across a boss, you get a small animation of the boss' appearance but when it cuts back to you, Dash has crouched down and you have to manually uncrouch yourself by pressing the button or by moving the control stick. You may wonder why that's such a big deal but, let me tell you, when you have a really tough boss who's ready to kick your ass as soon as the action starts, you shouldn't have to get out of a position you didn't even put yourself in because even that split-second of pushing the button leaves you open to attack. Taking damage like that which you could have easily avoided is really annoying, particularl when it's on your second or third attempt. Finally, when I talked about the graphics, what I meant was how they tend to make it difficult to keep you from seeing what's up ahead. There's this weird, hazy feel to the far backgrounds, even in levels that are taking place inside a ship or a building, that makes hard to tell if what you're seeing up ahead is an enemy or not. Even on a really good TV, like mine, this is a problem, which makes me think that this has something to do with the game itself. In fact, a lot of games on the Nintendo 64 had this same issue but some of them, like Turok: Dinosaur Hunter, made it work in context of the game by making it feel like there was thick mist up ahead. The Gall canyon and Swoop Bike levels here do make use of that but the presence of that haziness in indoor levels is still unacceptable.
%2B%2Bsnap0002.jpg)
%2B%2Bsnap0034.jpg)
As tough as the game is, I don't think it's entirely unfair. For one, you get to take all of the weapons you've gathered in one level to the next and when you lose a life, the game starts you back just a little bit away from the spot you did rather than forcing you to do the whole level all over again. Granted, it sometimes puts you somewhere you absolutely didn't want to be but I think that's better than nothing, especially since you don't have to recollect any Challenge Points you got before you died as well. If you game over, you have to start the level from the beginning and collect everything again but that's par for the course and shouldn't be a surprise. If you lose a life in a boss fight, the boss' energy doesn't regenerate during your second try, which is nice given how tough a lot of these bosses are, and I also like that the bodies of enemies that you've killed don't disappear as they do in a lot of games, which makes it easier to tell where you've already been when you're exploring a level that has a lot of twists and turns and involves backtracking. Finally, if you play through a level you've already beaten and you come out not doing as well as you did before, you have the option to overwrite the existing data. That may sound like another given but there are some games that don't give you that choice, so it's nice that this one does.
As my first real exposure to the Star Wars universe, Shadows of the Empire also served as my introduction to not only the sights of the franchise but to the sounds as well. While I had certainly heard the main theme before playing the game, the first time I heard a number of John Williams' other themes, such as the one for the Hoth battle, the driving theme that plays in The Empire Strikes Back when the snowspeeders are looking for Luke and Han (that's played during the junkyard level here), the frantic music when the Imperials overpower the Rebels during the aforementioned Hoth battle (which you hear whenever you fight a boss), and the music that plays as the X-Wings approach the Death Star in the original film (heard during the Echo Base and Imperial Freighter levels), was when I first fired this bad boy up. As a result, when I first saw the movies, I was really surprised and delighted to know that a lot of the music was shared between them and the game. Along with a lot of Williams' music from the original trilogy, with most of it coming from The Empire Strikes Back, now that I think about it, the game also has some nice themes of its own, like an eerie piece of music for the Imperial Sewers level, and a really catchy one for the penultimate level in Prince Xizor's palace (I don't care that much for the music in the Swoop Bike level or the final Skyhook one). The game's entire music score is unique for the Nintendo 64 in that's a real, orchestral score rather than a synthesized one, which was normally the case, and it helps enhance the feel that you're playing a Star Wars movie. But, that said, the music does have a downside: it tends to overstay its welcome because the themes for the various levels are on a constant loop throughout the gameplay. For instance, there's this bit of music from The Empire Strikes Back when Leia, Chewie, and the others rush to save the frozen Han Solo from Boba Fett that plays during the Gall canyon level, the longest level in the game, meaning that you're going to hear that piece of music dozens and dozens and dozens of times if you don't turn the music off. Trust me, I got so sick of that theme during that level that I was sure that I never wanted to hear it ever again. As cool as it is at first, don't be surprised if you find yourself going to the Options menu to turn the music off at some point. And finally, I also like that a lot of the distinct sound effects from the movies, like the electronic jabbering of the Probe Droids, the sounds of the laser guns, the creaking metal of the AT-ATs' legs, and the snarling and roaring of the wampas, are present in this game as well. Again, like the music, the first time I ever heard them was hear, meaning that I knew what to expect when I finally saw the movies.
Besides the cheats you get for collecting the Challenge Points on the various difficulty levels, there are others that you can activate by pressing a certain series of buttons during the gameplay, most of which require you having to call your respective game file, Wampa Stompa. You have to spell that in a specific way and have your controls set to a particular configuration in some cases. The most interesting and yet, toughest to activate, is what is known as Debug Mode, which allows you to switch from a lot of different options like increasing your lives to fifty, making it so you can jump higher, weakening the gravity, etc. To activate it, though, you have to be on Medium difficulty and hold a bunch of different buttons down at the same time while moving the control stick in many different directions. This is so hard to do that you may have to use both hands or even someone helping you to make it work. I only got it to work once and while it was cool, there was so much aggravation involved in activating it that I never attempted it again. There are also codes you can use to play as one of the enemies in a given level, be they guards, wampas, or, in the case of the first level, an AT-ST. While it is cool to be able to do this, these cheats don't have much purpose other than providing a little bit of amusement, especially when you realize that these enemies are very slow in their movements and their attack ranges are limited. There are other cheats you can activate but those are the ones I remember tinkering with the most when I was a kid.
Now it's time for my personal walkthrough of the levels and, as I said at the beginning, I'm going to talk about my own strategies, and issues, with the control mechanics of the different types of gameplay when I come to those specific levels. I'm also going to try my best to talk about what happens in a given stage on the harder difficulties but, since I didn't play higher than Medium when I went through the game again to do this, don't expect it to be completely comprehensive. And finally, you have to know that I'm going to be dividing the levels up into the various sections that the game itself does. For instance, the entire story is divided into four parts that each consist of, at the most, four levels, and many of the levels have at least two "stages," which are actually just different sections of them. I realize that reading this is probably rather confusing but I think once we get into the walkthrough, you'll get the gist of it. Speaking of which, let's go ahead and dive in.
Part I: The Battle of Hoth

Battle of Hoth: Obviously, since this is such a memorable scene from The Empire Strikes Back, it was destiny for it to be made into a level in a video game, just like the famous Death Star battle in the original film, and while it had certainly been in some of the earlier ones, I think the graphics here were so advanced that it made players feel like they were actually playing that famous sequence from the movie. In any case, there are four stages to this level, each of which involve you fighting off an ever-increasing number of attacking Imperial Forces in the nearby ice field. Stage 1 has you take down four Prode Droids, which is really simple to do since they don't take that many hits to put down, even on the higher difficulties, and if you bob and weave while making your passes, you can avoid their laser fire. Although I typically resort to the usual third-person camera view, going to Cockpit is useful since your computer there lets you know when something is up ahead of you, which can be difficult to do with the Probe Droids in the third-person perspective since they're so small. But, on the flip side, in Cockpit mode, you have a limited view of the battlefield, meaning you can very easily get tagged from the sides and behind, and you can also hit the ground and damage your ship since it can be hard to tell how close to the ground you really are in this mode.

In Stage 2, you face two AT-ST walkers along with two more Probe Droids. The AT-STs are best dealt with from behind, especially on the higher difficulties where their accuracy is much sharper; if you fly straight at them from the front, you'll get pulverized in no time. Of course, when they're far off in the distance, it can be hard to tell whether or not they're facing you but, fortunately, if you realize that you are in the line of fire, you can hit the Boost button to zoom past them, then use your Air Brakes to make sharp turn and resume your attack (you'll be doing that a lot), which is most effective if you hit the brakes while approaching and firing in order to ensure you inflict more damage, making attacking them from a great distance a nice strategy. The Probe Droids also become a real nuisance here when you're trying to deal with the AT-STs because if they get behind you, they will harass you mercilessly. I would say that you should concentrate on the droids first but, really, you just have to keep an eye on whatever's up ahead and concentrate on destroying it as quickly as you can. You can also destroy an AT-ST in one hit by slamming your ship right into one. This may seem pointless since you'll lose a life but, if you're badly damaged and are going to die from two more hits anyway, you might as well be a kamikaze and take one down with you! On the same token, though, if you destroy one up close with your blasters, you have to get out of the way quickly before you end up as part of the wreckage.

Stage 3 is where things start getting serious because a big AT-AT joins the party along with two more Probe Droids and AT-STs. Once again, the strategy of firing on your enemies from afar while holding the brakes and boosting past them when you find yourself in the line of fire in order to come around for a rear attack is the best way to go. The best strategy here is to take out the smaller targets before attempting to tangle with the AT-AT, since trying to trip it up with a tow cable while a bunch of other enemies are shooting at you is just asking for trouble. It's actually not too hard to avoid the AT-AT's laser blasts since it's so big and, like everything else, it's only a threat if you're directly in front of it. And, despite what Luke said in the movie, it is possible to take the AT-AT down with your blasters; the catch is that if you want this level's three Challenge Points, you'll have to use the tow cable, which can be daunting the first time you try it since you have to do this while in the awkward Camera Mode. It's definitely a case of practice makes perfect but you have to keep an eye on the amount of cables you have left since, on Medium, you only have six, and on the two highest difficulty levels, you only have three (the cables do reset between stages, though). Plus, if you go out too far, the cable will snap and you'll have to try again, and at the same time, you have to be careful not to run into its legs. So, it involves juggling a lot of different factors to make this work, which is why it's best to try this when the AT-AT is the only enemy left. The good thing, though, is that you can easily avoid getting blasted by it by simply staying below its head, which is simple enough to do.
Stage Four is by far the most grueling since you have to deal with four Probe Droids and AT-STs along with two more AT-ATs. Again, the same strategies above apply here, especially since the walkers act as groups, with one pair of AT-STs guarding an AT-AT; you really have to be patient here, though, and not just go in shooting like a madman because you will die and die fast. It is possible to fly between an AT-AT's legs but, unless you're suicidal or trying to show off to your friends, it's pointless to do so. And in case you're wondering, your teammates don't do anything other than draw enemy fire away from you as well as complain when they stupidly fly in front of you while you're shooting.


Escape from Echo Base: The Imperials have captured the now abandoned Rebel base and you have to make it from one end of the place to the next and turn on the power generators in order to open up the hangar so you can escape in Dash's ship, the Outrider. In Stage 1, you start right beside the snowspeeder you just flew and make your way to a large hangar where you actually see the Millennium Falcon take off (bye, Chewie!) before engaging in a firefight with a bunch of Snowtroopers, having to use the walls and crates as cover. After that, you have to navigate through one of two hallways crawling with more troopers and Tripod Laser Cannons. It doesn't matter which one you pick since they both join each other but, if you're out to get Challenge Points, you'll have to take the right. This is also where you come across rooms containing wampas that the Rebels captured for some reason and while it may seem stupid to let them loose, their cages do contain extra weapons like Seeker missiles (if you let them corner you while trying to snag those weapons, though, they'll cut you to pieces!) Plus, not only do the wampas come in handy since they attack other enemies as well but, more than likely, you can get them to take each other out for you by running out of the room and letting them fight each other. There's also a wampa hiding in a secret room containing a Challenge Point on the higher difficulties, though, so you'll have to deal with him yourself. Eventually, you come to a bridge stretching over a chasm that means instant death if you fall and you also have to contend with Probe Droids floating around the bridge and Snowtroopers on the ledges. That leads to an enormous canyon with more droids and troops, as well as Sentry Guns, and while you'd think this would be a great place to bust out the Seekers, there are so many distractions here that they'll more than likely hit the walls before killing any enemies. After you wade through this madness, you find an elevator that takes you to the second stage.


At the beginning of Stage 2, you come across the first set of generator turbines and the walkways surrounding them. There are goodies such as health hidden amongst the turbines but there are also plenty of troops and Probe Droids around, Once you've cleared the first room out, you once again have to choose one of two ways to the next area but this time, neither way contains something special, save for more enemies. This is where you reach the room where you turn the generators on by flipping all six of the switches you find after clearing it of troops. There are Challenge Points to be found amongst the turbines but getting them involves some tricky jumps across ledges, especially when you're trying to make your way back to the narrow walkway that you crossed. After another hallway, you come across a passage where the floor and ceiling split right down the middle and slowly pull away from each other due to an earthquake! Well it's natural to quickly run for the other side when you see this happening, if you stick around near the entrance, you'll see a Challenge Point appear on the left side after a few seconds. It is possible to snag the point and make it to the other side before the chasm becomes too wide for you to jump across but you really have to be quick and know what you're doing. After taking another elevator, you come across your first boss, which is an AT-ST in a large hangar. If you know what to do, though, this boss is pretty simple: you just have to stay behind it and constantly fire up at the spot between its head and legs until it blows up, which is fairly easy to do since you're much more agile than it is and given that it stops to look around every now and then when you manage to get directly behind it. Seekers work against it most effectively, even though you have to shoot them manually, and there are plenty of health packs nearby if you need them (you have to avoid the AT-ST's laser fire while going for them, though), so all in all, it's not that tough of a fight. Once it's over, you go through the door that opens up to another hallway leading to the Outrider (there's a separate passage leading to a small canyon with a Challenge Point, as well as a wampa). Once you blast your way through some Snowtroopers both outside and aboard the ship, you can head to the cockpit and leave the base, ending the level.


Asteroid Chase: Here's another scene from The Empire Strikes Back turned into a video game level, one that, although I could be wrong, I'm pretty sure that this has been in other Star Wars games both before and after this one. This probably the most straightforward and simple level in the entire game in terms of what you have to do: while Leebo, Dash's droid copilot, flies the Outrider, you have to fend off a swarm of TIE-Fighters and Bombers that the Star Destroyer you fly over at the beginning sends after you. The first order of business is to figure out the best viewpoint to play this level in: while the third-person perspective gives you a wider look at the battlefield, trying to shoot the fast-moving fighters like that can be very disorienting, which is why I always switch to Cockpit Mode. Yeah, it leaves you with a blindspot behind you but it makes shooting your enemies a lot easier and, like the Cockpit Mode of the snowspeeder in the first level, your onboard computer tells you if there are any enemies up ahead, which can be difficult due to the blackness of space and all of the floating debris, and shows you how much more damage it'll take to destroy them. The TIE-Fighters are more annoying than anything else but they can blow you up if they hit you enough times, so it's best to blow up as many as you can when they come at you; it's pointless to try to shoot them when they're circling around in the distance. It's also most helpful to plow through them when they come together in groups of three or four to rack up more damage. Besides your laser cannon, you also have guided missiles that are very effective and rarely ever miss their mark; they're the best thing to use to pick off some straggling TIE-Fighters in the distance that won't come near you. You can only fire six missiles at a time before they have to reload but there's no limit to how many times you can reload and it doesn't take them that long to do so. Sometimes, the fighters even stupidly crash into asteroids, which is also helpful but not something you should count on solely. The real threat in this level, though, are not the fighters or even the asteroids and the Star Destroyer (neither of which can hurt you), but the TIE-Bombers. There aren't as many of them and they're much slower than the Fighters but the green, plasma bombs that they fire at you can cause a lot of damage if they hit you. When you see the warning, Incoming Bomb, you'd best get your ass in gear, find the Bombers that have locked onto you, and blow both them and the bombs up as fast as you can (the Bombers themselves aren't too difficult to destroy since they just hover near you; some well-placed missiles will take them out). Finally, the six Challenge Points here come in the form of bright red asteroids that you have to blow up in order to acquire them. It's not too difficult to spot them and destroy them but doing so can leave you open to enemy fire so you have to be careful on the higher difficulties.
Part II: The Search for Boba Fett


Ord Mantell Junkyard: This is where the game starts to get hard. The two levels in this section are both very, very lengthy, especially the second one, and are quite challenging in their own ways. Here, you land in the Ord Mantell junkyard in search of IG-88, a droid bounty hunter whose ship was damaged in a fight with Boba Fett when he tried to take the frozen Han Solo away from him. You have to ride a series of hover trains through the junkyard to reach IG-88's location and learn from him where Boba Fett is, as well as defeat him. This level is divided up into two stages: the first involving you riding the trains and the second being the boss fight. This first stage is very challenging and grueling because it involves you having to either jump over or duck under barriers up ahead, shoot down a few energy barriers you can't avoid otherwise, and jump from one train to another many times, all the while dealing with annoying flying droids and Assassin Droids and Train Guards on the other cars. It's quite difficult to judge from a distance whether you can jump over or duck under a quickly approaching barrier, particularly when the train speeds up, meaning you'll probably take a lot of damage before you realize what hit you during your first attempts (which is disastrous on the higher difficulties). With the tricky jumping mechanics in this game that I mentioned earlier, jumping off a moving hover train to another one is rather dicey, especially when you've got enemies on both sides shooting at you, but it's necessary to survive because you have to do so to avoid obstacles that mean instant death like these big hanging structures on both sides of the track in one section and another where one track leads to a sludge pit. And as Leebo himself warns you, you'd best not jump when the trains are going around a sharp curve. As I also mentioned earlier, the enemies in this level, particularly the little flying droids, are very annoying, especially if you don't destroy them before you zoom past them, because of how utterly relentless they are in shooting at you. The only really easy ones to deal with are the Train Guards because you can kill them from afar without getting shot at (save for one who waits for you behind a small wall in one train). And finally, the Challenge Points here, and there are nine of them, are a real pain to get because they force you to jump in a certain spot at the exact right time as well as do hazardous things like climb on top of a train boxcar where it's easy to slip off and run to one side of a particular boxcar when you have to jump to another train on the other side. Thank God the Challenge Points don't reset if you grab that one but miss the train, losing a life in the process! If you keep your cool, though, you can eventually make it to the end where Leebo disables the train's brakes, allowing you to crash into the large building where IG-88 is.
 |
| Yeah, this leaves a lot to be desired for but it was the best image of this stage I could find. |
Unfortunately, as tough as the actual level was, the boss fight with IG-88 isn't much better because you're fighting a heavily armed, agile droid in a room that's filled with a bunch of junk that gets in your way and catwalks that lead over smelting pots which eat your health up like candy if you fall into them (there are also ledges in them with Challenge Points and health, making for a very sick joke). IG-88 is positively relentless in his attacks: he chases you wherever you go, easily jumping over and avoiding the obstacles that are in your way, has a flamethrower as well as a Pulse Cannon that can take you out in an instant, and is so nimble that he can pop up in front of or behind you before you know what happened. For instance, there was one time where I was trying to use the overhead camera mode to see which way I should jump into them in order to get the health I so badly needed but while I was dawdling around, IG-88 came up behind me and cut me down in an instant! With so little health to come by, it's best to just keep moving and looking around for an opportunity to blast IG-88 (the constant sounds of his mechanisms whirring when he moves and his electronic gibberish make this all the more nerve-wracking). There are platforms on either side of the room that offer you the best vantage point with which to find IG-88 but his slender form and the game's hazy graphics help him to blend into the environment. There are Seeker missiles scattered around the building, which are very effective against him but you have to aim well since they don't lock onto him, as well as a flamethrower that's only useful if you find yourself face to face with him. The one advantage that you have is that IG-88 will momentarily retreat if you manage to score a number of consecutive hits, giving you a chance to catch your breath, and will begin to play more defensively once his health gets really low. The only real strategy is to keep calm and moving, blasting him whenever you can, and he'll eventually fall down with a loud thud. Oh, yeah, and there are three Challenge Points here that you have get during the fight since the level ends when you beat IG-88, as if this wasn't stressful enough. One is on top of a junkpile that's tricky to climb up and the other two are in certain spots in the smelting pots that force you to jump perfectly to avoid getting scorched (yeah, try to work that out while a crazy robot is trying to blow you to pieces!) It's best to go after them during the moments when you make IG-88 momentarily retreat, which in itself doesn't last very long.

%2B%2Bsnap0046.jpg)
%2B%2Bsnap0048.jpg)
Gall Spaceport: Here, you land near an Imperial base on the moon of Gall and navigate your way through enormous canyons, narrow bridges, and, ultimately, use a hoverpack to reach the spot where Boba Fett is repairing his ship. This is the longest level in the entire game and is a prelude to how complex and lengthy the rest of the third-person shooter levels here are going to be; I'm not kidding when I say that it feels like it just goes on and on and the amount of enemies here, as well as the presence of a mini-boss before the big fight with Boba Fett, makes it all the more nerve-wracking. You start at your docked ship (watch how Leebo eventually gets the gall to actually say, "Go away, sir," if you loiter around and try to go into the cockpit a few times), which has a Challenge Point floating on top of it, and from there you have to make your way across some cliffs and canyons while dealing with Probe and Seeker Droids, Tripod Laser Cannons, Imperial Commandos, and Stormtroopers, as well as a brown, mountain wampa, as you attempt some potentially dicey jumps (as I mentioned before, it's best to use the overhead viewpoint to navigate the jumps). While there is Health and Seeker Missiles to be found in the caves in the walls, they also serve as hiding places for enemies, and there's also a spot where you can follow a narrow bridge down to a rock formation holding a Full Health power-up and a Challenge Point; the bad news in the case of the latter is that it's very easy to slip off the narrow walkway, there are droids floating around the spot that will shoot at you the minute you get close, and the Challenge Point forces you to jump to some very narrow, stone steps around a tricky corner. Back on the main path, you eventually reach the entrance to the Imperial base, which is filled with laser cannons, droids, and Stormtroopers, the latter of which can blow you to bits when you reach the top of the elevator you have to take, where you get surrounded. You then make it to an outside section of the base where you first encounter those Sentry Droids that look like R2-D2's evil twins (you know that they're around before you see them because of the vacuum cleaner-like sounds they make) as well as more Stormtroopers. Fortunately, there's Health to be found on the ground below but, in order to advance further, you have to ride a small moving platform to the spot where you can find the switch to open the doors to the next part of the base and then, make it back across to the doors before they close (there's a similar, much more frustrating challenge in the next to last level). After blasting your way through more troops and droids, you come to an air-shaft that has two walkways extending across it, the higher of which has a Challenge Point floating in mid-air. In order to get that point, you have to jump in a way that ensures you land on the walkway below, which causes you damage; falling down the shaft results in a life being lost. Fortunately, the hoverpack is just up ahead, so you could get it and come back to get the point that way. The hoverpack is at the top of an observation tower where you have to dispatch a commando after riding the elevator up there. After switching on the computer, which allows Leebo to tell you where Boba Fett is, the door to the ledge where the pack is opens up. Now, you have to hover across a long canyon, landing on various pillars in order to refuel your pack, and as if that wasn't difficult enough, some of the pillar have laser cannons on them, forcing you to land and then quickly blow them up. Even more frustrating is a Challenge Point that forces you to thrust very high up into the air, draining your fuel to the point where you'll probably lose a life once you grab it. Eventually, you come to a metal platform against the cliff with a Stormtrooper and once you get rid of him, as well as grab the Pulse Cannon there, you go through the door and finally end the first stage.


When Stage 2 starts, you use the hover pack to fly up to a spot where there are a couple of commandos and a switch that activates a hover car to take you to the next section (there's also a Challenge Point hidden on a ledge below the platform you stand on, as well as one off on another ledge that you can reach with your pack while riding the hover car). Once you ride the hover car to another part of the base, you have to battle another AT-ST like you did in Echo Base. Fortunately, you can defeat it in the very same way but I personally approach it by hovering up to a second platform you find when you arrive at the hangar, kill the commando there, and go through the door there to come around behind it. Once you've destroyed the walker, you get access to some switches that open the ventilation shafts at the top of back wall, the third of which you must take in order to go further (it also opens a door back there where a number of Stormtroopers are hiding, as well as one at the front filled with droids); the other shafts have goodies in them but also enemies, so you'd best go there only if you really need some health. The shaft that you need to take leads to some passages with rotating fans, one horizontal, the next vertical, and then it repeats, and this section is a bunch of bull because not only can the fans hurt you but so can the rotating sections they're attached to if you touch them; furthermore, the first vertical section has a Challenge Point floating amongst the blades, meaning that you'll probably take even more damage trying to get that while hovering downwards. These shafts lead to an enormous cavern filled with floating health packs and a Challenge Point, and while you do have to take care of some Seeker Droids when you first arrive, you can still stock up on some much needed health here. Once you've filled up, you have to hover up to the very top of the cavern where the exit is, kill some commandos there, and make your way to another hover car. While riding this one, you have to deal with some droids floating in mid-air, as well as jump at the right moment to grab a Challenge Point, before you reach another hangar. You have to clear out more troops while making your way through some more corridors, another hangar with a shuttle, and finally reach the elevator up to where you can fight Boba Fett.
%2B%2Bsnap0053.jpg)
%2B%2Bsnap0055.jpg)
Don't expect for the long-awaited boss fight to be any easier than the level itself: Boba Fett is one challenging opponent. He mostly attacks with a laser pistol but he also uses Seeker missiles and a flamethrower, meaning that, like IG-88, you have to keep moving (this is where I really get frustrated with Dash crouching down before a boss fight begins because Boba Fett fires a Seeker as the fight starts and it almost always hits me as a result). He spends most of the fight hovering around the arena, forcing you look upwards and fire on him; fortunately, if you manage to land some precise shots with your laser blaster (which is actually the best weapon to use here), he'll get stunned in mid-air and give you the chance to deal some more punishment. You can chase him around as well with your own hoverpack, grabbing some extra weapons and health strewn across the platforms and on top of the walls, but you really put yourself in the line of fire with that approach. And you must stay as far away from Boba Fett as you can because he'll fry you with his flamethrower if he gets close enough. Once you defeat Boba Fett and send him hurtling to the ground, you think you can rest, right? WRONG! Now his ship, the Slave I, flies up on autopilot in order to finish the job. Like the AT-STs you've battled before, the best approach is to attack from the back, staying out of the range of the ship's laser blasters, but this thing can turn around rather quickly so you have to make your shots count. Seekers and the Pulse Cannon are the best weapons to blast Slave I with and, like all of the other bosses, if you keep your cool, you'll eventually bring it down. Like the fight with IG-88, there is a Challenge Point to be found during this battle but here, it's outside of the arena where neither Boba Fett nor his ship will chase you.
Part III: Hunting the Assassins


%2B%2Bsnap0058.jpg)
Mos Eisley and Beggar's Canyon: This is the "Swoop Bike" level that I was describing earlier. You ride on a type of hovering motorcycle in an attempt to chase after and pick off the members of a gang who've been hired by Prince Xizor to kill Luke. Luke is practicing his Jedi skills at Obi-Wan Kenobi's old place and you have to stop them before they make it there; otherwise, they'll kill Luke. As with the snowspeeder level, this one comes with its own set of controls and strategies that you have to get a handle on in order to successfully complete it. First off, you only have two viewpoints to choose from here: third-person and first-person and, as usual, I go with the former because I find it easier to control the vehicle and keep from slamming into things that way. Second, in order to pick the bikers off, which you have to do one at a time, you have to catch up to them and ram against them to where they either crash into a wall or lose control of their bikes and then crash. You can either just bump against them with the control stick or push one of the actual "Ram" buttons to do so either to the left or to the right, depending on which side they are when you catch up to them. However, while this is pretty simple on Easy, it takes a lot more effort on the higher difficulties and you also have to keep up with them and, again, kill them before they reach Luke. The chase goes across three locations: Mos Eisley, the desert, and Beggar's Canyon, and the first and last are the best places to slam them against the walls since they're such tight spaces. The downside is that there are so many twists and turns and places that look the same that, if you lose track of the gang, it's easy to get lost and turned around, and while Beggar's Canyon is more straightforward, there's still the fact that you're running out of time if any bikers manage to make it there. As if this wasn't already difficult, when you play on the higher difficulties, you have to be careful because you can crash too if you hit a wall at a certain speed (you don't even have to be going that fast to crash on the latter two difficulties). Once you've dealt with the bikers, you can either head on over to Kenobi's place and meet up with Luke or you can go back to Mos Eisley and get the Challenge Points you had to pass up in order to defeat the bikers. There are twelve Challenge Points in all in the level and most of them are scattered around the town, often in sadistically tough places to reach like in mid-air in front of a ramp or on a rooftop off to the right of a ramp, as well as right above both Sarlacc Pits in the desert. Making these jumps is very difficult because of the speed you have to reach and if you don't come at them just right, you get caught on the edge of a ramp or a sand-hill and get slowed down. And worse, even if you make one of the jumps and get the point, you can still die by either crashing into a wall since it's hard to slow down or slipping down into one of the pits (one time, after a lot of effort, I managed to make it onto a rooftop only to crash into the wall at the back; I about went ballistic). And even if you manage to get all of the Challenge Points, you still have to make one last tricky jump through a hollow formation called the Eye of the Needle in order to reach Luke and end the level. Game designers can be such bastards, can't they?
Imperial Freighter Suprosa: After Dash saves Luke from the Swoop Bike gang, he tells him that Black Sun has informed the Rebels of a supercomputer being housed aboard an Imperial freighter and even though the crime syndicate is hardly trustworthy, it's necessary for them to check it out since the supercomputer could be vital to the Alliance. Upon reaching the ship, Luke stays outside in his X-Wing to provide cover while Dash sneaks aboard to find the computer. This level is interesting in that it's rather long and complex, with a bunch of challenging hazards to get around and a large room near the end that takes a while to find the right path as well as explore everything, and yet the boss it leads to is surprisingly easy. That said, the first stage is pretty short and all of the Challenge Points are in plain sight, albeit guarded by a number of enemies. You shoot your way through some Stromtroopers onto an observation deck, make your way through a computer room housing some guards, and then end up in the crew's quarters where you have to clear each room of guards. What's cool, though, is that each room has a locker that you can open to find some health and, in one case, some Invincibility (one of the last ones, however, houses a small black droid that'll shoot you as soon as you open the locker). Past this area, you have to blow up a Tripod Laser Gun and then take the nearby elevator to the bridge, where you blast through some Stormtroopers and then hit a switch that opens the door at the bottom of a ramp in the middle of the room. Getting through this last bit with rapidly closing and opening doors is pretty simple: just wait for the door in front of you to open and then walk through. I don't think these doors can hurt you... but the sentry droids lurking amongst them sure can (and heads up, this place is crawling with those little bastards).
Stage 2 is where this level starts to get hard. You start out in a V-shaped room that has a small compartment on either side, each of which houses a security laser that shoots whenever the door to the compartment automatically opens, which is constant. After blasting both of them, you throw a switch to enter a large room with four more security lasers whose panels all open up at once, forcing you to blast them from the limited cover of being just out of their range. The door to the next room has two switches, with one only opening it halfway, allowing you to duck down and blast some sentry droids on the other side. And then, when you open the door completely, you have to be careful because there's a security laser on either side of it (on the higher difficulties, that is) and enemies behind the hastily closing door leading to the next room. Speaking of which, you have to next run through two sets of big, spinning blades that can very easily slice you up. Getting through here without taking any damage is nearly impossible but I've heard it can be done if you move at just the right moment. There's a Challenge Point floating on top of a bit of machinery at the end of this gauntlet but you have to be careful not to fall over to the right or you'll have to do the whole thing all over again! The next room involves two rotating platforms that you have to navigate across, ducking under and jumping over small barriers here and there, in order to make it to the other side of the room. There are enemies on the walkway you need to jump to and, on the higher difficulties, down on the floor below, so it's best to take them out before attempting this craziness, especially since jumping onto the final walkway from something that's rotating is difficult enough as it is. The lift at the end of this walkway leads down to a room filled with more turbines and enemies milling around them. Once you get past that, you take an elevator to a very short corridor with sentry droids roaming backing forth. It's best to use Seeker missiles here.
%2B%2Bsnap0066.jpg)
The third stage starts you off in a large cargo bay filled with sentry droids, which you can easily pick off from the door you start out in without taking too much damage. From there, you have to flip the switches you find along the walls in various patterns in order to open the cargo doors and find the ones with the stairs leading up to the higher levels. Only one switch can be flipped in a set, meaning that you have to backtrack and flip a lot of them in order to explore every room in here, which is worth doing since there's plenty of health and weapons, as well as a Challenge Point, to be found. There are three stacks of boxes on the other end of the bottom level that you can make into stairs in order to reach the second level without going through the hassle of finding the stairway down below; plus, using these makeshift stairs is the only way to reach one of the doors on the second level (this is probably not making much sense but, when you actually play the game, you'll see what I'm talking about). Eventually, you reach the top level, which has some doors filled with Stormtroopers as well as health and a Challenge Point for you to collect before moving on. In the last room, you take out some commandos and take a lift down to a spot where you fight the boss: a large droid called a Loader. While it looks intimidating, it's actually not that tough to beat since all it has to attack you with are its long, scew-like arms, which you can easily back away from and sometimes, it'll actually stop while attempting to skewer you, leaving itself open to attack. Unlike a lot of bosses, the Loader Droid is vulnerable from the front, mostly on its little roller, with the Pulse Cannon, which you can find in the cargo bay, and Seekers working against it the most effectively. Once you blow it sky high, a nearby door will open to reveal the supercomputer (there's an easy to miss Challenge Point right behind it) and once you go up to it, Leebo tells you to go back up to the control room and flip a switch that's now there to deactivate the shield so he can fly in and pick you up.
Part IV: Lair of the Dark Prince

%2B%2Bsnap0074.jpg)

Sewers of Imperial City: While meeting with Price Xizor, Leia ends up as his prisoner, prompting Luke, Dash, and the others to come to the rescue. As Luke, Lando, and Chewie go after Leia, you have to make your way through the sewer system beneath Imperial City in order to find a way into Xizor's palace and cripple his connection to his Skyhook space station. This is a very challenging and complex level that forces you to make extensive use of the hoverpack to navigate your way through the sewers' many tunnels, as well as several sections underwater, in order to find everything necessary to make it through. There are enemies around every corner and even below the water, you'll have to make use of more than one viewpoint at certain points in order to successfully battle them, the level itself is just one long stretch with no different stages, and you have a very tough boss to fight at the end. In short: you've got your work cut out for you. You start in a very high, vertical shaft with a winding walkway leading downward; this is where it's best to switch to the overhead camera view in order to see the droids floating in mid-air down below and get some shots at them before they reach you. Once you reach the bottom, you have to make your way through some tunnels filled with guards (heavily armored Coruscant ones) and droids in order to reach another vertical section where you have to fall through these continuously opening and closing panels on the floor using the hoverpack. After that, you go through another tunnel, this one containing some security lasers in alcoves along the wall and a couple of rotating machines that, like the rotating blades in the last level, can really drain you of your health if you don't move at precisely the right point. The tunnel leads to a wide open room with very deep water and a number of sewer ducts in the wall. Before you even reached this room, you probably already heard the snarling of the dianogas in the water. It's possible to kill them above water but they're very hard to see there, so you could dive into the water and blast them, which isn't that difficult. You need to find a key to open the sewer gate at the other end of the room and it's hidden somewhere in the sewer ducts. This is where things get confusing: you have to navigate your way through a maze of corridors within the ducts, both horizontal and vertical, that are full of droids and enemies in order to not only find the key but all of the Challenge Points if you're going for them. In those vertical sections, you can often either go up and down and it's tough figuring out which way to go first since one leads you onward to the key while the other typically leads to a Challenge Point and backtracking in this section is a real pain. But, if you take your time and explore everything, you'll find a lot of weapons and health as well as what you need. Fortunately when you get the key, a grate in the tunnel behind you opens up to the main room so you don't have to go all the way back through the tunnels.
%2B%2Bsnap0003.jpg)
%2B%2Bsnap0006.jpg)

Once you open the sewer gate, you come to another underwater section and, after getting rid of another dianoga, you navigate your way through a long tunnel (you'd best have a full reserve of oxygen before attempting this) that leads upwards to a room with a sewage stir machine in the middle. I almost always lose a life here because I typically bang into the stirring arm and then get picked off by either the guard or the droid that's in there as well. A tunnel along the wall leads to another vertical room with a column in the middle and an underwater section on the bottom. Down in the water, you can flip some switches to find a Shield Deactivator, which is necessary in order to move on. After hovering up to a tricky room with a rotating cylinder where you have to blast a switch through an opening in order to open the door (there's a security laser on the other side as well), you make use of the device by turning off a series of force fields in order to make it through the corridor. There are some Wall Lasers here as well as guards on the other side of the last shield and once you get through them, you come to a room with three passages: a V-shaped passage on the ground, another one on the wall above it, and one right on the ceiling. You must hover through the two upper ones in order to find some switches needed to start a machine whose blades are blocking the V-shaped passage (it's best to fire a Disruptor, which you will have probably found at this point, up through the opening in the ceiling in order to more easily kill the guards up there). You have to make your way past the now rotating blades while shooting some more guards and once you're past that, you come to a large room with water in the middle that begins filling up completely once the door behind you closes. This is where you meet the boss: a gigantic dianoga at the bottom of the room. Your main target is the eye at the end of the long stalk amongst the barbed tentacles that the monster uses to stab you, which causes a lot of damage. While you can shoot the tentacles, they only regenerate a short time after you pop them so it's best to just avoid them, which is rather difficult to do given their length and surprising agility. As for the eye, it's best to use Seekers, Pulse blasts, and other weapons on it since the laser blaster doesn't do much and you also have to follow it around, including down toward the dianoga's mouth, as well as come up for air from time to time in the very small space above water at the very top of the room. Eventually, the dianoga will go down squealing in pain and the water will drain. Once that happens, you can fly up through an opening in the ceiling that leads to the exit.

Xizor's Palace: Now that you've entered the big bad's hideout, it's time to blow up the connection to the Skyhook space station but doing that is easier said than done. While not as complex as the previous level, this is still very lengthy, with a lot of tough enemies and challenges and a very no-nonsense boss at the end. Starting in a big, open room with a number of guards, some of which are hard to see due to the hazy distance effect I talked about at the beginning. After getting through this and up a flight of stairs with more guards, you come to a room with a higher up level that's full of floating droids, a guard, and wall lasers on either side of the exit door. Trying to shoot all of these enemies without taking a hit is really difficult since, even if you use Seekers from the doorway, the low-hanging ceilings of the second level and all of the pillars in this room constantly get in the way. And once you've blown everything up, you have another frustrating challenge ahead: you have to flip a switch on the upper level across from the exit door in order to open it and then run like crap in order to get through it before it closes, with the specific spot where you can flip the switch, the fact that you can't hesitate at all, and the stiffness of the Control Stick making the whole thing harder than it should be (I didn't think I was ever going to get through it when I played the game again for this review). Once you make it through the door and up some stairs with silver droids guarding them, you have to fight your way through another big room filled with droids and wall lasers before taking an elevator up to a large hallway that curves to the left. After blasting through the guards here, you can throw a switch to activate a bridge that leads you to another hall with guards and wall lasers where you have to go straight ahead to find a switch to activate another bridge and then head back and take a small hall off to the right to reach said bridge. You can actually fly through the girders of the bridge in order to find some items and a Challenge Point before going onto the next stage.
After going through some more narrow passages, you enter a room where you have to get around three, turning gears as well as blow up some Assassin Droids in order to proceed (if you drop down below the second gear, you can find a Challenge Point and then use the hoverpack to fly back above the gear, but it's hard since this is another obstacle you can't touch at all without taking damage). This leads to a similar room where you have to go from ledge to ledge in-between more giant gears in order to reach a hallway up along the wall at the end. There are more droids and guards here and, like before, there's a section below with a Challenge Point and other goodies, although getting back on the right path isn't as difficult this time. The hallway leads to the Skyhook column, which is in the middle of a big, vertical shaft with three ledges with guards and droids protecting it. You have to plant charges on the three spots on the column that look like plus signs by hovering up to them and pressing the C-Up Button, which can be tricky since the button doesn't always respond even when you're in the right spot. And, needless to say, it's best to kill the enemies before attempting this. Once you've planted the explosives and gotten Leebo's message that Luke has rescued Leia, you can escape through a now open door on the level you started on. The door leads to another big open room with a bridge in the distance, which is where you must go after destroying the enemies here. This bridge leads to an elevator that takes you to the Gladiator Droid.

As the game's last actual boss, the Gladiator Droid is one difficult opponent with a very deadly arsenal: a laser that it shoots from its head that can span the width of the room, a flamethrower, and a Pulse Cannon. This first part of the battle is similar to how you fought the AT-STs: you have to stay behind the droid and empty your laser pistol into its back (don't use any of your stronger weapons because you'll need them in a bit). It turns around a lot quicker than you would think and you don't have to be directly in front of it for it to use its weapons, so you have to keep moving. Eventually, the droid will fall but its torso will come to lif and hover in mid-air to continue to fight! What's worse, the floor beneath you will open up and drop you into a maze that's filled with weapons and health as well as enemy droids, making this fight even more grueling. Now, you have to play defensively by running from the droid and its weapons until you come to a spot where you can take cover and then find a spot with enough of a view to where you can fire back (your hoverpack begins to malfunction here, so you have to stay on the ground and run the maze). Seekers and a Pulse Cannon are best here and when you die, you start on top of a platform, giving you a clear shot at the droid (of course, that works the other way around as well). When you take out the torso, the damn head starts chasing you! While it can now only shoot its laser, its head is such a small target that its best to use your Disruptors and cause the droid a lot of damage in consecutive shots. Eventually, the head will blow up and you can leave this hellish level behind.
 Skyhook Battle: Prince Xizor manages to escape to his Skyhook space station but Dash, Luke, and the others are in hot pursuit. The first stage here is much like the asteroid field level: while Leebo flies the ship to the Skyhook, you take command of the Outrider's guns to fend off an enormous swarm of Xizor's fighters, known as Star Vipers. There's no real strategy to this first battle: just shoot down as many enemies as you can until you reach the Skyhook, but don't be surprised if you lose a number of lives in the process. These bad boys are like a lethal cross between the TIE-Fighters and Bombers: they're extremely fast and agile, with above average shields, and can launch plasma bombs. There are so many flying around here that, no matter how good you are, you're going to get tagged, mostly from the sides and behind. Don't be afraid to fire as many missiles as you can; it'll strengthen your odds of blowing up a greater number of Vipers, which you'll want to do since you get an extra life for every twenty that you take down.

 Eventually, you reach the Skyhook and this is when all hell breaks loose because a Star Destroyer arrives to attack both the station and you with an army of TIE-Fighters. While the dogfight rages, you take control of the Outrider and use it to destroy the laser turrets at the end of each of the station's four arms. To blow up a turret, you have to zero in on it using the brake (be careful about turning while braking because you can disorient yourself by turning on an axis) and then shoot it with as many missiles and laser blasts as you can. You have to put yourself in harm's way and keep firing for this to work because the turrets are powered by energy from the station and will regenerate damage if you stop your attack but if you overpower them using that method, they will blow up; again, you shouldn't be too surprised if you lose some lives doing this. Once all of the turrets are destroyed, it's time to make like Lando and fly inside the station to destroy the core. You fly in through the arms, avoiding the walls that partially block the passage, and reach the glowing core, which you must shoot from all sides with two or more missiles. You have to hit the brakes again in order to make the most effective hits possible and because of the confined space, you have to exit the station and then go back in for another attack. It is possible to turn around inside the core but it's extremely dicey, so it's best to use the longer but safer method. Once you hit all of the core's sides enough times, the place will start flashing red, meaning that it's time to get out. All you have to do is head down one of the arms and once you reach the end, watch a cinematic of the station blowing up. After that, you get a cut scene of Luke and Leia on Tatooine, mourning the fact that Dash apparently didn't make it out; however, if you beat the game on Medium or harder, you get another scene where you see that Dash and Leebo did survive and that they're going to let everyone think that they're dead in order to stay off the Empire's hit list. And with that, the game is over.
 While it certainly has its faults, Star Wars: Shadows of the Empire is a very entertaining, memorable, and, most definitely, challenging game. It's got a nice variety of gameplay, really good graphics for the time, well-designed and detailed levels, some very challenging boss battles, a nice assortment of weapons and vehicles to play with as well as bad guys to fight, a good mix of classic Star Wars music with original themes, a varied difficulty system with rewards that make you want to keep trying, and the game, overall, was the first that really felt like you were playing one of the movies. Yes, there are some controller and graphics flaws, aspects of the levels themselves that are perhaps a little too difficult for their own good and are compounded even more so by said flaws, and the music, while it's cool to hear at first, can get monotonous with how it loops continuously, I think the good far outweighs the bad here and that, despite its datedness, it's still a game that's definitely worth anyone's time if they haven't played it before.