
I first came across this game at the exact same time I did with
Super Godzilla, the game for the Super NES: in the summer of 1998, at the Wal-Mart close to my house. Like
Super Godzilla, I had no inclination that this game existed, or that there were actual Godzilla games period, before then, so it made for quite a delightful surprise. Both games were really cheap as well, meaning that my parents would get them for me at a time other than my birthday or Christmas, which was when I usually had to wait for a new video game, but I could only get one at a time. Since
Super Godzilla was the one that initially caught my eye, I first opted for it, and didn't get this game until some time later. I can remember specifically that, when we were at that Wal-Mart again, I was trying to coax my parents into getting me
Banjo-Kazooie, which had just come out and was the hot new game. However, it was still a $50 game at that point, so it was out of the question, and I opted to get this game instead. Yeah, this was not a game I actively sought out and I only ended up with it as a very distant second choice. If you've seen the Angry Video Game Nerd episode this was featured in, you remember how taken aback the Nerd was when he began playing it and saw how kiddy the graphics were. That was not my reaction when I first played it, as I could look on the back of the game box and see the screenshots (although, the very chipper music did give me pause), and what's more, the gameplay was much simpler and easy to figure out for an eleven-year old than the much more cryptic and overly complicated
Super Godzilla. However, I didn't play this game as much, as I've never been that big on puzzle games (mostly because I suck at them), and despite the different paths you can take here, I would eventually reach the point where I would get stuck and couldn't figure out how to go on. As a result, I couldn't tell you the last time I played it before I decided to do this review, and I still found parts of it to be quite difficult, to the point where I did have to resort to walkthroughs in order to make it to the end. But, replaying it, I will say that, if you can get over the cutesy, chibi designs of the monsters and the silly music, this is quite a good puzzle game, albeit one where the limited controls and often exacting nature of what you need to do can make for a lot of frustration.
(Credit goes to Monster Island Buddies on YouTube for some of the images you're going to see here, as he graciously allowed me to use snapshots from his review of both the game and its Japanese version.)


The ultimate goal of the game is to rescue Minya (or Minilla, his true official English name, which is used here, even though it had never been used in any dubs before), Godzilla's son, who has been kidnapped by a number of his old foes and is being held captive in the center of an enormous maze called the Matrix (make your own jokes). As Godzilla, you must navigate your way through the maze, destroying all the boulders you find in a given stage in order to progress as well as fight off the enemy monsters who try to attack you. It may sound simple but this isn't the type of game where you go from Stage 1 to Stage 2 to Stage 3 and so on until you reach the end. The Matrix is made up of 64 stages in total, with a map screen that's made up of eight rows of eight, which you can access from the "Select" screen during gameplay. Each stage that hasn't been completed has a question mark on it, while those you have completed are now squares with one or two arrows pointing in various directions printed on them... and that's one of the tricks with this game. When you complete a stage by destroying all the boulders (and grabbing all the power-ups), one or two arrow icons pop up and touching one will take you to another stage. Each direction corresponds to another spot on the map: if you touch an arrow pointing right, you'll go to the very next stage, but if you choose an arrow that's pointing up or down, you'll head to the stage directly above or below the one you're currently on. Minya is being held in Stage 37, at the center of the map, and you have to clear a path that will ultimately lead you there. It is possible to make your way through all 64 stages but it's purely for completionist's sake, because once you make your way to Stage 37 and rescue Minya, the game's over (there's no turning back once you reach Stage 38, which goes directly into that). Given how complex this is, you often find yourself checking the map to remember where you've been and to keep yourself from pointlessly replaying a stage (though, in some instances, you have no choice but to do so, as there are stages that are simply dead-ends).


The actual gameplay is quite basic due to the limited controls. You can only walk, climb, and punch (a big fist appears in front of Godzilla for a split-second), the latter of which you use to move and smash boulders, defeat or knock away enemies, and even grab power-ups that are just beyond where you're standing or hanging. You can't run or jump (the A-button does nothing during the actual gameplay, which even the instruction booklet flat-out says), and as we'll get into, the game designers really took advantage of that latter handicap in creating the harder puzzles and when you deal with the enemies. The "Pause" button is surprisingly useful here, as while the game is paused, you can press left or right on the control pad in order to scroll through level and see what's on the next screen, which you can use to come up with strategies in how to solve the puzzles. Pushing "Select" brings up a screen of options, such as "Continue," "Try Again" (you lose a life every time you choose this), "Entire Plan," which is the map screen of the entire maze, and "Password," which gives you a couple of passwords for the stage in case you get tired and want to come back to it later. At the bottom of the screen during gameplay, you have a score bar to the left, and to the right, you can see how many lives you have and how much health you have (your score depends on how much health you have left when you complete a stage). You start the game with only three lives but you get an extra one every time you complete a stage. Not only do you lose a life if your health gets depleted completely but there are also hazards that kill you instantly.


The boulders you find strewn throughout the stages are your biggest priority, as you must crush all of them in order to progress through the maze. The boulders can be pushed along with one punch and can be smashed by pushing them against a wall or another boulder. They can also be used as weapons against enemy monsters, either by ramming them or dropping them onto them, but the boulders can also kill you if you get too close to one when it drops (you don't have to be even halfway underneath it for that to happen). It may seem ridiculously simple for your goal in each stage to be to destroy all the boulders but there lies the other major trick of this game: the farther you progress into the maze, the more boulders you have to smash and the harder doing so becomes. It gets to the point where you can't just run through and smash them all one-by-one as you come across them; rather, you find yourself having to destroy them in various patterns and orders, push them into specific positions in order to reach others that are otherwise unobtainable, and being very careful in how you do all this, because if you make a mistake, you'll likely get stuck and have no choice but to restart the stage (this is where the lack of a jump command is often exploited). Moving the boulders throughout the stage is further complicated by the physics that climbable objects like vines, ladders, and tree-shaped crystals create, as any part of them can act as a spot for a boulder to sit rather than fall. It's the same with you, as you can stand in the middle of these objects when climbing them and you can also walk across a row of them easily, rules that really take some getting used to. Plus, there are many instances where you have to hang off the tip of one of these objects in order to smash a boulder you can't reach otherwise. And then, there are the spike strips and pits, which the boulders can land safely on but, not surprisingly, you can't, as they mean instant death if you touch them. There are a number of stages where you have to approach boulders that are sitting on spikes very carefully in order to avoid dying and others where, if you knock them down onto some spikes, you can't smash them and you have to restart the level. So, yeah, this game is not nearly as simple as it may seem and I'll admit that, even with the online walkthrough, it took me a very long time to figure out the best way to beat every single stage (mainly because said walkthrough's instructions sometimes weren't spelled out in the best way). I'll do my best when I go through the stages here but I can't promise that I'll give you the greatest method with which to beat each one bur rather, talk about the ones that worked for me personally, which is the point of the walkthroughs that I do.

Often inside boulders that you smash, you can find one of three different items that prove to be quite useful against enemy monsters. The hourglass freezes all of them, enabling you to get around them and also leaving them open to attack; lightning flashes the screen and takes out all enemy monsters that are onscreen (save for King Ghidorah); and the heart, which is the rarest of all items, restores your health. However, these items are more than just useful; getting them is actually
required, along with breaking every boulder, in order to finish a stage, something I don't think I've ever encountered in another game. I can remember being stumped on one stage where I had managed to smash all the boulders and yet, the arrows wouldn't appear until I grabbed an item that I'd found but hadn't touched since I didn't really need it. Seriously, have you ever heard of a game that penalizes you for not taking an item whose only purpose is to give you a brief advantage, as opposed to one that's an actual objective?


The enemy monsters don't show up on every single stage (in fact, there are quite a few where the puzzles are the sole challenges) but when they do, they continuously spawn out of these dark openings and their AI is very basic, as they do little more than follow after you, usually in the same direction that you're walking. For example, they'll follow you up a ladder or another climbing object but, if you reach a platform up above and start walking across before they do, they'll drop off and walk parallel to you below. Most of them can be taken out with a single punch and nearly all of them are vulnerable to either having a boulder shoved into or dropped on them or falling onto spikes, so they're often more of a nuisance than an actual threat. Heck, there are even a lot of stages where their spawn points are placed in spots where it's impossible for the majority of them to escape. That said, these stages can be claustrophobic and confining, giving the enemies ample opportunity to gang up on you and easily drain your health.
 |
| It's not often when the enemies give you gameplay tips. |


The monsters' specific attributes are very minute, as it typically comes down to how fast they can walk. Baragon (whose game sprite looks a little pig-like), for example, is very slow and can be taken out easily, whereas Mechagodzilla has the fastest walking speed but can also be taken out by a single punch. Anguirus also has a fairly slow walk but, once he's on the same level as you, he'll suddenly charge at you very quickly. He can be taken out with a single punch as well. Rodan, despite still being vulnerable to Godzilla's punch, is one of the more troublesome monsters as he's able to fly around any obstacles in his way and can zero in on you, no matter where you are in the stage. In those stages where the spawn points are placed in spots that serve as traps for all the other monsters, Rodan will still be the one you have to worry about. By far the most annoying one, however, is Hedorah. He's the slowest of them but he's also immune to your punch, as it does nothing but knock him back a bit. Because of your inability to jump over him, Hedorah becomes quite a problem if he can manages to get in front of you, as you have no choice but to walk past him, taking damage as you go, which is compounded by how slow he moves. He is vulnerable to the boulders being shoved into or dropped on him, as well as the lightning bolt item, but when you don't have any of those options, he can really be a pest. Finally, there's King Ghidorah, who serves as a penalty for not completing a stage within a certain amount of time. The game has no time counter but, if you take too long to make it to the next stage, Ghidorah will appear from the side of the screen and fly towards you in quick spurts. While it doesn't automatically mean you've failed, you probably won't be able to complete whatever tasks you have left before Ghidorah completely drains your health bar, as it's very fast and there's no way to defeat it, not even with the lightning bolt item. What's more, it will even appear on stages where none of the other enemies are present, so it's a looming threat throughout the entire game. The only nice thing about Ghidorah is that, if you manage to activate and reach a direction arrow after it's started chasing you, it won't follow you to the next stage.

Like most games produced before the advent of save points, passwords are needed in order to continue on from where you left off; but, unlike most other games, you get two passwords for each stage: a four-digit one and an eighteen-digit one. The four-digit one takes you to the stage in question but the eighteen-digit one does it while also actually recording the progress you made previously, so if you want to keep track of the stages you previously completed, you'll have to use that one. Again, I don't know if I've seen another game that does it quite like this. What's more, when you first boot up the game and select "CONTINUE" from the first menu you see, you get the option of "LAST GAME," along with entering either of the passwords. You'd think that would start you back from where you left off in and off itself but, every time I've tried it, it starts me back at the first stage. And no, you don't have to enter a password, then select "LAST GAME," because once you've entered the password and selected "END," it automatically takes you to the corresponding stage. This game is odd, in more ways than one.


Like with James Rolfe, the character sprites are likely to turn you off upon first glance because of how utterly juvenile and childish they are. Godzilla looks more like a cute, little chibi dragon, akin to those found in the game
Bubble Bobble, rather than the King of the Monsters. Also, was it really that hard for them to do a brief flash of his trademark atomic blast instead of that awkward punch? In addition, Baragon, as I said, has a pig-like appearance, while Anguirus and Mechagodzilla resemble their movie counterparts in only the vaguest sense, especially the latter. And the game sprite for Minya, whom you only see when you rescue him at the end of the game, looks even less like Godzilla than he did in the movies, feeling like a little imp with a stubby tail and an almost elfin face. Rodan and Hedorah are the ones that look the most accurate, though still not great, and the same can be said for King Ghidorah, although you can only see two of its heads at a time and they have a weird, duck-like shape to them. This disconnect is not helped by how, at both the start of the game and at certain points during your progression through the stages, you see these very well-done portraits of the monsters as they look in the films. Moreover, the title screen shows Godzilla looming over the title in a very menacing manner, with ominous music to boot, but when you start the game, you're hit with both the cutesy designs and the cheesy, kiddy music. There is an explanation for why the game looks the way it does and I'll get into that later when we talk about the Japanese version.


The game's stage design is the very bare bones of such, with completely white, blank backgrounds and very simple designs to the foreground elements, such as the boulders, climbing objects (earlier, I described the crystals that you can climb on as "tree-shaped" and that's because I used to think they were trees, because of their shape), platforms, and so on, though they did put enough detail into brittle sections of said platforms to where you can make them out. However that's to be expected, given that we're talking about a 1990 GameBoy title, and, in fact, the stages aren't that much more intricately-made than those from
Super Mario Land, which came out the previous year. Also, the stages are often very compact and claustrophobic, usually taking up less than two full game screens when you use the pause/scroll method to scope them out. And would it have been too much to ask for the stages' numbers to be displayed before you play each one or, at the very least, on the map screen? As you can see, there is one such map screen in the instruction booklet but, if you don't have that with you, it can be very hard to remember which one you last played, especially if you also forgot to write down the appropriate code before quitting the game and are trying to figure out both through vague, outside sources like websites.
Again, when you first start the game and see the title screen, you hear this very ominous and kind of freaky-sounding music, but if you let it play out, you get a montage of various monster portraits that's accompanied by much more upbeat music. And then, when you actually start the game, the music becomes absolutely juvenile, with this happy, cheery melody to go along with little monsters walking and climbing after each other on vines. There are several different stage themes throughout the game and they change the farther into the maze you get, all with melodies that are just as upbeat and cheerful but also have their own, unique, and memorable beats. Seriously, they're so catchy that, after playing the game for a while, you'll find yourself humming these tunes to yourself. The final stage doesn't have its own unique music but it does have a jingle after your score is tallied up that lets you know you've beaten it, with a really cheery, playful bit for the last screen with Minya thanking you for saving him. The actual sound effects are as simplistic as you might effect, with there only be a handful that stand out: a gnawing sound when an enemy is damaging you, a scratchy, vibration when you hit an enemy, a beeping variation when you punch Hedorah back, a brief crumble effect when you smash a boulder, a harsh zing when you use the lightning bolt item, and a small explosion when you die.


As with movies, it's not uncommon for American versions of games to differ from their Japanese counterparts and that's certainly true of Godzilla games, with this particular game being one of the most drastic examples. The game that we have over here is the international version of a title that, in Japan, was called
Gojira-kun: Kaiju Daikessen which roughly translates to
Godzilla-kun: Great Kaiju March. This game, itself, was a sort of sequel to a game released in Japan for the MSX home computer, which was simply called
Godzilla-kun (for those not in the know, "kun" is a suffix that, in the Japanese language, is placed at the end of names of either young men or those who are the same age as the one who's speaking) and had identical gameplay. Significantly, both games were based off of a children's line of Godzilla merchandise called
Godzilland, which began in 1984, explaining why the monsters are portrayed in such a kiddified fashion and it served as the basis for the similar designs in the American GameBoy version. As you can plainly see, though, this game was originally far more cartoonish, both in terms of its character designs and story. For example, the main story there is that Godzilla is out not to save Minya but, rather, his
girlfriend. Yeah, I just wrote that. Godzilla has a main squeeze who's been kidnapped in the Japanese version: a female version of himself in a dress, with blonde hair, a bow both in her hair and near the end of her tail (I believe her name is "Bajiran"), and who's being held in the very last stage of the maze as opposed to its center. I couldn't believe my eyes when I saw that image for the first time, either. Moreover, when you complete certain levels in the Japanese version, you get images of members of Godzilla's
family, who say words of encouragement as he continues on his quest to look for his girlfriend. Given how silly both Godzilla and his girlfriend look in this version, I had to see what else they could come up. I looked around and managed to find a review of the Japanese version of YouTube, which shows some images of Godzilla's family members. I just decided to take screenshots of them and post them here, as I don't think words could do them justice. And yes, the sprite representing Godzilla in the actual gameplay wears that same vest that he has on in that top image.


The enemy monsters are depicted differently in the Japanese version, as their designs are just as cartoony as Godzilla and his family, with big eyes, dopier expressions, and, in some cases, clothing on their bodies. Also, they really dumbed down the enemy AI in creating the American version, as their Japanese counterparts each have their own unique behavior and attack patterns. Baragon, who still has a pig-like appearance and moves very slow, often just stands around and yawns when he should be chasing after you; Mechagodzilla, whose appearance is more defined, only comes after you if you get too close; Hedorah, who looks more like a little owl than the Smog Monster, sort of meanders around, will sink into the ground if punched, allowing you to get around him, and you can eventually take him out after a good number of hits; Anguirus not only charges you if you're on the same level as him but he's constantly rushing around in general; Rodan, instead of homing in on you, just slowly flies around for the most part and only attacks once in a while; and King Ghidorah, while the most aggressive of the monsters, is easier to avoid than in the American version and can actually be taken out. What's more, all of the monsters, including Godzilla, move faster in the Japanese version.

The last major difference between the versions is that the Japanese version has a two-player option, available through a cable that links two GameBoys together, whereas the American one is just one player. Otherwise, the gameplay and the music are basically the same, save for that ominous title screen music that was done specifically for the American version. Looking at the two versions, you have to wonder, what was the thought process behind the changes made for the American port? While the Japanese game doesn't hide its kid-oriented nature at all, including in its box art, the people behind the American version decided to put actual movie images of the monsters on their box art and put movie-accurate portraits of them on both the title screen and at various points throughout the game. I get the notion that advertising the true nature of the game may have turned off American players who had no knowledge of the
Godzilland merchandise brand, which is no doubt why they altered the character designs to make them less cartoony than they already were, but this is fooling them into thinking this is going to be a traditional Godzilla game, which will result in them becoming angry when they actually play it (which really happened for a lot of people). Yeah, they put screenshots of the gameplay on the back of the box but, if you're not a hardcore Godzilla fan like me, one who will watch or play virtually anything related to him no matter what, you're going to look at those images, think, "Wow, that looks dumb," and not buy it. Bit of a customer relations dilemma, if you ask me, and one that makes me think they should have either been upfront about the game's nature or not even bothered porting it over here, despite its good qualities.
Getting into the individual stages, I have to reiterate that it's best not to take what comes up next as a player's guide for beating the game; again, when I do this, my attention is to mainly talk about my personal experience in playing the game rather than give gameplay tips, but if you do get that out of them, that is cool with me. I will tell you where you can go from each stage and, since Stage 38 leads backwards into 37, which is the last one, I'll save those two for last, going into numerical order otherwise. Finally, I'll tell you the quickest route to take in order to the center of the maze right here: Stage 1, Stage 2, Stage 3, Stage 4, Stage 5, Stage 6, Stage 14, Stage 15, Stage 7, Stage 8, Stage 16, Stage 24, Stage 32, Stage 40, Stage 48, Stage 47, Stage 46, Stage 54, Stage 53, Stage 61, Stage 60, Stage 59, Stage 51, Stage 43, Stage 44, Stage 36, Stage 28, Stage 29, Stage 30, Stage 38, Stage 37.
Stage 1: Of course, the very first stage is ridiculously easy, as there are only two boulders to find and crush here and they're both easy to get to. Moreover, the first one, which contains an hourglass item, is in a spot that introduces you to the way the vines and other climbing objects, and when you push the second one off of its ledge, you can easily take out some enemies down below. Both of the direction arrows appear in the same spot and they give you an option of either going right to Stage 2 or down to Stage 9.
Stage 2: This one is also fairly easy, despite there being eight boulders to crush, but one thing you have to be careful about is, when you reach the bottom platform, you must crush those boulders from left-to-right. If you push a boulder into that shorter ladder on the left, it'll fall down onto the spikes where you can't get at it. I say this because it's easy to head down the platforms in a manner that will lead you to destroy those last two boulders from right-to-left. Also, the one arrow here, which takes you right to Stage 3, pops up right beside the ladder used to climb from the very first platform down to the second and the enemies may crowd you as you try to climb your way back up there.
Stage 3: The first order of business is to destroy one or both of the boulders on either side of your starting point and, once that's done, climb your way up to the top row of vine segments and drop down to the platform housing the other three boulders. When climbing the vines, Rodan is the only monster you have to worry about, and the middle boulder on that platform will smash into whichever other boulder you punch it into. The boulder on the right side of that platform has a useful hourglass inside it and the two arrows materialize on either side of the aforementioned platform. You can either go on right to Stage 4 or go back to Stage 2 (which, again, only leads back here), so it's not much of a choice. The only part of this stage that can be a bit tricky is how the enemies drop down on you from above, making it easy for you to get surrounded while trying to smash the boulders.
Stage 4: You first have to destroy the sets of four boulders on either side of the central part of this stage (once you drop down into the center here, you can't climb back up), which involves you punching them across the makeshift steps of vines that lead down and stacking them up at the bottom where you can crush them. The spawn point for the enemies is hanging right above the central area of the stage and, save for Rodan, all of the monsters drop down there, so he's the only one you have to worry about initially. When you drop down to the center area, you'd best make sure a monster isn't about to spawn from the opening, which you have to climb across, and the tall stack of boulders down there can crush you if you get too close when punching them from the base. Speaking of the base, the middle boulder there contains a lightning bolt that will clear out all of the enemies that have no doubt crowded around there by this point. There's only one arrow here and it takes you on to Stage 5.
Stage 5: This one may look daunting because of how spread out the boulders are amongst these rows of vines, which vary in length from long to very short, but it's actually not that hard, as you simply have to punch the boulders until they get to a spot where you can crush them and there's nowhere for them to get stuck either (the bottom right one contains an hourglass). The enemies, however, can be a bit annoying, as they tend to drop down on you from the vines above when you're trying to concentrate on the boulders. Upon crushing the boulders, two arrows appear, one to the right of the bottom, left row of vines and the other against the wall near the top of the big section of vines on the right side of the screen, giving you the choice of either going on to Stage 6 or dropping down to Stage 13.
Stage 6: Looking at the image, what you have to do should be pretty obvious: you have to knock the individual boulders making up the towers on either side of you down below and do the same to the other two towers and lone boulders beyond them. Like with Stage 4, all of the monsters except Rodan drop down to the space below, so clearing out the top boulders is very simple (you still have to be careful not to get crushed while doing this, though). When you go down below, it's easy to take out the monsters down there with the boulders and the right lone boulder beyond the second tower has an hourglass, making the task all the easier. The only issue is that when the two arrows pop up, they do so on either side of the room, meaning you might have to wade through a bunch of respawned monsters if you want the arrow across from where you are. Finally, this is where any hope of a linear journey through the game becomes impossible, as you can only go back to Stage 5 or down to Stage 14.
Stage 7: Very straightforward, this one. You have to make your way over to that large tower of boulders, where you can knock them off of each other and promptly crush them. Again, Rodan is the only one who's able to maneuver around the tower to get at you and the others end up trapping themselves in that space near the bottom of the tower, making them easy pickings for the boulders up above them. This is another level where the only real problem is that, when you reach the bottom boulders, the monsters can drop down on you from above. Fortunately, the very last boulder has an hourglass in it, and the arrows, which appear either in that small alcove by the vine next to the right wall or along those "steps" on the platform next to where the tower was. You can only go on to Stage 8 or back to Stage 6 from here.
Stage 8: This one starts off easy enough, as when you go for that first boulder on the left, Rodan will be the only monster that can reach you, as the others will fall off and kill themselves on the bed of spikes below. When you make your way across to the get to the other boulders, though, that's where things can get crowded very quickly, as there are two enemy spawn points stacked on top of each other and all of the boulders are placed near them, with one sitting atop them. The last boulder on the right contains a lightning bolt, thankfully, but by the time you reach it, the enemies can easily sap away a good chunk of your health. And when you activate the one arrow, which takes you down to Stage 16, it appears down on the spikes, to the left of the spawn points, meaning that you have to go back through there to reach it. There's no way to climb on top of those points, as you fall right through them, and you can easily get swarmed by spawning enemies before you realized what happened.

Stage 9: Here's another one where the end goal is very obvious, as you simply have to climb your way up to that one boulder up on the top platform and smash it. The enemies can crowd you when you first walk past their spawn point but, once you get ahead of them and climb your way up the platforms, the only one who poses any sort of resistance is Rodan. When you crush the boulder, it reveals a lightning bolt, which comes in handy, as you now have to go all the way back to where you started to reach the arrow, which takes you down to Stage 17. The enemies will quickly respawn but if you really book it after hitting the lightning bolt, you shouldn't have to worry about running into any of them until you reach the last platform. This is an example of a stage where Hedorah can really be a nuisance if he manages to get on a platform with you, as you'll have no choice but to walk through him and take damage.
Stage 10: This one is very simple, as all it does is take the right side of the room in Stage 4 and stretch that out to make it the entire stage. Like before, you simply have to knock the boulders down the "steps" of vines, crushing them against each other along the way. The only snag is there are enemy spawn points both at the top and bottom of the stage and the slowness of your task can leave you open to attack from them. The last boulder has a lightning bolt within it, which gives you something of a reprieve because, like before, you have to climb your way back to where you started to reach the arrows, which will take you either back to Stage 9 or up to Stage 2.
Stage 11: It may not seem like much at first glance but this stage can be kind of annoying. Again, since both spawn points are blocked off by the boulders on the bottom, Rodan is the only enemy you have to worry about for the most part, and the bottom boulder on the left contains a lightning bolt, while the next-to-last one on the right has a heart to replenish what health you may have lost. The aggravating part comes in how, in order to get off the vines and onto the platforms where the boulders are, you have to move in exactly the right spot; otherwise, you'll get caught and walk in place, leaving you open to attack. And once you've crushed the boulders, you have to go back to the platform below the starting point in order to go to Stage 19.
Stage 12: This one is pretty simple, all things considered, but you really have to watch the terrain as you climb down to the boulders, as there are spike strips here and there. You can push the first boulder up top into the spike strip to the left and smash it easily but it's best to knock the second one all the way over to the right and smash it, as you can't reach it if you knock it into the spike pit to its left because the large block prevents your punch from reaching it. When you climb down to the third boulder, you have to watch out for the spike strip on the middle platform as well as to the right on its level, whereas the bottom one can easily be dispensed by knocking it into the large spike strip to its left and then smashing it. All the while, you're being dogged by enemies that spawn from both up top and on the bottom and they can easily slip up on you using the vines that are strewn throughout the stage. The arrows come up near the top of the stage and will either take you back to Stage 11 or up to Stage 4.

Stage 13: Now this is where the puzzles start to get more difficult in terms of the order you should destroy the boulders. You can go ahead and knock off the boulder atop the tall vine before smashing it below, uncovering an hourglass that helps with the enemies honing in on you. Climbing up to the top part of the stage, you have to knock the one boulder over the left edge of the platform, climb down and knock the boulder next to the vines on top of the two below it, climb down and knock the three of them down into the pit by punching them from bottom to top, and walk across and use the little vine there to smash them. When going for the last boulder, you have to hang off the very edge of the vine and smash it, because if you fall, there's no way to get back up there. With that done, you can simply smash the boulder on the blocks to the left, climb up and smash the last boulder up there, and then drop down to the arrow that pops up in the leftmost, which takes you Stage 14. This is just a taste of the puzzles up ahead.

Stage 14: This one is absolutely annoying due to the enemies. You can smash the boulder atop the leftmost vine from the platform you start on but after that, you must continuously climb the vines and smash the boulders across from them, as the enemies drop down and climb up after you. The second vine there is especially bad, because the enemies can use it to climb down on you, and this is another instance where Hedorah is annoying as crap with how he follows you relentlessly, climbing up the vines and then dropping off them when you do in order to keep up the chase. You do get a brief reprieve as the fifth boulder, the one in the exact middle, contains an hourglass, but by the time you activate the arrows, you'll like want to grab the one that takes you on to Stage 15, as it pops up right below where you are. The other one takes you down to Stage 22 and pops up back across the screen.
Stage 15: You better have quick reflexes, as this stage gives you just barely enough chance to react to its starting off with these boulders that come raining down on you (this isn't the only stage that starts like this, either). Moreover, there are only two little platforms here that the boulders will land on rather than fall through, so you have to realize that very quickly, too. So many times I would reach this one and forget how it starts off, leading to me getting crushed by not reacting in time. Once I figured out that it comes after a portrait of Godzilla, followed by text of him saying he'll destroy anyone who gets in his way, though, I was able to avoid it every time. Once you do, the stage is very simple, as you just have to destroy the two boulders on the ground to the left of you, climb up the vines and drop down onto the boulders that fell on the suspended blocks, knock them off, get down, and smash them all like normal. The arrows will take you either up to Stage 7 or down to Stage 23, and since the latter pops up on the right side of the bottom of the screen, I often end up grabbing it since those are the boulders I smash last.

Stage 16: This stage gives you an inkling of the most frequently-employed puzzles in the game, where you have to think before hitting the first boulders that you see and you have to create small towers out of separate boulders in order to reach others. For instance, here, you have to climb down the vine, punch the two lower boulders once to the left and right respectively, climb back up and punch the two boulders up there onto the ones down below, and use those makeshift columns to reach those other boulders suspended on the two lone platforms in the air. Once they're down, you simply have to knock the lower ones down onto the vines as well and crush them through the obvious means, while dealing with the enemies. That said, you'd best be careful about knocking the boulders toward that spot in the middle of the vines right below the platforms, as they can fall down that gap and onto the spikes. The two arrows that pop up along the vines either take you back to Stage 15 or down to Stage 24.

Stage 17: The puzzle here is slightly more complex variation on the theme from the one in Stage 16. You can destroy the boulder that you start out on whenever you choose but, in regards to the others, you have to climb up to the boulders on the right side of the screen, stand on the highest one, use it to punch the boulder sitting atop the middle column, and then head back down and punch the other boulders over the edge on the way. Once down there, you can destroy them like normal, and when the middle one fell, it cleared the way, allowing you to reach the boulders on the left side of the screen. Again, you have climb atop one to reach the other before you can smash them, and when you do, the arrows appear between the pairs of columns on either side of the screen. You have the choice of either going on to Stage 18 or back up to Stage 9. (Numerically, this is the first stage where there are no enemies to worry about.)
Stage 18: To progress through this stage, you have to knock the stacks of boulders out from under themselves, sending them down the gaps beside them and repeating the process until you reach the bottom. While not hard, you have to watch how frequently you punch, as you can end up smashing a boulder against another and you need both of them to fall into the pits in order to cross over them yourself; otherwise, you'll get stuck. The enemies, who spawn up in the center of the ceiling, aren't much of a nuisance at first, though any you've taken out can fall down on top of you when you walk under it. But, when you reach the last set of platforms, they're likely to climb up that vine to the left and swarm you on that platform. This is another stage where Hedorah is really annoying, because when you reach the floor, he can drop down in front of you, forcing you to take damage to get past him, and then constantly punch him back while trying to clear the way, all while more enemies fall down on you from above. One of the middle boulders has an hourglass, which should give you enough time to smash the remaining boulders and activate the one arrow, which takes you back up to Stage 10.

Stage 19: This is the second stage that, like Stage 15, you have to get out of the way from fall boulders, specifically those two stacked ones that come down on the spot where you start. You can crush them as soon as they land but, in order to reach those that landed atop the vine, you have to walk over to the vines hanging by the suspended platform, climb up to the lower of the two boulders there, knock it other the right edge, punch it until it's one square past the platform, climb back up there, punch the other boulder from atop the vine to its left, climb over and continue hitting it until it falls over the platform and lands on the boulder below. With that, you can drop down on the small column and knock those two off the vine in order to crush them. Of course, you have to do this while dealing with the enemies, constantly having to punch them as they climb up the vines after. Yet again, Hedorah is particularly a pain in the rear, as he can follow you across the platform and drop down between the boulders below, trapping you in there with him until you clear the way. The last boulder under the column you made yourself has a lightning bolt, which should clear the way so you can walk back over to the starting point and reach the arrows that appear on either side of the small vine. One takes you on to Stage 20, while the other down to Stage 27.

Stage 20: You may have a heart attack when you first see this stage but it's actually nowhere near as hard as it looks, as you simply have to climb along the vines and punch the boulders along until you find a spot where you can easily crush them. You always have a spot to climb up and reach the boulders, the enemies aren't that much of a problem for the most part as, save for Rodan, they'll end up spiking themselves until you get over to where their spawn point is and remove those boulders, and once you activate the arrows, you either have to climb over to the left or to a little alcove underneath the "steps" next to the spawn point. You have a choice of either going to Stage 21 or up to Stage 12 (and as we'll see, the latter is the better choice).
Stage 21: If you choose to go on from Stage 20, you'll get a portrait of Baragon, followed by text where he tells you, "Serves you right. It's a dead end!" Indeed, this stage is nothing but a short distraction, as there's only the one boulder and you can just push it to the left until you can crush it. In addition, the only way to lose here is to fall in that space underneath the vine, where you can't climb back out. (If you pause and scroll over to the left, you'll see Baragon walking around next to a spawn point in an area that you can't reach at all. Note how it's in the shape of a question mark.) After you've crushed the boulder, you get one arrow at the top of the vine, which takes you back to Stage 20.
Stage 22: No enemies here, which is nice, as this one is tricky. You have to punch that boulder that's in front of you when you start over the edge, use it to reach that vine where you can climb up and get around to the boulder up there, punch it until it falls through cracked layers of stone, get down to its left and punch it until it's right behind that little vine to the right, punch the boulder you knocked before until it falls on the strip of spikes over to the left, go back to the other boulder, use the little vine to get around it, and punch it until it falls on the spikes in front of the other one. Once that's done, you can walk over to the vine to reach that third boulder, punch it until it lands atop the little bridge you made, use it to smash the boulder atop the vine there, get over to the left and smash the one boulder, and climb back around to the vines to smash the last one. The two arrows pop up on the right side of the screen and you have a choice of going on to Stage 23 or going back up to Stage 14.

Stage 23: Another example of a stage where you have to think before you act. You have to climb up that long vine to the right, knock the boulder to the left of its tip over the edge, use it to reach the boulder across from it, climb back down and repeat the process, knocking the boulders out from under each other until you end up creating a two-boulder column with the one that was to the left of where you started. Standing on top of that, you can reach the three-boulder column across from it (the bottom one has a lightning bolt to take out the enemies that will be breathing down your neck by this point), drop down, and destroy the remaining boulders like normal. The arrows pop up near the top of that long vine on the right and next to the short vine before the first platform, giving you a choice to go on to Stage 24 or down to Stage 31.
Stage 24: Again, you have to create columns to reach the boulders on either side of the screen but the trick here is to figure out which of the six boulders on the suspended platforms to use and in what order. It's not as simple as it seems, because of the different lengths of the platforms. To reach the boulder on the left side of the screen, you have to knock the leftmost boulder on the bottom platform over the edge, hop down and punch it once more to the left, climb up to the top platform, and knock the first two boulders to the left, making them fall over the edge to create your column. As for the boulder on the right side of the screen, you have to create the column out of the remaining boulder up top and the two on the bottom one; in this instance, it doesn't matter which order you arrange them in. This was the stage where I learned that you have to grab all the power-ups as well as smash the boulders, because the boulder on the right side of the screen reveals a lightning bolt, which you can only get with a punch. Having pretty much crushed all of the tricky boulders at this point, I hopped down to get the remaining ones, only to be surprised when the arrows didn't pop up. It was only through more retries that I figured out that it was required to grab the power-up to get the arrows. In any case, the one arrow here appears on the left side of the bottom platform and takes you down to Stage 32.

Stage 25: Talk about a stage that tries to psych you out! There is absolutely nothing to be done with that entire middle section of brittle stones and blocks (it's kind of shaped like a Pac-Man ghost, don't you think?) Instead, all you have to do is climb up those vines on either side of the stage, punch the boulders over the edge, and then climb back down and smash them like usual. It takes so little time that, even though there are enemy spawn points on either side of the room, they'll barely have a chance to cause you any grief, and what's more, the leftmost boulder on the floor on the right side of the stage contains a lightning bolt. Only one arrow pops up here, in the spot on the right suspended block where the one boulder was sitting, and it takes you on to Stage 26.
Stage 26: This one is similar to the previous one in that it seems like it's trying to intimidate you by looking more complex than actually it is. Like before, all you have to worry about is making your way over to the four boulders here and smashing them. The two up top are easy, since they're right next to the wall, and the four down below aren't that much harder at all. It's also unlikely that the enemies will cause you much trouble, especially since the lower right boulder contains a heart. The two arrows pop up on either side of the "X," with the one over to the left taking you back to Stage 25, while the other over to the right takes you down to Stage 34.
Stage 27: First order of business here is to punch those two boulders on either side of your starting point across those platforms until they fall through the weak pieces of them, landing them next to spike strips on either side. Once that's done, you can climb down either vine and destroy the boulders down there like normal. Other than the enemies, the one thing you have to be careful about is leaving the boulders on the ground next to the vines' ends for last, because you won't be able to reach across without them (the boulder next to the vine on the left contains a heart). The arrows pop up in said boulders' spots, taking you either down to Stage 35 or back to Stage 26.
Stage 28: Now, this stage's puzzle is as complex as its layout would suggest, as it's one where you need to do everything precisely right. You first must climb down the vines you start on, punch the boulder down below to the left until it's right next to the last vine you come to, climb up the vines across from it, walk along the boulder on the suspended block and up to the vine with another boulder sitting on it, punch it on top of the boulder on the block, walk on top of the newly-made column and punch off the boulder on the vine across from you, get on that vine and punch the second boulder on the vine next to it, then go back to the column, punch both boulders over the left edge, forming a column of three, stand atop it to smash the boulder atop the vine next to it, and then go down and destroy the three boulders making up the column. Once all that's done, you have to make your way back to where you started, climb up the vines and punch the boulder up there over the edge, punch the boulder across from the edge, drop down and walk over to the vines, climb up to where that boulder is, get it in position to where you can use it to reach the last boulder to the left, knock your stepping stone off, and, finally, destroy the remaining boulders like normal. The arrows then pop up around your starting point and you can either go on to Stage 29 or back up to Stage 20.

Stage 29: The puzzles continue to grow in complexity and this is also a stage where the enemies can really get your goat. You have to knock down those boulders on either side of your starting point, climb over to either side of this space in order to crush and knock off the pairs of boulders on either side, destroy the pairs of two-boulder columns that have now been created, and then crush the boulders on either side of the bottom area. This is such a small space you're working in for most of the stage that the enemies can really crowd you, even with the hourglass and lightning bolt items to be found within a couple of the boulders, and Hedorah is again the biggest pest, tailing and trapping you endlessly. There's only one arrow, which takes you on to Stage 30, and is materializes right below the enemy spawn point, above the spike bed, forcing you to really watch where you fall, as you'll kill yourself on the spikes if your aim is even the tiniest bit off.
Stage 30: This one really takes some brain power to figure out, and if you don't know what you're doing, King Ghidorah will come baring down on you before long. First you can have to climb down the vine you start on, knock the three boulders off the vines by hitting one and using it as a stepping stone to reach the next, and create a two boulder bridge in the gap to the left by punching the last one in there, knocking it one more space, and using the boulder behind it to fill the space. With the bridge made, you can walk across it and knock the other boulder there over the edge, although you have to leave it be for now. Making your way back to where you started, destroying the boulders along the way, you have to get the boulder next to the starting point in position between the vines so you can use it to reach the suspended platform where the one boulder is. Knocking it over the edge to the left, you have to go down, hit it to the left twice more, go back up and knock the second boulder atop the vine on the one below, go down and move the stepping stone so you can reach the section of vine beside the two boulder column. By hitting them to the left from top to bottom, you can place them under the boulder atop the vine to the left, making a three-boulder column. Next, you have to smack the bottom rock twice, manipulate the stepping stone in order to get back up on the vine, and hit the remaining boulders to create a two-boulder column next to the one on the platform. You then climb the vine they were suspended on before, onto the column, use it to punch the last boulder on a vine over the edge, and then use that vine to punch the boulder on the blocks beyond that. Now, you can destroy the remaining boulders on the platform you were on, drop down, and destroy the final boulders down there. Both arrows pop up there, giving you the option to either go up to Stage 22 or down to Stage 38 (remember, the latter will automatically take you to the final stage when you complete it, so if you want to try to complete all of the levels, it's best not to take that option).

Stage 31: Despite its size, this one is much simpler when compared to the one before it. It simply entails making your way to the different parts of this stage and smashing all the boulders. There are no spots where you can get trapped, both of the enemy spawn points are blocked by boulders, meaning you'll only have to worry about Rodan until you smash them, and two of the boulders in the stage contain lightning bolts. The only real dilemma here is that the arrows pop up on the opposite sides of the stage's expanse, meaning that you'll possibly have to fight your way through the enemies that will now be swarming the place in order to take the direction you'd like. Speaking of which, you can go up to Stage 23 or down to Stage 39.
Stage 32: This is another one that's quite easy, especially since both enemy spawn points are in a spot where the walking monsters can't escape and will walk onto a spike strip. You just have to go back to the left, climb up on the second platform, knock the boulder onto the one situated in the gap, use that to cross over and smash the boulder next to the crystal stalk, and climb back around and smash both of the boulders that make up the column you used. From here, you can either go back to Stage 31 or down to Stage 40.
Stage 33: To succeed here, you have to move that huge tower of boulders all the way over to the opposite side of the stage so you can use it to reach the three in the area above the enemy spawning point. Doing this properly requires you to first move the tower, one boulder at a time, from top to bottom, then doing it again from bottom to top, and repeating this pattern until it's next to the appropriate spot. You must do this in the correct pattern, otherwise you'll screw up and have to start over. Think of it this way: the only way you could do it from top to bottom is to use a vine, so you do it that way when the tower is in one of the spaces between the vines, and then bottom to top when it's on a vine itself. While doing this, the enemies will try to get at you and some may manage to slip over to your side but you can take them out easily, whereas most of them will get rammed by the boulders as you hit them across (weirdly enough, Rodan is not in this stage). Once the tower is in the right spot, you merely have to climb up to its top to reach the boulder across from there, knock off the two top boulders to get the middle one, knock off two more to reach the one on the bottom, and when they're dust, simply climb down and destroy the remaining ones like normal. The two arrows appear on top of the first and third vines from the start and they either take you up to Stage 25 or down to Stage 41.

Stage 34: Here's another simple one. All you have to do is climb up the vines on either side of the stage, crush the boulders sitting down in the spaces there, punch the two boulders on the upper podiums over the edge, and then drop down over said edges and smash them both where they landed. The enemies can be a bit of a nuisance but the only major hazards are the spike strips hidden under the boulders when you smash them, though the lower one to the left contains an hourglass item. The arrows appear atop the tall vines on either side of the stage and will either take you down to Stage 42 or on to Stage 35.
Stage 35: I must confess that this is one that had me stumped for a while, as I didn't get how to move that four boulder column across the platform in order to get it into the position I need. It wasn't until I got around to playing the similar Stage 28 that I figured it out and once I did, it was quite easy. The same patterns of moving the enormous boulder tower in that stage apply here as well, despite that top boulder sticking out above the lengths of the vines. Once you get the column over to the edge of the platform, you have to climb up onto the last vine, knock the top boulder off, walk onto the now shorter column and use that to hit the boulder across the gap, knock the rest of the column over the edge, stand atop it down there to knock the two boulders stacked on the small vine down to the floor, use that pair to reach the boulder in the wall to the left, use the column to reach the boulder in the wall to the right, and finally destroy the remaining ones like normal. The one arrow, which leads up to Stage 27, appears down in this area.

Stage 36: Once you know what to do, you can breeze through this stage easily. You first have to climb down and go back around behind the boulder to the left of your starting point, punch it to the right until it's in the spot where you can use it to walk over to the row of vines, and destroy the three boulders in that spot. When you've done that, you can go back to where your stepping stone is, knock it over the edge of the two-block platform it's on, and then climb down and punch it once more, landing it down beside the three-boulder column. Before going down there, you have to take care of the boulders in the lower left area by punching the one on the platform next to the vines down on top of the small vine, punch it again from the large vine, climb up the small vine and use it to reach the vines where you can destroy the boulders in the alcoves up and above. Doing that, you can destroy your stepping stone, climb back to where the three-boulder column is, climb up and around it to land on the one boulder next to it, use that to reach the vine that allows you to climb to the one boulder in the section to the right, and then go back and destroy the remaining boulders like normal. The two arrows pop up in this spot and you can either go back to Stage 35 or up to Stage 28.

Stage 39: This is an absolute cinch. You have to make your way over to that boulder that's caught up in the structure, punch it to the left so that it falls through the cracked part of the platform, climb up and down to the floor, and smash both it and the other boulder down there. The boulder blocks the enemies' spawn point and, when you punch it down through the platform, the walking enemies will walk towards it and get stuck in the small gap between it and the platform's edge, leaving them sitting ducks for when you come back around and punch the boulder, taking them all out in an instant. The arrows take you either up to Stage 31 or on to Stage 40, and the latter is on the far right-hand corner of the stage, while the former is on the exact opposite side.
Stage 40: While this type of stage isn't exactly unprecedented, it's much more frustrating than those that have come before. Said frustration is not from the puzzle itself but rather due to the enemies, as the double spawn points can lead to things getting crowded very quickly, with Hedorah, as usual, being a massive pain. You have to knock the boulders that appear on either side of your starting point down below and use them as stepping stones to reach those spots with the four boulders. Those on the platforms are easy to smash, whereas the ones suspended next to the vines are a bit trickier, as they're sitting on little spike strips and, in order to reach the ones to the far right, you have to walk out across the width of the vines and punch them without falling onto the spikes. Try doing that when you have a bunch of relentless enemies breathing down your neck. There is a useful heart on the left side of the stage, namely on the one boulder sitting on the platform there, but it usually doesn't make much of a difference, as you'll likely complete the stage with very little health left. And this is another stage where the arrows pop up on opposite sides, forcing you to wade through enemies if you're opposite the one you want. Here, you can either go up to Stage 32 or down to Stage 48.

Stage 41: Here's another stage where you have to place the boulders in the right spots in order to progress through it. You start by smashing the one boulder to the left of your starting point, climbing up the vines to knock the one up there over the edge, climbing down and punching it to the right once more, climbing up and landing on the vine you knocked it on, punching it again so that it lands on the rock in the gap, and using the vines and rocks to knock the boulder atop the vine on the far right off so you can climb down smash it. You then climb back up there, smash the two stacked boulders, knock the one to your left over until it gets smashed, and then knock the remaining one on the main platform down onto the boulder in the gap to the left, using it as a means to smash the boulder against the left wall, and then smashing the last two. Once they're gone, the arrow that takes you up to Stage 33 appears in that spot.
Stage 42: One wrong move here will royally screw you over and force you to retry the stage. First off, do
not smash that boulder to your immediate right when you begin, as you'll eventually need it. You need to climb down and around right to the very top of the stage, knocking the two boulders up there into the gaps to their left. After that, you have to go back around to that platform next to where you started, use the vines and the lone boulder there to climb up and reach the bottom of the two boulder column sticking in the gap, smash it into one boulder, and punch that boulder to the right until it falls into the gap over there. You then climb back down, punch the boulder you used as a stepping stone until it falls into the gap, atop the boulder next to where you started, and use it to cross over to the vine you can use to reach the other boulder you knocked into a gap up there. Finally, you can back to where you started, smash the two boulders there, and the head over to the spot where the four remaining boulders are and take them out through obvious means. The arrows appear to the right of the starting point and around the spot where the remaining four are, giving you an option to either go back to Stage 41 or down to Stage 50. (While you have the option to smash those boulders next to your starting point last, you'll have no choice but to grab the arrow that pops up in that spot, as it's impossible to get around from there.)
Stage 43: (I'm afraid you'll have to use your imagination for this one. The site where I've been getting the images of the stages printed the same one twice a couple of stages prior and they skipped this one completely.) You begin next to a tower of seven boulders and, as before, you have to manipulate the individual boulders into the correct spots in order to solve the puzzle. First, you have to punch the top boulder twice, over the edge of the platform it's sitting, climb down and punch the next boulder three times, landing it next to the one you punched before, punch the middle boulder of the tower to the right, destroy the two above it, and punch that middle boulder until it's in the center of the platform beyond it. Next, you have to punch the two bottom rocks, destroying one and punching the other until it's positioned beneath a suspended platform near the right wall. Now, you have to climb back up the tall vine at the start, walk over to where the two boulders are sitting next to each other on the second suspended platform, and use that to knock the boulder sitting on the suspended block over the edge, down on the platform below. Using the small vine next to them, you then have to crush one of those boulders and punch the second one until it's on the right side of the platform containing two boulders, making three horizontal ones there. You have to use this to punch the boulder on the suspended block across from it and, after that, punch at the three boulders on the platform until there's one left and it falls over the edge, making another small bridge you can use to reach the boulder sitting across the small gap, against the wall. With that done, you can easily crush the remaining boulders, opening the way to either going on to Stage 44 or up to Stage 35.

Stage 44: Yet another one that's fairly simple when you know what you're doing. You first have to punch the boulder at your starting point once to the left, using it to cross over to the row of vines beyond, where you punch the first boulders up to top to the right until they fall. Reaching the other side of the stage, you have to hang down from the vines to punch the lower boulder into the wall, while punching the top one left until it falls through the brittle bricks there. You can then jump down to the middle level and punch the boulders you come across to the right until you smash them (the brittle bricks on the right side of the bottom row of vines will deposit the boulders atop some more vines rather than making them fall down on the spikes). All you have to do then is walk over to the left where the last boulder is sitting by the spikes, hang down from the vine, and smash it from there. The two arrows appear right above the spikes and you can either go on to Stage 45 or up to Stage 36.

Stage 45: Better move to the right as soon as the stage starts if you don't want to get crushed by two falling rocks. You then have to punch the boulder to your left through the gap behind it, climb up the vine next to the two stacked rocks and punch the top one to the right until it falls through the gap, and punch the bottom one after it, creating a way to cross the gap. Cross over the gap, punch the rock you find there until it's on the other side of the small vine, climb up, stand on the boulder, use it to smash the rock in the wall, and then jump off and punch the stepping stone rock to the right until it's crushed. Now, you can go back to where you pushed the first boulder through the gap, go down and smash it, and do the same to the two boulders you used to cross the gap before. From here, you can go on to Stage 46 or down to Stage 53. (Weirdly, each one of these boulders contains a lightning bolt item, even though there are no enemies, and there's an unreachable spike pit in the bottom right of the stage. God knows what the designers were thinking with this.)

Stage 46: This one is akin to a more advanced version of Stage 23, and it's also the first one in a while to have enemies to deal with. You have to create a column to use to reach the vine that leads to the upper left section of the stage, namely with the two boulders on the platform to your right, the left boulder on the upper platform there, and one of the boulders in that three boulder column, after you've destroyed the other two (as well as climb up and take care of that one lone boulder up against the right wall). Once the column is formed, you can climb up that vine, punch the two boulders to its left into place, go around the edge, drop down on the stacked boulders, punch the boulder on the upper left piece of wall over the edge, then climb back down the vine and demolish everything. One of the boulders down there contains an hourglass but a lightning bolt would have been better, as the enemies will probably be pretty thick below you and you'll have to climb down and walk through them. Regardless, you can then destroy the four boulder column from before and head on down to Stage 54.
 |
| Ever feel like the game designers are mocking you? |
Stage 47: Your reflexes need to be quicker than ever at the start of this one, as you have to punch the boulder to your right, quickly move to the left to avoid getting crushed, and then push that falling boulder until it falls down next to the one you just pushed. Once you've done that, you can cross over them to the ladder, climb up and smash the boulder next to the enemy spawn point on the upper left, come back down and smash those two boulders, and then head down to Stage 55 or back to Stage 46.

Stage 48: You should crush that boulder to your right from the get-go. From there, you can walk all the way to the left, climb up the vine, punch that boulder over the edge of its platform, go over yourself and punch it to the left, sending it down beside the vine, and head down and punch the boulder to the right until it's underneath the brittle section of the platform near where you started. Now, you have to climb back up to where those four boulders are on those suspended platforms and create a path for you to get across the gap. You have to punch the two bottom boulders twice each to the right (from the bottom up, that is), punch the third one from the bottom once to the right and then hang down from the tiny vine there to punch it right once more. When it's against the wall, you can drop down and dispose of the two bottom boulders before climbing up to the top platform, punch the boulder there over the edge, onto the other boulder you have on the small vine, then go down to the next to highest platform and punch across the gap, getting the top boulder onto the platform beside that. Now, you can go back up, drop down on the one boulder, punch the other to the right, down to where the one from earlier is sitting, and use that as a way to walk over to the vine and punch the boulder in the left alcove across from the right wall. From there, you can destroy the remaining boulders, using one of the tiny vines to smash the lone one up above, and use the arrow, which takes you backwards to Stage 47.

Stage 49: This is most definitely a no-brainer: simply make your way down those steps of boulders, smashing every two you land next to until you reach the bottom, climb up the vine, punch the one boulder there out of the space in the wall, and dispose of it however you see fit. There are two enemy spawn points here but they shouldn't pose any threat, as you find both an hourglass and a lightning bolt amongst the "step" boulders. The arrows appear right below the spawn point on the left side and at the top of the long vine and you can either go on to Stage 50 or down to Stage 57.

Stage 50: This one is all about knowing which path to take. Namely, you should avoid dropping down to the low, left-hand corner of the stage because there's no way to get back up there if you do. After smashing the boulder to the left of your starting point, getting an hourglass for your effort, you have to climb down to the enemy spawn point, walk by it, climb down the vine across from it, down the vine to that one's right, smash the boulder down there, climb up to where the last boulder is, knock it over the edge, and then climb back down and smash it (if you drop down after it, you'll get stuck). The arrows pop up around that area you had to avoid before and you can either go back to Stage 49 or down to Stage 58.

Stage 51: Another one that's actually easier than it looks and, moreover, is another no-brainer. After knocking the boulders off the vines of either side of your starting point, you can crush two of the three you're standing on, sending the third over the edge, down where you can destroy it later, and destroy the latter three below them, though watching out for the spike strip they're sitting on (you'll have to switch sides at one point to safely get all of them). Destroying all of the remaining boulders on the bottom of the stage, and there should be five of them, is a cinch and you can then either go on to Stage 52 or up to Stage 43.

Stage 52: You'd think, this far along, the stages would be getting harder and harder but this is another easy one. All you do is exactly what you'd expect: crush the first three boulders you come across up to, climb down, crush two of the three you come across down on the next level, knocking the last one over the edge, and repeat the process again until you knock the last remaining boulder of those four down next to the one on the spike strip. Destroying these last two is very simple, as you simply have to stand to the pit's left and punch, while dealing with the enemies that crowd around you down there (those that don't fall on the strip and kill themselves, that is), and using the vine over to the left to climb back around in order to reach the arrows, which take you on to Stage 53 or up to Stage 44.

Stage 53: Despite there being only three boulders to smash, this is one stage that depends on you doing everything in the correct order. First you have to climb around the boulder to the left of where you start, onto the vines across from it, punch the boulder there to the right twice, climb around it and punch it to the left once, down on the platform next to the sets of brittle stones, and punch it to the right so it falls down into the gap, through those stones. You then must crush the boulder across the gap, climb back to where you started, push the boulder up there until it's to the right of the vine, get around it, punch it left until it falls through the upper set of brittle stones, follow it down there, and destroy both it and the one you pushed earlier. Only one arrow appears in the far left section here and it takes you down to Stage 61.

Stage 54: Now, here's one that's very, very tricky the first time you tackle it, as it requires a lot of climbing back around to the same spot. You must first drop to the floor, walk to the right, climb up the vine there, punch the boulder out of your way, climb around it, and punch it back in place (in order to keep the walking enemies from following you), climb up the vines, go along the top section to left, knock the boulder you find over the edge and onto the one below it, then walk back to the spot where those really tiny vines are, drop down, walk to the section of vine to the left, punch the boulder atop the small, suspended block into the space to its left, step on it and punch the boulder to its left down through the brittle bricks, and then knock the two boulder-column over its left edge (this blocks the enemy spawn point, so the only respawned enemy you'll have to worry about for the most part is Rodan). Now, you must drop back down to the floor, punch the lone boulder there to the right until it's crushed, climb back up the vine and smash the boulder up there, climb all the way around the top portion in order to drop down onto the two boulder column and smash the boulder sitting atop the spawn point, and then hop down and destroy the column. And then, you have to go back up to the top section, drop down from the tiny vines, climb around to the left side of the boulder you pushed in the gap and destroy it. The arrows that appear take you back to Stage 53 or down to Stage 62, and if you want the latter, you'll have to climb back around and drop from the tiny vines yet again to reach it.

Stage 55: Like Stage 47, as soon as this starts, you must smash the boulder to your right and then move to the left to avoid being crushed (if you miss your chance to do the former, you won't be able to complete the stage). After that, it's a simple matter of climbing those vines, knocking the boulder up top to the left, into the little gap, smashing it at your leisure, climbing down and using that center vine to knock the left boulder over the edge to the left, climbing over and punching the right rock into that same spot, using the column to punch the boulder across from them over its ledge, climbing down the center vine and crushing the column, then dropping down and using the little short vine to the left to reach the floor, where you can smash the last two boulders. The arrows appear on either side of this floor and you can either go back to Stage 54 or on to Stage 56.

Stage 56: Again, order is the name of the game here. First, you must climb down, walk to the left, smash the one boulder right against the bricks, climb up to the upper left one and punch it down through the bricks to its left, climb down the vine you're on, punch the boulder from across the vine, and then get around and smash the boulder that fell. You can then make your way over to the right side of the stage, punch the boulder on top of the tall vine over the right edge, do the same to the one on the lone, floating platform, punch the two stacked boulders down below on top of that one, climb back up and punch the boulder you used as a stepping stone over the edge of its platform, and get down there and demolish everything. The one arrow pops up in the center of the stage, below the lone brick, and it takes you down to Stage 64.

Stage 57: The first thing you have to do here is get down on the floor on the left part of the stage, punch the boulder there to the left until it's on the other side of the small vine there, climb around it and punch it twice to the right, use it to reach the section of vines floating in the air, and punch the boulder up there to the left to land it on the one below. You can use this column to reach the boulders sitting atop the vine against the wall and then hop down destroy the column you just used (you have to hang off the vine against the wall to knock the top boulder of the column off in order to smash it). Now, you can go back to the starting point, punch the two boulders on the edge of the pit into it, and then drop down there and smash everything, activating the arrow that takes you up to Stage 49.

Stage 58: Another simple one. Making your way up to the top part of the stage, dealing with Rodan, as well as Anguirus, when they get too close for comfort, you must knock the boulder over the left edge, stand on it and use it to do the same to the one sitting on the block across from it, get off the boulder and punch it to the right until it falls on the spikes, get down there and smash it, and then smash the remaining boulders to the left, watching out for the small spike strip the one boulder has landed on. The arrow, which takes you to Stage 59, appears below the rightmost vine hanging above the spikes and you'll have to go down and back around in order to reach it.

Stage 59: God, I sucked at this one for the longest time, as I could never figure out which order to punch those boulders in that "Y" shape. The walkthrough guide I was using for this game didn't help much, either. In any case, I finally figured it out. You first have to knock the boulder that forms the upper right part of the "Y," follow that with the boulder that's second from the bottom, punch the very bottom one onto it and then punch it again so that it's up against the two stacked blocks, and add the rightmost of the boulders that's left. Once you're done, you should have a formation that looks like an "L" that's lying on it's back. You can then use the remaining two boulders to fill that small gap on the other side of the blocks and smash the boulder sitting in the alcove with the little vine. Following that, you can climb up the vine on the right side of the stage, up to where the one boulder is up top, punch it to the left a couple of times, climb around it, and punch it to the right until it falls through the brittle stones there. With that done, you can climb over and down to the lower level, pushing the boulder there to the right until it falls through the brittle stone and on the end of the spike strip. Hopping down to the vine to the right, you can now smash both and then climb down, walk back to the left, and destroy all those remaining boulders. The arrow, which takes you up to Stage 51, appears atop the long vine against the stage's left wall.

Stage 60: The enemies got a raw deal here, as there's a spike strip right under their spawn point, so all of them get taken out as soon as they spawn, save for Rodan. This is yet another surprisingly easy one. You can drop down to the left, walk over and knock the boulder into the small gap, cross over it and smash it, climb back around to above the enemy spawn point, climb the vine to the right there, knock the boulder on the platform over the edge to the left, hop down, and punch it to the right until it lands into the space between the vine and the platform with the lone boulder on it. You can walk across there, knock that boulder over the right edge, and use it to reach the vine against the right wall, which leads up to the platform where you can smash the boulder up there. That done, you can climb back down, smash your stepping stone, climb all the way back around to below the starting point, smash the boulder you pushed down there earlier, and make your way back around to the stage's left side to get the arrow that takes you back to Stage 59.
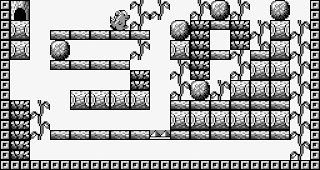
Stage 61: The main goal of this stage is to create a boulder column in the middle in order to reach that one boulder on the platform below where you start. To do this, you must go down and around to the right wall of the stage, climb up the vine, punch the first boulder you come across twice to the left, sending it through some brittle bricks, and punching the second boulder up there once to the left so it does the same. Climbing down the vine, you have to punch that first boulder in between the two blocks, climb down and punch the two stacked boulders down there over the edge, onto the little spike strip (you must do this from top to bottom to be successful), punch the boulder between the blocks left until it joins the column, and then climb up and do the same with the one boulder left up top. Now, you can use the four-boulder column to cross over, knock the one boulder over the edge, follow after it and punch it to the right until it gets next to the column, where you can smash it. With that, you can smash the column, collecting a heart from one of the boulders, and then either go back to Stage 60 or on to Stage 62.

Stage 62: Starting off here, you must push the first boulder next to you until it's on the left side of the small vine, climb up on top of it, knock the next boulder off of the vine ahead, and crush the one you just used against it. You have to do this again and, when one boulder goes over the edge, you push the other boulder on top of it. Getting around to the two-boulder column's left, you have to knock the boulders over the right edge, climb down and repeat the process twice more, crushing one of the boulders and leaving another on the ground next to the vine there. Using the boulder to reach the vine, you can hang off the end and smash it before climbing up, knocking the boulder up there to the right, using it to knock the boulder on the vine ahead off, smash the boulder from before, and use the one you just knocked off to reach and do the same to the third boulder, sending it over the edge and onto some spikes down below. You can then smash your stepping stone, drop down and smash the boulder on the spikes, and take the arrow that leads backwards to Stage 61.

Stage 63: Knock the boulder to your left over the edge, climb down and punch it left twice more, climb back up and punch the other boulder up there over the right edge, hang off of the little vine it was on to knock the boulder off of the vine below, get down and destroy that boulder and then move the other one to the left until it fills the space between the long vine and the suspended vine. You can use this makeshift bridge to reach the stack of four boulders on the one vine, knock them off and smash them (grabbing an hourglass from one of them), and then turn around and smash those two remaining boulders. The arrows appear in the space to the right of the last vine's top, giving you a choice between going up to Stage 55 or back to Stage 62.

Stage 64: For what is the last technical stage, they decided to do what they did with Stage 21 and give you one that's easy as crap to complete: smash the boulders on either side of the tunnel and that's it. There is an enemy spawn point and you would think that would cause things to get really, really cramp, but the left boulder has an hourglass, allowing you to freeze and punch out any enemies that do manage to spawn.

Stage 38: I was absolutely stumped the first time I tried this one and, after trying many times and failing miserably, I had to break down and read a walkthrough on GameFAQs. There's a lot of work involved here, and it's a warm up to the complexity of the actual last stage. First, you have to drop over the edge and go around to get behind that boulder that was behind you, punch it a couple of times to get it on the platform, punch it four more times, then climb around it with the small vine there and punch it to the right twice so you can use it to reach the other vine. Climbing up to that platform, you have to punch that boulder to the right twice, climb around it, and keep punching it to the left until it falls over the edge of the lower platform, on top of the boulder. You now must climb back up to the platforms, getting on the highest one with a boulder, and punch the boulder three times to the left, before using it to climb along the suspended vines to the left, where you can reach that gap up there and destroy the boulder across from it. Now, you must climb back down the vines and the stepping stone over the edge, onto the two other stacked boulders down there, and go back around to the right, down below, and punch the middle of the column, followed by the top one to begin to form a bridge. That done, you can complete said bridge by climbing back around and punching the boulder left up there to the left until it fills that last space. Now, you can reach the area to the far left, climb up the vine and punch the boulder off the lone suspended block, keep punching it right until it falls through those brittle stones, and finally smash them all. With that, it's time to move on to the final stage.

Stage 37: Following a nice portrait of King Ghidorah, with the dragon informing you that Minya is just ahead, you begin the final stage and there is a lot of work to do here in order to solve the puzzle. First, you have to get around the boulder to the left of your starting point and punch it to the right twice so it falls down below. Second, you must hang from the vine it was on and punch the one boulder to the left off its vine and do the same to the right boulder, punching it over its edge and onto the first boulder you knocked down there. Third, you stand atop this column and smash the boulder sitting on the vine next to the right wall, before heading over to the short, narrow tunnel to the left. Fourth, you must punch the boulder inside the tunnel to the left twice, before going back to the column, climbing around to its right, punching the top boulder once to the left, the bottom twice, and then continuously punching the top one until it goes through the tunnel and falls next to the one on the ground beyond. Fifth, after going back through the tunnel and punching that base boulder twice to the right, you must climb up and to the left, using the boulder on the platform to climb up the vine so you can punch off the one across from you. Sixth, you have to go back around through the tunnel, climb up the vine on the other side, punch the rock you just felled twice to the right, come back around, and use the two boulders and the vines together to reach that last boulder on the suspended vine to the far right. Seventh, climbing down between the two boulders below, you must punch the right over the edge, onto the boulder down below, and use the same method from before to get it through the tunnel and at the end of the line of rocks. Eighth, you have to move that base boulder back into position again with two hits to the right, go back through the tunnel, up the vine, and punch the boulder to the right until it falls over, onto the base boulder. Ninth, repeat the same process, completing the bridge. Finally, you can go back and destroy the base boulder, use the bridge to reach the boulder on the far left, and then destroy the bridge to complete the stage. This takes a long time, even when you know exactly what you're doing, and you shouldn't be surprised if Ghidorah shows up before you complete the task fully. If you're close enough, though, you can power through Ghidorah, finish up what you have left, and complete the game.

As you should have figured out by this point, if you can get over the shock of its cutesy nature, Godzilla for GameBoy can be an enjoyable puzzle game. It may be simplistic in its stage and sound design, the controls are very limited, the maze can be tricky to navigate, even with the in-game map you're given, the "CONTINUE" and "PASSWORD" menus are odd, and the exacting nature of the puzzles and the physics involved in traversing the stages can be frustrating to deal with, but it's still a game that rewards you for creative thinking, it makes you want to keep playing once you get into it, the music and sound effects are fairly memorable, you get some nice portraits of the monsters here and there, and the "chibi" nature of the characters' game sprites has a certain charm to it. Not a perfect game, and when it was brought over here, it might have been a better idea to be upfront about its kid-oriented aesthetic, but in my opinion, it does have enough merit to warrant a playthrough or two.
 I first came across this game at the exact same time I did with Super Godzilla, the game for the Super NES: in the summer of 1998, at the Wal-Mart close to my house. Like Super Godzilla, I had no inclination that this game existed, or that there were actual Godzilla games period, before then, so it made for quite a delightful surprise. Both games were really cheap as well, meaning that my parents would get them for me at a time other than my birthday or Christmas, which was when I usually had to wait for a new video game, but I could only get one at a time. Since Super Godzilla was the one that initially caught my eye, I first opted for it, and didn't get this game until some time later. I can remember specifically that, when we were at that Wal-Mart again, I was trying to coax my parents into getting me Banjo-Kazooie, which had just come out and was the hot new game. However, it was still a $50 game at that point, so it was out of the question, and I opted to get this game instead. Yeah, this was not a game I actively sought out and I only ended up with it as a very distant second choice. If you've seen the Angry Video Game Nerd episode this was featured in, you remember how taken aback the Nerd was when he began playing it and saw how kiddy the graphics were. That was not my reaction when I first played it, as I could look on the back of the game box and see the screenshots (although, the very chipper music did give me pause), and what's more, the gameplay was much simpler and easy to figure out for an eleven-year old than the much more cryptic and overly complicated Super Godzilla. However, I didn't play this game as much, as I've never been that big on puzzle games (mostly because I suck at them), and despite the different paths you can take here, I would eventually reach the point where I would get stuck and couldn't figure out how to go on. As a result, I couldn't tell you the last time I played it before I decided to do this review, and I still found parts of it to be quite difficult, to the point where I did have to resort to walkthroughs in order to make it to the end. But, replaying it, I will say that, if you can get over the cutesy, chibi designs of the monsters and the silly music, this is quite a good puzzle game, albeit one where the limited controls and often exacting nature of what you need to do can make for a lot of frustration.


No comments:
Post a Comment