


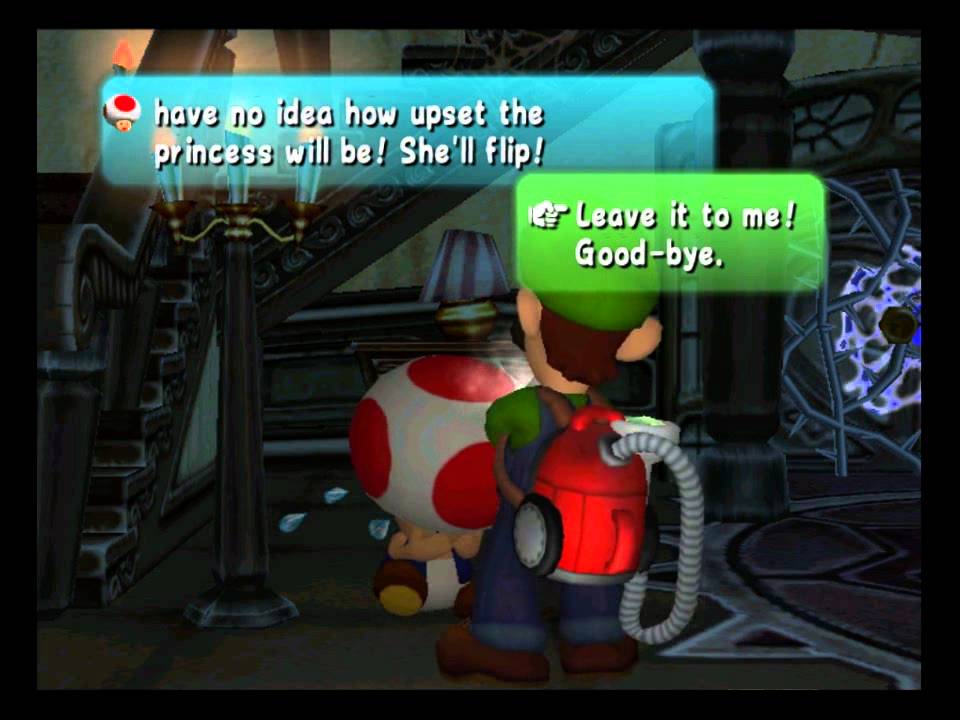
The game's story is that Luigi has won a mansion in a contest... despite having never entered one. But, undaunted, he and Mario decide to meet up at the place one night, with Luigi following a map to it. The map eventually leads him to an enormous and very sinister-looking house atop a hill in the woods and when Luigi heads inside to investigate with his flashlight, he finds the place to be just as dark and creepy on the inside, with no sign of Mario. Inside, he receives a key that opens the door to the upstairs parlor, where he's attacked by a ghost, which itself is attacked by a little old man wielding a vacuum cleaner-like device. The ghost manages to escape and the old man introduces himself to Luigi as Prof. E. Gadd, a ghost expert and collector. At his laboratory, he informs Luigi that the mansion appeared only a few nights before and that it was nothing more than a trap set by the ghosts for both him and Mario, the latter of whom E. Gadd saw enter the mansion and never come back out. When Luigi tells him that Mario is his brother, the professor decides to help him save him by instructing him how to capture ghosts with his device, the Poltergust 3000, and explore the mansion and keep in contact with the small but useful GameBoy Horror. Now, it's up to Luigi to explore the mansion, unravel its secrets, vanquish the ghosts, and ultimately, locate and save Mario from whatever evil force is behind everything.


The basic gameplay is that you investigate each of the mansion's many rooms and clear out the ghosts within; once you've captured them all, the lights come on in the room and you're often rewarded with treasure chests that contain either keys for opening up the following rooms or lots of money and treasure for points value. In regards to the former, sometimes it's pretty straightforward which key you use on which door (every time you collect one, the GameBoy Horror automatically shows you which door it opens on its map of the place), while other times, it's a little more complex, as the key for them may not show up until much later and sometimes not where you'd expect. As for the money and treasure, it may initially seem pointless but, in reality, how much you collect by the end of the game determines how large the mansion Luigi receives afterward is. The mansion is divided up into four main areas that you have to explore, each with a central, connecting hallway or corridor full of ghosts that act as little more than distractions and can't be vanquished until the area's boss ghost has been defeated. Each boss ghost gives up a key that breaks down the barriers separating the areas. There are several Toads in the mansion (either that, or it's the same one you keep encountering again and again in different areas) and once you've calmed them down and reassured them, they'll give you the option to save your progress whenever the need arises. The main one you'll find yourself going to for this is the one in the foyer, and what's funny is whenever you run into one, you actually have the option to turn him down when he asks you for help, but I've never done that, as you won't get the help you need if you do.


You have two important pieces of equipment to help you in your quest, the most crucial of which is the Poltergust 3000, a vacuum cleaner that Prof. E. Gadd has modified to be able to suck up and contain ghosts. The way to do this is to use the device in tandem with the flashlight that Luigi carries around. When ghosts approach you, you have to illuminate them with the flashlight in order to make them freeze in place (they disappear if they're too far away when you illuminate them, so it's best to do this by switching the light off with the B-button and then flicking back on when the ghosts are close enough), revealing their hearts and hit points, and then activate the suction with the R-Button. Once you've begun that, you use the Control Stick to increase the force of the suction by pushing it in the opposite direction of the ghost while using the C-Stick to keep the vacuum aimed correctly. (Yes, in short, this game is basically Ghostbusters, except with Mario characters.) It's not too hard to get the hang of it, especially since you can train with it a little bit before heading to the mansion, and you can very easily drain a ghost's HP and capture it using that method combining the Control and C-Sticks, but there are variables that do tend to complicate matters. For one, a ghost can escape if it manages to squirm out of the vacuum of air, which can happen if furniture gets in your way, allowing it to get far enough away, or if another ghost punches you (you often find yourself facing more than one at a time and while it is possible to suck them up all at once, doing so is really tricky and takes skill), and it's tricky to concentrate on avoiding these obstacles while also trying to apply enough force to capture the ghost. For another, it can sometimes be hard to aim at a ghost depending on which control type you choose, be it Standard or Sidestep (I'll go into the differences between the two later), so it's best to alternate from one situation to the next to see which works best. Third, there are other types of ghosts aside from the regular ones and their hearts are only revealed by either meeting certain conditions or exposing them by using elemental powers that can be applied to the Poltergust later in the game.

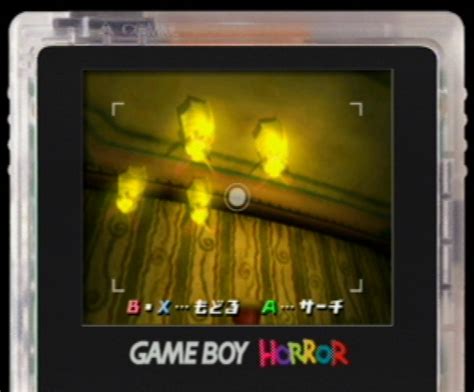
The other useful tool you use is the GameBoy Horror, which serves many different purposes. Not only is it constantly onscreen during the gameplay, showing you how much money you've collected (breaking it down specifically to coins, dollar bills, and gold bars, but including other types when you come across them), but you can also use the Y-Button to have it bring up a map screen that shows you which doors are locked and which ones you have a key to, in addition to your current location, the X-Button to bring up a first-person view through it in order to investigate things you find in the mansion (most of the time, you'll only get a comment from Luigi but other times, you'll activate something like the way to a hidden room or a warp back to the foyer when you use it on a mirror), and the Z-Button to bring up an inventory of all the treasure you've collected and the various ghosts you've captured. It's also how E. Gadd stays in contact with you, as he often uses it whenever he needs to tell you something important. Finally, after a moment early on when you accidentally unleashed a big group of Boos. E. Gadd refits the GameBoy Horror with the Boo Radar, a device that allows you to zero in on their hiding places in the mansion's rooms so you can draw them out and capture them.


There are plenty of useful items to be found throughout the mansion, the most useful of which are the keys to the various rooms, which you often receive inside a treasure chest when clear all of the ghosts out of a room (though, I like said earlier, they aren't always that simple to find). When you defeat an area's boss ghost, you get a special key that breaks down the barriers that block your access to the mansion's other areas, allowing you to move further along. There are three Element Medals that you pick up that, once equipped, allow the Poltergust 3000 to suck up small Elemental Spirits and then, spew the element, be it fire, water, or ice. These Elemental Spirits are found in spots that correspond to their element (torches, spots where water is running, cold areas) and you can either expel the element slowly by pressing the L-Button or shooting it in a concentrated form by holding the button down and releasing it. Not only is this useful for exposing the hearts of certain ghosts but you can also use the elements to get by a fire by extinguishing it with water, use the fire to light candles that trigger special events, freeze Boos and other obstacles that block your way, and so on. The downside, though, is that you can only use one element at a time, meaning you have to go find an Elemental Spirit source when you want to switch, and you have a limited supply of it each time you suck one up, forcing you to suck up another in order to recharge. Hearts that replenish your health can be found in several different sizes, with the really big ones restoring 50 hit points, and are hidden within furniture, particularly vases and drawers. Speaking of which, this game really encourages you to tap on or vacuum every single moveable object you come across, as they often expel money and treasure that you can then either grab or suck up. They mostly come in the form of coins, dollar bills, and gold bars, but you later find gigantic amounts of treasure in chests and in special rooms that include various-colored gems and diamonds, and when you attempt to pull in one of the "gallery ghosts," they drop pearls during their struggle (the longer you're able to pull on one without it breaking free, the bigger the pearl you receive). As I said earlier, how much money you have by the end of the game determines the size of the mansion Luigi ultimately buys with it, meaning that it really acts as little more than bragging rights about your gameplay ability (but hey, just try to ignore those tantalizing riches once you've uncovered them). However, once you've uncovered the riches, you have to collect them quickly or they disappear, meaning that you have to make sure not to get into a dialogue bit with a nearby character or grab something that Luigi poses and displays while doing so. What also sucks is that whenever you take damage, you lose some money as well and you only have a limited amount of time to gather it back up. You also lose money if you end up touching one of the purple-and-black spotted mushrooms that sometimes pop out of objects or are dropped by struggling ghosts. Normally in Mario games, mushrooms are a good thing, but these cause you to shrink for a few seconds, making you lose some health and money, as well as make you unable to use the Poltergust 3000.


As you might expect, there are many different types of ghosts to be found haunting the mansion, and they come in several different classes. The basic ones that you encounter in the mansion's rooms and have to clear out we'll call "regular ghosts," the two most common of which are Gold Ghosts and Purple Punchers, both of which attack by floating up to you and socking you in the head, causing you to lose 10 or 20 hit points respectively. While they're not difficult to freeze and suck in at all, since they themselves only have 10 and 20 hit points respectively, they can prove annoying in how they whack you while you're trying to reel in another ghost, especially the Purple Punchers, who attack as soon as they appear and have a longer punching range. Green-colored Garbage Can Ghosts are, however, tough to deal with, in that they have 40 HP and are always tossing aside banana peels that you slip on. While slipping on one of the peels only takes off 5 HP, it can really get annoying when you're trying suck the ghosts up, as you'll instantly lose your grip on the suction if you slip while doing so and it also leaves you open to attacks from other ghosts that are nearby. Grabbing Ghosts do exactly what their name implies: float up behind you and wrap their arms around you, damaging you in the process (although, only the red-colored ones actually hurt you in doing so, making the white ones little more than a nuisance). You have to rock the Control Stick back and forth in order to shake them off and once you do, you can vacuum them up fairly easily. (There are some instances in the game where these types of ghosts only appear in shadow form or reflected in a mirror, so you have to really time when you swing around and illuminate them in order to capture them.) Blue Twirlers are these big, blue-colored ghosts that appear later in the game, have 30 HP, and attack by pounding the floor, creating shockwaves that can cost you 10 HP if you get caught up in them. They're especially difficult to contend with in big groups. There are three ghosts you encounter that require you to use one of the three elements on them before they become vulnerable to attack: Temper Terrors; light-blue-colored variations of the Gold Ghosts with flaming hearts that are vulnerable to water; Flashes, which are white-colored Purple Punchers with icy hearts that need to be melted; and Blue Blazes are lighter-colored Blue Twirlers with water hearts that need to be blasted with icy mist (they all deliver the same amount of damage as the ghosts they're palette-swaps of).


Shy Guy ghosts come equipped with spears and often twirl around in their respective areas in pairs, threatening to stab or slash you with their weapons in the process. They only have 20 HP but you have to remove their masks with the Poltergust 3000 before they become vulnerable to being sucked up and while doing so, you have to have others that are twirling around nearby. Waiter Ghosts appear in the mansion's first floor dining room, serving the "portrait ghost" known as Mr. Luggs' food, forcing you to suck them up in order to battle and capture him. They're not hard to suck up at all, though. Skeleton Ghosts are ghosts with 30 HP that appear in only a few areas in the game and assemble and disassemble themselves between their attacks, which is simply throwing bones at you. One of these ghosts is essential for capturing Spooky, the portrait dog ghost. Finally, you have Speedy Spirits, which have the same design and HP as Gold Ghosts but are colored blue, are very rare, and try to very quickly run away when you uncover them rather than attack. Thing is, though, if you manage to capture one, you'll get a ton of money and treasure as a reward, so if you want to try to get the best mansion possible at the end of the game, you may want to go for them. However, they don't appear unless you uncover their hiding places, they're not crucial to lighting up a room (meaning, if you defeat all the other ghosts and light up the room before uncovering a Speedy Spirit, you lost your chance to get it), and if one manages to give you the slip, it won't come back, save for a section in the game where the mansion's power goes out (I'll try to specify which ones can be found only during that part of the game specifically), so you have to keep your wits about you when going for these guys.


Portrait Ghosts, also known as Gallery Ghosts, are among your main targets in the game, as they've escaped from Prof. E. Gadd's gallery thanks to the big bad behind it all, King Boo, and you have to recapture them. Including the area boss ghosts, there are 23 in all, they all have 100 HP (save for Boolossus and King Boo himself), and each of them has a special trick to exposing his or her heart in order to make them vulnerable to capture. Because of that, I'll talk about them individually during the game walkthrough, but I will say now, that after you've completed an area of the mansion, you take all of the Portrait Ghosts you've captured back to E. Gadd's laboratory, where he puts them through a device he calls the Portrificationizer in order to turn them back into paintings and if you look at the paintings in his gallery, the pictures themselves and the frames say something about how well you did in capturing them. As I said earlier, Portrait Ghosts drop pearls as you're pulling them in and the longer you're able to go without them breaking out of the vacuum, the bigger the pearls will be, with the biggest one coming after you manage to drain 90 HP in one swoop; also, the frame around the ghost's portrait in the gallery will be golden and the picture will show the ghost in a rather relaxed and compliant pose. Otherwise, the frame will either be bronze or silver and the ghost's image won't be as peaceful (the silver frame pictures seem to be the more defiant of the two).


Early in the game, there's a moment where you enter a storage room on the first floor and unleash a gang of 50 Boos, plus their leader and the game's ultimate villain, King Boo. Once you've done so, they all escape into the mansion and you get a new objective along with the others: hunt them all down and capture them with the Poltergust 3000. The Boos are different from the game's other ghosts in that they can only be uncovered in rooms where the lights are already on (meaning you have to go back to those you've already cleared out once you've unleashed the Boos) and you have to use the GameBoy Horror's Boo Radar to zero in on where exactly they're hiding. The blinking yellow light atop of the device's onscreen image will flash faster the closer you get to where something round like a Boo is hiding and will turn red once you're on top of it, prompting you to either knock on the spot or blast it with the vacuum in order to flush the target out. Sometimes, though, you'll end up falling for a prank the Boo has left for you, be it a ball with a Boo's face drawn on it (suck it up and shoot it at the wall to get rid of it) or a bomb that you quickly have to dodge, but once you do draw a Boo out, you have to quickly hit it with the Poltergust and drain its HP to capture it. Capturing Boos tends to be a rather tedious and irritating part of the game for me, because they don't get caught up in the vacuum's pull but rather have their HP slowly ebbed away by it, making it easier for them to escape in the next room or hallway, which they often do, and while you can follow them to continue the chase, if you don't do so as quickly as possible or if they make it into an area you haven't unlocked yet, they'll disappear and you'll have to come back to the room later to try again. The controls and the fixed camera angles can also make it hard to aim at them properly enough to suck them in before they can escape and you never know whether they'll attack you or simply try to escape. The first ones you encounter start out with fairly small HPs but as the game goes on, they become tougher and tougher, with some of the last ones having up to 300 hit points. Fortunately, though, they are susceptible to ice mist, which slows them down, and even though you unleash 51 of them, you don't have to search the mansion for every single one of them, as 15 of them form one of the bosses and King Boo himself is the final boss, as you'd expect.


Finally, there are Hallway Ghosts that you find in both the hallways and outside sections connected to the rooms in the mansion's individual areas. These ghosts are all very weak (many of them literally have zero or no hit points whatsoever and can be sucked in immediately), act as little more than distractions or annoyances, and unlike the ghosts found in the rooms, capturing them isn't important, as the lights will only come on in these spots once you've defeated the boss ghost, so it's best to ignore them unless they're in your way. Among them are Ghost Bats and Mice that often fly and scurry around the hallways (if a gold mouse appears, quickly vacuum it up for a lot of treasure); Ceiling Surprises, who are these ghosts that hang down from the ceiling and do nothing more than cackle and clap their hands; Purple Bombers, who look like the Ceiling Surprises but toss bombs at you instead; Bowling Ghosts, who are similar in size and shape to the Gold Ghosts but roll bowling balls down the halls at you to try to trip you up; Flying Fish, which appear in only a couple of spots and can be rather annoying in how they continuously dive at you in big groups (they only take off 5 HP a hit but when there's a bunch of them, that can add up); and Sparks, which explode if you get near them or if you suck them in, costing you 10 HP, although they are vulnerable to water. There are also a number of fake doors to be found lined along the walls that slam you against the wall when you try to open them, costing you health and some coins. You can tell in advance if this is the case, though, as they don't appear on the GameBoy Horror's map.


I don't think it's an over-exaggeration to say that, graphics-wise, Luigi's Mansion was one of the most mind-blowing things gamers had ever seen at that point. Game graphics had gotten pretty sophisticated by that point with the always developing and evolving Nintendo 64 and the PlayStation (I can remember how amazed I was in the mid 90's when I saw TV spots for Final Fantasy VII, although that was mainly the cinema scenes) but this was definitely a huge leap. Both the cutscenes and the in-game graphics looked exactly the same, which was quite rare at that point (and would remain so for some time, as far as I can remember), there were no polygons or other such mistakes that you often saw in games, particularly on the N64, and the detail and sharpness was incredible. It was basically like someone took the N64 and gave it some steroids, it was so advanced. When I finally got the GameCube working and began playing, I couldn't believe I was playing such an advanced system in my own home. This was the kind of thing I often saw other, "wealthier" kids playing, the kind of thing I would go over to their house to play rather than something my parents could ever afford to get me, and yet, here it was. And I must say, sitting in my own house, playing this awesomely advanced game after years of being amazed at the capabilities of the PlayStation and PC-games (despite always loving my N64), made me feel like quite the big shot. It didn't last for very long, as soon, all games looked like this, albeit sometimes not as polished, but for a bit there, I was like, "Now, I'm the rich kid!"


Speaking of the graphics, I really like the way the game looks, particularly in the design of the mansion itself. As you would expect in this type of game, it's your stereotypical, overly sinister Gothic mansion, with the interiors looking very fancy and old-fashioned, but surprisingly, it does manage to convey a sense of atmosphere with it. Obviously, since it's a Mario game meant for all ages, this isn't as scary and unsettling as horror games like Resident Evil and Silent Hill (or, for that matter, another game you'll see reviewed here this month), but there is a kind of dark, spooky quality to it, as you're walking around the inside of this big, creepy mansion, often with the only light being the beam from Luigi's flashlight (as well as the occasional flash of lightning from outside), the sometimes downright eerie music, and the subtle but perceivable sounds of the ghosts. You can see Luigi's breath in the areas that haven't been cleared out, hinting even further at the ghostly presence there, there's a dark, cinematic close-up of Luigi's hand unlocking or pulling a door handle when you try to enter a locked room, and when the ghosts do appear and you have to confront them, the sudden loud noises they make can cause you to jump if you're not ready for them. Also, while most of the ghosts are just silly in the way they look, there are others, especially some of the Portrait Ghosts, they do have a creepy vibe to them, especially when they materialize out of the darkness with that unearthly glow around them. Heck, the cinematic that you see when you choose to head to the mansion is unnerving, as you watch Luigi slowly walk up the hill to the mansion, Prof. E. Gadd waving at him as he does so, and the music becomes genuinely creepy as he reaches the front door, slowly opens it up, and shines his flashlight inside, hinting at the terror waiting for him inside. And am I the only one who finds that little message, "You'll be back," that appears when you decide to quit the game for the time being to be a but unnerving? All in all, maybe it's not one of the scariest games ever, especially since, when you break it down, it's little more than Ghostbusters with Mario characters, but there is a spookiness to it that makes it more than stand up to the haunted house levels in past Mario games.


I wish they could have been a little more creative with the environments that pertain to Prof. E. Gadd, though. Obviously, the mansion is the main environment, so they spent most of their energy on making it look good, but everything with E. Gadd seems like the cliched type of laboratory you'd see on Saturday morning cartoons, like his very plain-looking control room, the main lab where you take the ghosts you've captured and he turns them into paintings with the Portrificationizer (this cinematic is seen every time you clear an area, with the same exact dialogue, apart from the first time, and you can't skip it, meaning that it quickly becomes tedious to watch again and again), the big, catacomb-like room with pipes and such where you can test out your ghost-catching skills, and the old-fashioned gallery where the ghost paintings are kept, which have angel statues that, when you examine them, their wings slowly flap, for some reason. I guess I shouldn't be too hard on it, given the kind of game this is, but I would have liked something a little less typical, as opposed to the mansion itself, which is cliched but, like I said, they manage to make it work. Also, all of this stuff is apparently under the ground beneath the small shack that E. Gadd lives in, making it even more akin to Dexter's Laboratory than it already is.


The controls are pretty fair for the most part, although I don't get the point of the A-Button making Luigi call for Mario when you press it while you're not close to a door you can open or something you can examine (although, that does manage to be an interesting part of the game's sound design, as I'll get into) and, because it's closest to my thumb when I hold the controller, I often hit the X-Button when I mean to push Y so I can look at the mapscreen, although that's not the fault of the designers. But, like I said earlier, aiming the Poltergust 3000 or the flashlight can be a little tricky, depending on the always fixed camera angles. It's especially bad when you're trying to wear down a Boo and the damn thing keeps escaping because you can't aim the suction at him precisely, swiping you and doing that annoying chattering laugh that they do. Trying to catch ghosts in the hallways are also a pain, again because of the camera angles, which are often more distant than necessary or angled in an awkward way, and the two latter boss battles are where the angles become tricky to the point of frustration. Even though you can switch control schemes whenever you want (Sidestep and Standard, with the former being the default, where Luigi will automatically turn to face a direction before, which he doesn't in the latter), I rarely find myself doing this, because in the heat of the game, I don't have the patience or the foresight to do so; I kind of just want to get on with it. Again, that's my fault, but it's just the way it is, and I think it would have been better if the developers can come up with one, well-balanced control scheme in the first place. Besides the controls, another aspect of the game that gets irritating are the bits of animation that Luigi goes through whenever certain things happen. For instance, whenever a ghost appears, Luigi will stop and jump in fright, even if it's behind him rather than in front, and it leaves you open to attack for a few seconds. The same happens whenever he reacts to getting punched or when a Spark or some other such explosive detonates and momentarily sets his cap on fire, which he takes off and fans in the air, trying to extinguish the flames. It's funny when it first happens but, again, you have no way to bypass this animation when it happens and it leaves you open to any other ghosts or hazards that are nearby. The fake doors that you find in the hallways are particularly annoying, because they cause you to lose some coins if you fall for them and get slammed up against the wall, and the animation of Luigi getting flattened against the wall and falling to the floor detains you long enough for the coins to disappear.


Although the game got a lot of good reviews when it came out, one major criticism that it did get was in regards to its rather short length and, like I said in my introduction, it's not unwarranted. With only four main areas to complete before you reach the final boss, the game, while fun to play and full of interesting and unique challenges, does tend to fly by and, as GameSpy noted at the time, you could probably complete it in about six hours. Whenever I play a game, I usually do so for maybe an hour a day and going by that, I would say that it did take me a little over a week to get through it completely when I did the playthrough before beginning this write-up (I think the only reason it even took that long was because I didn't play it every single day). Besides being short, it's also not that difficult once you get the hang of the ghost-catching mechanics and the puzzles typically aren't that tricky to figure out. Granted, I'm saying that as someone who's played through and beaten it many times before, so I knew what to expect, and yet, even though I hadn't played it in a while and was a bit fuzzy on some of the challenges, I didn't need to consult my old Nintendo Power Player's Guide that much. So, yes, this game could have been extended a little bit, maybe by adding another couple of floors or wings on the mansion, or maybe even another dimension, for you to explore, with some more bosses, and maybe actually have Bowser involved (you'll see why I say "actually" later) and therefore, as fun as it is, I wouldn't recommend it to those who want a real, lengthy challenge. I don't have a Nintendo 3DS (or a DS of any kind), so I've never played the sequel, Dark Moon, but from what I've read about it, it looks like the developers fixed the length and challenge issues with it.
Luigi's Mansion has a pretty memorable, if somewhat repetitive and limited, music score composed by Shinobu Tanaka and Kazumi Totaka. The main theme, which you hear a sort of prototypical version of on the title screen, can be heard in its main form whenever you're wandering the dark hallways that connect the haunted rooms and it ranges from being genuinely menacing and eerie, with low thrumming accompanied by high-pitched, otherworldly pieces, to still having a somewhat playful feel with its melody and rhythm. You also hear this theme in a more high-tech, computerized-sounding version in Prof. E. Gadd's main control room, a harp-like, magical version when you manage to make it to outside areas and in the observatory, a very eerie-sounding clock kind of version in the Clockwork Room late in the game, and when Luigi's wandering the rooms and hallways, he either nervously hums it to himself or casually whistles it, depending on whether or not these parts of the mansion have been cleared. I also like the music that plays during the opening of the game, which still manages to be fairly creepy, as you see Luigi cautiously walk up to the mansion's front door, when he finds the key to the upstairs parlor, and when he meets and is talking to E. Gadd in there after your first encounter with a ghost. As I mentioned earlier, the music that plays in the cinematic as Luigi approaches the mansion when you decide to go there, is very creepy, starting out low and menacing and going into a high-pitched, unearthly sound as he walks up to the front door, opens it, and shines his flashlight in, and the same goes for the even more high-pitched, unsettling music when you enter the parlor the second time and the paintings inside talk to you before the ghosts appear. The music for the boss battles are also highlights, ranging from playful and mischievous during the battle with the baby ghost, Chauncey, to weird and otherworldy when you battle Bogmire, big and bombastic during the battle with Boolossus, and downright epic during the final confrontation with King Boo. However, those are really the best highlights of the game's music, as the rest of it ranges from unremarkable (like when you're training and when E. Gadd is turning ghosts back into paintings) and, in some cases, irritating (whenever you chase after a Boo or are trying to suck in a ghost), to downright generic (whenever you tangle with a Portrait Ghost in what is basically a mini-boss battle). However, the music that plays during the ending credits is pretty catchy, and when Mario has been saved and is being turned back into himself after King Boo made him into a painting, you get a funny, frantic rendition of the classic Mario Bros. theme.


Sound-wise, the game is also interesting and often quite effective. Whenever you leave the hallways or other adjoining areas and enter a room, the music will cut off and it will be mostly silent, save for the subtle, croaking sounds of the ghosts inhabiting a room, which is quite eerie. Funny enough, if you listen carefully to the sounds the ghosts are making, you'll realize that, like Luigi, they're actually "humming" the game's main theme in their own, unique way. Speaking of the ghosts, they all make a distinct sound whenever they materialize, so you instantly know they're there, even if they're offscreen, and each individual ghost, be it the regular ones, the Portrait Ghosts, and so on, has its own unique sound, letting you know what you're up against as soon as they come out to play. Going back to the silence angle, that's when the game is at its spooky best, as you're roaming around a dark room, with only your flashlight to guide you, just waiting for a ghost to appear, hearing every little sound, be it crackling thunder, a popping fireplace, vibrating pots and pans in the kitchen, and so on. There's one moment where you're outside and you come to a well where you can hear the sounds of Mario, who's being kept down there, calling for you. If you listen closely, you can hear that he's saying stuff like, "Luigi, what's the holdup?!", but because of the music and the sounds of the ghosts out there, initially all you'll hear are yelling sounds that you can identify as Mario just from the texture of them, which is both cool and kind of creepy (I know I was kind of creeped out when I realized what I was hearing). Also, as I mentioned earlier, whenever you press the A-Button when you're not opening a door, investigating something, or trying to talk to Toad, Luigi will call for Mario. Again, it serves no purpose whatsoever, but what's interesting is how Luigi's voice changes the more health he loses: his voice becomes more and more frightened and desperate-sounding. What's more, his whistling of the game's theme becomes slower, as does the music itself, and when he's humming it, he makes more apprehensive whines. It should be noted, though, that, despite these instances of spoken words, 99% of the dialogue is text only, as is often the case with Mario games. When you talk to Toad, he either makes a happy sound or is whining and crying in fear when you first find him before he calms down, and Prof. E. Gadd's speech sounds like actual Japanese mixed in with a bunch of nonsensical sounds and words, like, "Yabbo, yabbo," and, "Chut, chut, chutta!", which he repeats over and over again, in spite of the situation. It's just really odd to listen to. Originally, I was going to fault the game for not putting in more actual dialogue, since they most definitely had the capabilities by this point, but then I thought about how well it went when they did Super Mario Sunshine the following year. Good game, mind you, but the voice-work, both the performances and the audio quality, are dire, to say the least.


Intro: The game begins with a cinematic of Luigi following a map that leads him through the woods to the mansion he supposedly won in a contest, only to see that it's much more menacing than what he was expecting. He goes in through the front door and the first bit of gameplay has you in the darkened Foyer. You have to go up the stairs you find there and try to open the door at the top, which, of course, is locked. However, when you go back downstairs, you'll have your first ghostly encounter when a vague, transparent form appears and drops a key at your feet. Once you've got it, you can go back to the door upstairs, which leads to the parlor, and unlock it. You're then treated to another cinematic, as Luigi encounters a Gold Ghost that scares him down to the floor and attempts to attack, only to be nearly vacuumed up by Prof. E. Gadd. The ghost manages to escape and E. Gadd introduces himself to Luigi, remarking about all of the ghosts within the mansion. More ghosts show up and the two of them head back to his laboratory, where he tells Luigi that he's been duped by the ghosts, as the mansion appeared only a few days before. When Luigi mentions Mario, whom E. Gadd saw enter the mansion and never come back out, the professor offers to help him save his brother. That's when you get a crash course in ghost catching in the training room, where you're challenged by a number of Gold Ghosts, which shouldn't be that easy to suck up with the Poltergust 3000. Once that's done, you have the option to either go to the gallery (which now has no paintings whatsoever) or go straight to the mansion and begin the game proper. Once you return to the Foyer, you find a distraught Toad there who's worried about Mario but, if you talk to him and agree to go after Mario, he'll cheer up, turn the lights on, and give you the option to save your game. (If you stand directly underneath the chandelier here, odds are that it might suddenly fall, so get out of the way as quickly as you can if it does. You can pull a lot of cash out of it from the top of the stairs if it doesn't fall.)


Area One: The first leg of the game involves just a few rooms and a fairly small, connecting hallway, where you get the hang of the basics of ghost-catching and encounter both regular ghosts and Portrait Ghosts for the first time, before having your first boss battle, which is a pretty simple one, all things considered. First stop here is the parlor, where you have to extinguish the candles on either side of the painting on the wall directly across from the door, and once you do, the paintings in the room will come to life, admonishing you for doing so, and threaten you with an oncoming ghost attack. The ghosts that they send after you, though, are just three Gold Ghosts, which are very easy to vanquish. Your reward for doing so is the key to the connecting anteroom, and when you step inside, both the door you just walked through and the door on the other side of the room, as you're then attacked by three more Gold Ghosts, followed up by two Purple Punchers. Once you've captured them, the barriers will go down and you can make your way into the Wardrobe Room, where you run into more Gold Ghosts and first encounter the Garbage Can Ghosts. Once you've dispatched them, you'll be surprised to see that the lights don't come on, meaning that there's still a ghost hiding somewhere in the room, namely in the wardrobe at the far left corner of the room. There's also a Speedy Spirit hiding in the one in the right corner, so you might want to capture him after you've vanquished all the ghosts that come for you in the middle of the room and before you catch that last Gold Ghost in the other wardrobe and turn the lights on. Once you're done in there, you're rewarded with the key to the floor's west wing (you have to suck it off of the coat rack to get it), and you can also walk out the door on the room's left wall to a balcony where you run into another Toad. Once you've consoled him and he turns the light on, you'll be able to save your progress before moving on to the west wing.


The west wing can be found on the other side of the door to the left of the parlor door at the top of the foyer's stairs. Before you head inside, though, Prof. E. Gadd contacts you and warns you that there are stronger ghosts lying ahead, namely the Gallery Ghosts that have escaped from his paintings, and that it'll be harder to get them to expose their hearts. The hallway connecting these rooms also gives you a taste of the main hubs you're going to encounter in each area, with Ghost Bats and Mice and the fake doors that slam you against the wall (there's one here that has a trail of coins leading to it, but the others later on aren't as clearly marked). The first room you can access here is the Study, which is the first door on the wall you see once entering the west wing and is where you encounter the first Gallery Ghost, Neville, as he rocks back and forth in his chair, reading. With all Gallery Ghosts, you can either use the GameBoy Horror's search function to examine them to get a clue to their weakness or you can feel them out to see how to vacuum them in. In Neville's case, all you have to do is wait for him to stretch and yawn for his heart to be exposed and you can then freeze him with the flashlight and vacuum him up. You can also find a Speedy Spirit hiding within his rocking chair before you attempt to capture him, and the books on the shelves around the fireplace do offer clues on how to capture some of the Gallery Ghosts coming up. After you've captured Neville, you receive the key to the master bedroom, which is on the other end of the west wing. Inside, you find Neville's wife, Lydia, sitting in front of a mirror, brushing her hair, and you have to use the Poltergust 3000 to pull back the window curtain, exposing a hole in the glass. A gust of wind will distract Lydia, making her reveal her heart, and you can then capture her. You receive the key to the nursery as your prize and, when you walk back out into the hallway, you'll hear the unsettling sound of a baby cooing behind the door you're supposed to go through next. Once you enter the room (you can find another Speedy Spirit hiding in the crib during the blackout), you have to blast a rocking horse in order to draw out Chauncey, Neville and Lydia's ghost baby, who then hops onto the horse and asks you to play with him. In his mind, though, "playing" means sending objects like teddy bears hurtling towards you, although you can easily dodge the slowly floating objects and then, suck up a nearby ball and whack him in the face with it. Enraged at this, Chauncey will make you shrink for the game's first boss battle.


The battle takes place atop Chauncey's crib, as he floats outside of it and sends projectiles hurtling towards you, with the first ones being big rocking horses, which will float parallel to the crib and suddenly turn and launch at you when they're lined up with you. You simply have to get out of the way in order to avoid taking a hit and if two come from other side, you have to stay in the center of them. After the rocking horses, Chauncey sends three big, bouncing balls into the crib at you and you have to avoid them until two disappear, while one remains for you to suck up and fire at him again (the angle and aiming mechanics can make this a tad bit tricky). Once he's been hit, he becomes vulnerable to the Poltergust and you can then freeze him with the flashlight and try to capture him. If he manages to break free during the struggle, he'll bounce along the crib, forcing you to dodge him, and he'll then repeat the same attack pattern until you manage to wear him down and capture him. After the battle, you're returned to the nursery, where you'll find a chest holding the key that opens the door in the foyer, and you'll also go back to E. Gadd's laboratory, watch as he turns the ghosts you've captured back into paintings, and then see your totals for the game so far before saving and continuing on. (There is another unexplore room found in the west wing but you don't find the key for it until much later on.)


Area Two: Things have been fairly straightforward so far but, starting here, things get a lot more complicated. The main hub of the area, which is the first floor hallway beyond the main door in the foyer, has many more rooms and are inhabited by different types of ghosts, the hallway itself is filled with ghosts that will actively try to harm you, unlike the mice and bats, you get your first taste with using the elements to weaken certain ghosts, gradually gather clues as to Mario's whereabouts, encounter the Boos, and battle a boss who's a lot more challenging and tricky to defeat. The first room you can enter on this floor is the bathroom in the far back left of the hallway, where you're ambushed for the first time by two of the Grabbing Ghosts, but they're hardly a challenge to contend with and capture, and once you've done so, the key to the ballroom appears on a shelf by the bathtub. In the ballroom, which is the first door on the right side of the hallway that connects to the one you walk into through the main door from the foyer, you first take on three pairs of Shy Guy Ghosts and you have to be careful as they twirl around to avoid getting whacked with their spears (it's best to unmask and try to capture two at a time if you can). Once they've been vanquished, the dance floor will begin slowly rotating and a pair of dancing Gallery Ghosts called the Floating Whirlindas will appear. You have to stand very close to where you see their ghostly glimmering in the darkness in order to make them materialize and, once they do, you have to wait for them to spin and bow before they expose their hearts and make them susceptible to capture. When they're gone, you receive the key to the storage room, the door to which is located in the back of the ball room. Inside, you get jumped by a Purple Puncher and a Red Grabbing Ghost (a Speedy Spirit is hiding within the lone chair on the right side of the room) but once you've captured them, you'll be surprised to find that you don't receive a reward. However, if look in the mirror on the wall opposite from you, you'll see a button reflected in it on the wall behind you and if you press it, the wall to the left rolls away, revealing a hidden section of the room with a trapdoor in the floor. There's also a poster on the wall across from the trapdoor and if you use the Poltergust to remove it, you'll reveal another button. Pressing this one opens the trapdoor, unleashing 50 cackling Boos, led by the game's big bad, King Boo, but once they see the Poltergust, they'll quickly escape into the mansion. Afterward, Prof. E. Gadd contacts you and tells you that the Boos were the ones who freed the Gallery Ghosts. You're then tasked with capturing the Boos, with the aid of the Boo Radar on the GameBoy Horror.


You have to capture at least five Boos before you can continue on, so it's best to go back to the lit rooms in Area One to capture BamBoo in the parlor, Bootha in the anteroom, GameBoo Advance in the wardrobe room, TaBoo in Neville's study, Boolicious in the master bedroom, and, while you're at it, you may want to go ahead and get Turboo in the nursery, Boo La La in the ballroom, and GameBoo in the storage room so you don't have to go back later (and yes, all of their names are bad puns involving the word "boo"). Once you've gotten five Boos, which isn't that difficult since all of the ones I've mentioned are fairly weak (Boo La La has the most HP at 60), E. Gadd will contact you and tell you to go to the washroom on the first floor to try to relax. The washroom is parallel to the bathroom but, if you try to go in before you've got the Boos, someone will say, "Er, um, occupied." When you go inside, you'll find out that that someone was Toad, who's upset because he dropped something important in the toilet. Once you've consoled him and the lights have come in, you can walk right up to the toilet and if you investigate it with the A-Button, you'll receive a key that unlocks the door to the fortune-teller's room, which is located off to the right of the end of the middle hallway on the first floor. When you enter, you'll find that if you illuminate the crystal ball on the table in the middle of the room with your flashlight, the ghostly Madame Clairovoya will appear. Unlike the other Gallery Ghosts, she's actually helpful towards you, although she won't be able to do anything for you at the moment. The door on the right side of the room leads into the mirror room, where you'll be attacked by five Grabbing Ghosts that can only be seen via their reflections in the mirror that stretches around the room (this is also the one mirror in the mansion that doesn't warp you to the foyer). You have to watch their reflections, wait until they're close enough, then swing and around illuminate them, making them visible and vulnerable to the Poltergust 3000. When you've collected all of the ghosts, your prize is a chest containing the Fire Element Medal, allowing you to vacuum fire elemental spirits, which happen to be found in the torch on the other side of the other side of the room, so the Poltergust can shoot flames. Using the fire to light the candles in the room will cause the barrier blocking the door to dissipate so you can leave. You can then also flush out and attempt to capture Kung Boo, who has 40 HP but, despite his name, will not attempt to attack you. Once you're done in the mirror room and return to the fortune-teller's room, you can light the candles in there in order to acquire the key to the laundry room, which appears atop a column next to the table.


The laundry room is on the opposite end of the hall from the door to the fortune-teller's room and has a trap door (which you can destroy with fire), as well as three Garbage Can Ghosts. After you've captured them, you receive a treasure chest full of money and if you look in the washing machine, you find Mario's cap, the first of five of his dropped items that you must take to Madame Clairovoya. (The Boo here is Boogie, a 40 HP Boo who will go for an attack.) When you do so, she'll use her powers to try to find out what happened to Mario, revealing a little bit more of information each time. (On the down side, though, she says the exact same dialogue, as well as the same humorous bit of misspeaking in the middle of it, each time she invokes the spirits. It's funny the first time but when you have to do it four more times, it quickly loses its luster.) After you've done that, the next order of business is to light the candelabra that you see floating back and forth at the end of the connecting hallway outside. It's being held by Shivers, a ghostly butler, who panics at the sight of the fire and heads back to his room (which is through the real door on the opposite wall in the laundry room), yelling frantically. You have to follow him there and, when he sits down and starts complaining to himself, he'll be vulnerable to capture, after which he'll give up the key to the conservatory. (There's also a Speedy Spirit found hiding in the sewing machine and the resident Boo is PeekaBoo, who has 40 HP but won't attack.) If you scan the wall on the right side of the room, you'll find a mouse hole that you can investigate with the GameBoy Horror and, when you do, a mysterious force will suck you into a hidden room through it, one that's filled with treasure chests bursting at the seams with treasure, such as gold bars and rubies. However, there are also Flashes, the ice-hearted variations of the Purple Punchers, hiding in some of the chests, so you'd best be equipped with the fire element in order to make them vulnerable, as well as a Speedy Spirit hiding in another of the chests during the blackout. The hidden room has a Boo, too: GumBoo (getting sick of these pun names, yet?), another 40 HP Boo who will attack. Once you've finished, you exit the hidden room the same way you entered. Next, you head to the conservatory, which is located at the top of the middle hallway outside, and inside, you can interact with the instruments there to play the original Mario Bros. theme. Once you've got them all playing, the ghostly pianist, Melody Pianissima, will appear when you approach the piano and will then quiz you on a piece of music she then plays for you. The question will either be what the composer was thinking of while composing the music or what game it came from ("Underwater" and "Super Mario Bros. 3" are the correct answers to either). If you answer correctly, Pianissima sends her sheet music flying after you but you can easily vacuum it up and once you do, you can capture her and receive the key to the dining room. A Speedy Spirit can be found hiding in the piano stool during the blackout and the room's Boo, Boomeo, has 40 HP but doesn't attack.


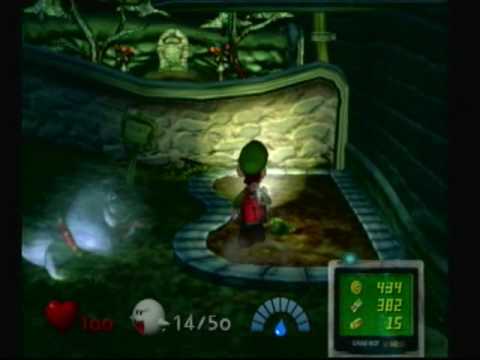

The dining room is the first room on the left side of the center hallway when you enter it from below. You'll have heard the sound of Mr. Luggs, the room's fat glutton of a Gallery Ghost, stuffing himself from inside beforehand but, when you enter the room, he won't materialize until you light the candles on the table (there's a Speedy Spirit hiding in the left china cabinet on the room's back-wall and you can also find a bit of cheese containing a Gold Ghost Mouse under a chair near Luggs). Once you can see him, if you vacuum up the food on his plate, and stop the Waiter Ghosts from replenishing his food, Luggs will become enraged and begin spitting fireballs at you. You have to dodge them until Luggs tires himself out and flops onto the table, where he'll then be vulnerable to capture. Once you've gotten rid of him, your prize will be a chest filled with money and treasure, including a big silver diamond, and you'll also be able to track down and capture Boodacious, who's one of the stronger Boos you've yet encountered, as he has 80 HP, although he doesn't attack. The door on the far left of the room leads into the kitchen, wherein you first get attacked by floating pots and pans and then, when you open the refrigerator, you get jumped by a Flash, requiring you to use flames to make him vulnerable to capture (before you open the refrigerator, you may want to investigate the dishwasher to draw out a Speedy Spirit). After you've vanquished the Flash, you receive a chest with the Water Element Medal as a reward, and after E. Gadd contacts you and tells you what it is and how to use it, you can take in a water elemental spirit from the sink and use it to extinguish the burning door in the back of the room. (The Boo in this room, Booligan, who's the last one you can find before the next area, is another with 80 HP and yet, doesn't attack.) The door back there leads into the boneyard, the first of three spots outside the mansion, where a ghostly bulldog named Spooky acts as a guard. If you approach him, he'll start chasing you around, his barking awakening a cranky Skeleton Ghost named Mr. Bones who complains about the noise. If you vacuum up Mr. Bones, one of his bones will be left behind, sticking out of the ground, which will entice Spooky to come over and start licking it. He then becomes vulnerable to the Poltergust. (While there are no Boos or Speedy Spirits to be found here, if you water the plant found in the garden once every area, it'll grow until it gives you a lot of treasure and, eventually, one of two golden diamonds found in the game. But, if you die or forget to water it after defeating a boss, the plant itself will die and that'll be the end of that.) After you've gotten rid of the dog, you can use the GameBoy Horror to investigate his doghouse, which will activate a force that pulls you through it and into a small graveyard on the other side of the wall behind it.


The graveyard is inhabited by three more Skeleton Ghosts that will pop up and attack when you disturb their graves. They're not too difficult to capture, but you may want to try to get them all at once to avoid taking hits. Fortunately, one of the tombstones gives you a big heart that restores 50 HP (a drainpipe in the lower right-hand corner contains a red ruby), and you're going to need it for what's coming. Once you've vacuumed up the skeletons, the big tombstone at the head of the cemetery begins glowing ominously and if you approach it, the game's second boss, the shadowy Bogmire, appears in front of it and the next thing you know, you're transported to a large arena. Bogmire fills the place with a number of transparent, shadowy copies of himself that vary in size, although he himself doesn't cast a shadow, and the trick to making him vulnerable lies with them. You can vacuum up the shadows into a ball that you hold at the end of the Poltergust and then, once you're armed, you fire them at Bogmire, making him expose his heart. However, what complicates matters are Bogmire's tendency to teleport around the arena and the numerous other shadows roaming around, which have a bad tendency to hit you when you're trying to make Bogmire vulnerable and when you're trying to suck him up, as if these tasks weren't already complicated with the angling of the Poltergust and the pulling method of capturing a ghost with the amount of HP that he has. It'll probably take a while but eventually, you can wear him down and return to the graveyard, where you receive the courtyard key that allows you entrance to Area Three.


Area Three: The third section of the game takes you outside the mansion as well as into the remaining rooms on the first floor and rooms on the second and even the third floors, culminating in a very frustrating boss battle on the mansion's large, third-floor balcony. The key that you received from Bogmire breaks down the barrier blocking the door by the bathroom in the back of the first floor and it leads out into the courtyard behind the mansion. The place is full of annoying little ghosts called Flying Fish, Ceiling Surprises, and Purple Bombers (even though there's no ceiling; also, if you suck up all these ghosts, you'll be able to turn on the lights out here and receive a treasure chest), as well as a birdhouse containing a letter from Mario that you must take to Madame Clairovoya when you get the chance, a statue that acts as a prelude to a Gallery Ghost you'll soon be facing, a little shack where you can find a horrified Toad in order to save your progress (anybody else think this "shack" is actually an outhouse?), and a well that you can climb down. You definitely want to go down to the bottom of that well and follow the small tunnel that leads to the right, as you'll then learn Mario's fate: he's been trapped in a painting in a big, golden chamber, but you're unable to help because all you can do is look at him through the mouth of a lion's head statue. Going back through the tunnel, you get jumped by a Ceiling Surprise but you can easily capture him and receive the key to the rec room, accessible on the right side of the courtyard, as a reward. Inside the rec room, Biff Atlas, a ghostly Arnold Schwarzenegger wannabe, is lifting weights and, if you use the Gameboy Horror on him, he'll actually insult you, asking you to be his punching bag. To capture him, you have to goad him into attacking by hitting him with one of the punching bags hanging around him. When you do, he'll come after you, and you have to hit him two more times (after you've hit him the second time, he chases you with his arms swinging and he can cause a lot of damage, so you really have to avoid him as best as you can) to make him hit the floor and become vulnerable to the Poltergust 3000. When you capture him, you'll get a chest full of money but no key; it's actually hidden in a treadmill machine on the left side of the room and you can get it by walking on the treadmill. It opens up the door in front that leads to the hallway connecting the first floor with the stairs leading to the second. There's also a Speedy Spirit hiding in a machine on the rec room's right wall and the first Boo of Area Three, Booregard, has a 100 HP and will attack you.


Your next stop is upstairs, specifically the washroom, which is at the opposite end of the hall you reach at the top of the stairs (this is where the Bowling Ghosts make their first appearance, along with Purple Bombers and Sparks, so navigating this floor is just as hazardous as the actual rooms). There, you find a toilet with a leaking tank, which is where you can also find water elemental spirits. You need to suck them up, because the toilet itself houses a Temper Terror, the type of ghost with the fiery heart that needs to be sprayed with water in order to make him vulnerable. Once you've captured him, the room will light up and you'll get a chest full of money. There's also a poster on the wall (a thinly-veiled Universal monsters poster, I might add) that you can pull on with the Poltergust and remove to reveal a poster showing the upcoming boss, Boolossus, but it does nothing and you can actually hurt yourself if you hold on the suction for too long. Next is the tea room, which is behind the flaming door in the corridor at the top of the stairs before the second floor itself. Once you've put the flames out, you can enter the room, where you're faced with some floating dishes, followed up by two white Grabbing Ghosts. When you vanquish them, you'll get a treasure chest but it appears on the left table, apparently out of reach. There's a special pad on the floor at the edge of the right table and if you step on it, you'll reverse the gravity and make it possible for you to walk on the ceiling. You can step on a similar pad over the left table to land on it and open the chest, which contains the Ice Element Medal, the last of the three medals. Ice elemental spirits can be found in the ice buckets on the tables and it also has three red emeralds hidden amongst the furniture, as well as a possibility of two Gold Ghost Mice. The room's Boo, Mr. Boojangles, is much weaker than the previous one, as he only has 50 HP, and tries to flee rather than attack, but the bad thing is that he has a tendency to try to escape into the room through the left wall which, if you're following the order of the rooms in the Player's Guide (which is how I'm breaking them down), you haven't investigated yet. In any case, the Ice Element Medal is needed to capture the next Gallery Ghost, Miss Petunia, who's showering in the bathroom, which is down the small hall from the washroom. You'll see her silhouette behind the shower curtain when you enter the room and if you pull it back to reveal her, she'll retaliate by spitting water at you. You can immediately get back at her by spraying her with icy mist, making her vulnerable to capture, and you've sucked her up, you'll get a chest containing the key to the billiards room on the first floor.


The billiards room is behind the door that's located down from the first floor washroom and when you walk into it, you encounter Slim Bankshot, the ghostly pool-player, who circles around the table before going on with his game, sending the three billiard balls slowly flying in all directions throughout the room. The balls are both a hazard to be avoided and the key to capturing Bankshot: if you suck one up and hold it at the end of the Poltergust's nozzle, you can fire it back at him. However, if you're flashlight illuminates him, he'll turn invisible and the ball won't hit him, so you either have to turn the light off or turn around as it floats towards him (it floats so slowly that this isn't difficult to do, although it's best to fire at him when he stops to take another shot). After you've beamed him with three balls, he becomes vulnerable, and you can then vacuum him up; if he manages to break free, you have to hit him with another ball to make him vulnerable again and keep doing so until you've caught him. The reward is a chest full of treasure, including a diamond (there's also a Speedy Spirit hiding in one of the chairs over in the room's lower right-hand corner), and the room's resident Boo, Boohoo, has a fairly low amount of energy, with 50 HP and doesn't attack. The door on the room's right wall leads into the projection room, where the ghosts will only make their presence known once you go over to the projector and tap on it, activating it. Even then, the ghosts here, which are four Grabbing Ghosts, are trickier than most, as you can only see their shadows on the projection screen when they enter the room and approach you, similar to the ghosts in the mirror room which you could only see via their reflections. Like in that room, your method of defeating the ghosts is allowing them to get as close as they can by watching their shadows then quickly spinning around, illuminating them with the flashlight, and sucking them up. When you've gotten all of them, your prize is a chest containing Mario's glove, which you must take to Madame Clairovoya. ShamBoo is the Boo that can be found hiding in here, with 50 HP and a predilection to attacking. Back up on the second floor, the door found across the hall from the bathroom is where you'll find the next Gallery Ghost, a grandmother-like figure known as Nana (which makes me smirk, because that's what we call my paternal grandmother), who sits in her rocking chair, knitting. Catching her is similar in how you dealt with Slim Bankshot: you have to knock over the yarn balls sitting in the basket on the little table next to her, suck one of them up, and launch at her. You have to do so two more times to make her vulnerable, and like Bankshot, if she wriggles away, you have to hit her again for another chance. The big difference between her and Bankshot is that, when you hit her the first time, Nana will start chasing you around the room, shooting lasers at you from her eyes and making a noise like an angry, squeaking cat (can't say I've ever seen my Nana do that). Your prize for catching her is the key to the twins' room, which is the still locked door in the west wing off the foyer. There's also a Speedy Spirit hiding in the chair at the end of the table on the right side of the room and the room's Boo, LimBooger, has 100 HP and will attack, so prepare to chase him around a bit.


The ghost twins, Henry and Orville, don't appear right away when you enter their room. You have to draw them out by using the Poltergust to make the mobile hanging on the ceiling spin and then move around in circles while continuing to do so (before attempting this, you may want to investigate the bunk-beds to find a Speedy Spirit). After a little bit of this, the twins will appear and ask you to play hide-and-seek with them, an offer you have to accept in order to get a chance to capture them. When you accept, they'll tell you to go outside while they hide and, as soon as you do, they'll give you an audible signal to come back in. Doing so, you find five boxes in the room and you have to guess which two the twins are hiding in. You can either just guess or use the Poltergust on the boxes; whichever ones shake when hit with the vacuum contain the twins. However you find them, the twins prove to be sore losers, accusing you of cheating, and attacking by jumping atop a couple of toy vehicles (one a toy car and the other an airplane, which he uses to drop bombs on you) and floating around the room while trying to hit you. You have to suck the vehicles out from under them to make them vulnerable to capture and it's best to try to get both at once, since the other will interfere with your trying to capture his brother, although this is easier said than done because of their arching and angling movements. When you've defeated them, your reward will be a chest containing another item for Madame Clairovoya, Mario's shoe, and you'll be able to have a crack at Booris, who has 100 HP but doesn't attack. Astral Hall, which is found on the second floor, through the first door on the right when you walk down the central hallway, is your next stop and, when you first enter, you'll find no ghosts in sight. However, if you try to go into the door on the room's right side, you'll end up coming right back through the door that leads into Astral Hall, as if it's looping back in on itself. To solve this puzzle, you have to use the Fire Element to light all the candles in the room (if you don't currently have a Fire Element, you can go back out through the main door; it doesn't loop around to the right) and when you do, the ghosts, namely four Shy Guy Ghosts and several other types, will come out to play. Once you've captured them and the lights come up, you can then move on to the next room, which is the observatory, as well as attempt to capture Boonswoggle, another 100 HP Boo who doesn't attack. The observatory is unique amongst the mansion's rooms in that there are no ghosts to be found here, including a Boo, but it's no less supernatural. If you investigate the telescope, you'll look through it at the moon in the sky and when you pull away from it, the room's walls disappear, exposing the night sky and some shooting stars. You can suck in one of the stars (although, they can also whack you in the head if you get too close) and fire it at the moon, which is very tricky to do because you have to do so at the exact correct angle to arch it in the correct direction. When you hit the moon, it'll glow brilliantly and then explode (no doubt causing chaos and destruction throughout the world that you never see), revealing an ethereal walkway leading out into the darkness. Following the walkway leads you to a small platform where you find the last of Mario's five items, which happens to a glowing star.


Once Madame Clairovoya has examined all of Mario's items and told you all that she can (her last bit of information suggests that Bowser may somehow be involved), she'll be ready to return to her painting. Even though she doesn't attack and is supposedly going willingly, you still have to suck her into the Poltergust the same you do all the other ghosts (she also lets loose a Shrinking Mushroom along with pearls like the other Gallery Ghosts), but it's certainly not as difficult as capturing some of the other ghosts you've come across. After you've captured her, she'll leave behind the key to the safari room on the third floor, which is the first room you'll be able to open upon reaching the top of the flight of stairs you find at the end of the hallway on the second floor. You can also finally capture the fortune-teller room's Boo, Booigi, who's relatively weak, with only 40 HP, but who does attack. At this point, you may have noticed a door at the right end of the hallway outside the fortune-teller's room and if you go through it, you'll find that it leads down into the basement, although the only room down there that you can open is the breaker room. While it isn't necessary to go down there until after you've completed Area Three, if you do decide to investigate it beforehand, you'll be able to flush out a Speedy Spirit that can only be caught before the blackout that occurs at the beginning of Area Four (there's no Boo here until you come down during Area Four). In any case, on to the safari room, which is filled with ghosts that you'll need to hit with the Ice Element before you can capture them and which only appear after you make all the deer-heads on the wall move with the Poltergust. You're first attacked by several Blue Blazes, which marks the first appearance of any iteration of this type of ghost, along with two Garbage Can Ghosts, so it's quite a challenging fight and you'd best make sure you have plenty of health before attempting it. Once you've captured all of the ghosts, you'll receive a chest with the key to the balcony, as well as a chance to capture Little Boo Peep, a 100 HP Boo who doesn't attack (there's also a Gold Ghost Mouse hiding in a piece of cheese on the floor on the right side of the room). It's then time to head out to the balcony for the third boss battle, although you won't be able to do so if you haven't collected at least 20 Boos by this point (if you've been capturing the Boo in each room you've explored, you should have more than enough by the time you make it up here).


Walking out onto the balcony, your Boo Radar will immediately flash red, and if you walk over to the left, you'll see why: 15 Boos have gathered there. After they taunt you, they come together to form one enormous Boo: the game's third boss, Boolossus, who comes crashing down at you from above and begins hopping across the balcony, trying to squish you. Despite his size, though, Boolossus can still grabbed by the Poltergust's vacuum and, once you've got him, you can manipulate him into the horns of one of the two unicorn statues on either side of the balcony (sometimes, he may even jump into himself!) Once he does, he'll pop like a balloon and be divided back up into the Boos that make up his body. You can then use the Ice Elemental to freeze the Boos as they fly crazily through the air, swooping down at you at every chance, and once you've frozen them, you can suck them up into the vacuum. Eventually, they'll reform back into Boolossus, forcing you to repeat the process until you've gotten all of them. I said earlier that I find this to be a very frustrating boss battle and the reason for that is trying to freeze and capture the Boos rather than Boolossus himself. You also don't have to worry about running out of ice, as there are elemental spirits to be found around the unicorn statues; the problem is trying to aim the Poltergust correctly due to the less than favorable high-angle of the camera throughout the battle, as well as the Boos' speedy and cowardly nature. They constantly dive and swoop down at you like regular kamikazes and, even though a hit from one doesn't cause much damage, it can quickly add up if you get overwhelmed, which can easily happen (this is a moment in the game where I have died before, with only one Boo left, no less), and this is also a prime example of Luigi's character animation unfairly leaving you open to attack at every turn. Their speed makes them harder to hit than it already is but what's even more irritating is how they flee whenever you spray the ice mist, then quickly come back in, aim themselves, and fling their bodies at you like missiles the second you stop. Annoying doesn't even begin to describe this battle, especially when you come so close to freezing and capturing the last couple or so Boos, when they suddenly form Boolossus again and you have to pop him and start all over. With every Boo that you capture, Boolossus himself becomes smaller and smaller when he's reformed but he also becomes faster and harder to catch, making him even more of a threat than when he starts out at such a gigantic size. I can stress enough how frustrating this battle can be and, in all honesty, the only advice I can give is to keep trying and attempt to stay calm until you finally suck up all of these annoying Boos and win the key to the third floor's west wing.


Area Four: Not surprisingly, things really become tricky and intense during the last leg of the game, as you hunt down the rest of the ghosts and Boos hiding in the mansion's remaining rooms, confront the ghost that has been creating many of the spirits you've been dealing with, and finally, make your way down to the basement and battle the one behind everything in order to free Mario from his painting prison. However, when you head back up to the balcony to head into the west wing of the third floor, you'll immediately find yourself in a real bind when a lightning bolt strikes the mansion, blowing out the circuit breakers and plunging the place into darkness. Prof. E. Gadd immediately contacts you to make sure you're alright and warn you that, with the lights off, the ghosts will start coming out of the woodwork, which they do the second he breaks contact. It's no use trying to capture them all, as they'll be endlessly respawning until you get the lights back on, so it's best to try to avoid them. Heading through the door that leads to the west wing, you'll find a long, narrow hallway with two doors on either side of the opposite end (there are fake doors here as well). You can only go through the door on the right for now, which happens to be the telephone room. One of the phones will ring when you enter the room and upon answering it, the person on the line will ask you to identify yourself. You get a choice of answering as yourself or Bowser; if you tell the truth, the caller will reveal himself to be one of the Toads and then tell you that he and the others have all fled because of the blackout (in short, after this moment where you do get the opportunity, you won't be able to save your progress again until you get the power back on). He'll also mention the circuit breaker down in the basement and, after he hangs up, the phone will ring again. This time, it's E. Gadd, who tells you of a ghost named Uncle Grimmly, who's now on the loose in the darkness and because, of his predilection for it, this would be the best time to try to capture him. You actually have to capture him before you can turn the lights on, as he's taken it upon himself to lock the breaker room. E. Gadd informs you that Grimmly likes rooms with mirrors, which will probably have you searching the mirror room on the first floor, but actually, he's hiding in the wardrobe room beyond the parlor. After you deal with the first round of ghosts that appear in the room after the professor hangs up, you can head that way, avoiding all of the ghosts that attack you unless you really need to defend yourself, and easily capture Grimmly there when he raises his arms in front of the mirror in a very poor attempt to scare you. Capturing him gets you the breaker room key and you can then make your way down there and flip the switch, turning the lights back on and allowing you to breathe easily again. You can also then root out a Boo hiding in the breaker room named Boo B. Hatch, who's the strongest one yet, with 200 HP and does attack. If he manages to escape, you won't be able to chase after him in the other basement's other rooms at this point, so it's actually best to wait until you've unlocked them all.


Speaking of which, your prize for turning all the lights back on is the key to the cellar, which is the door across the hall from the breaker room. Walking in, you'll find that the floor is covered in big mounds of dirt that you can't get around but which you can easily suck up with the Poltergust (there's a Speedy Spirit hiding in a crate by the entrance but you better get rid of some of the dust blocking your way before you flush him out, in case you don't lock onto him right away). There are a couple of Purple Punchers found in this room as well, one of which appears when you suck up one of the mounds of dust, and once you've captured them both, you'll receive the key to the clockwork room on the third floor. You also can then go for the room's Boo, Booripedes, who has 100 HP but doesn't attack, although at this point, like Boo B. Hatch in the breaker room, it's very possible that you might not be able to catch him before he manages to escape into the next hallway and one of the rooms connected to it that you don't currently have access to. What's more, every time you exit and re-enter the cellar, the mounds of dirt will reset, forcing you to clean house again, although you don't have to vacuum every single pile each time, as you can find those reversed gravity pads hidden under some of the dirt, allowing you to walk across the ceiling and bypass them to get to the other door. With that done, you can finally head back up to the third floor and the telephone room, which you can light up by capturing two Skeleton Ghosts hiding in the chests you find there. The Boo in this room, Boomerang, has a whopping 300 HP, putting him amongst the strongest of them, and he will attack. More than likely, you won't catch him on the first try and he'll escape into the next room, which is the clockwork room, but it's not locked, so you simply have to give chase and wear him down. Getting back on track, the clockwork room, the door of which is found on the right side of the telephone room's back wall, is inhabited by three ghostly toy soldiers, who come to life when you activate the room's three windup clocks. You really have to watch out for these guys, as they come at you all at once and the corks that they fire can rack up the damage when you get hit again and again. To make them vulnerable to the Poltergust, you have to first pull the keys out of their backs and then illuminate and try to pull them in, which can be really difficult to pull off without getting attacked by the other soldiers, especially since you're talking about three enemies that each have 100 HP. You can try to pull in all three at once but the odds of getting very far while doing so are very unlikely. This is another instance where the only valid advice is to keep trying and attempt to stay calm until you've succeeded. The Boo in this room, Boocaster, is another one with 300 HP but, unlike Boomerang, he won't try to hurt you.


After you've captured the toy soldiers, the main toy house in the background will open its doors, revealing an elevator that you can use to reach the mansion's roof. Once there, you'll come across six Shy Guy Ghosts dancing around a campfire, and after you've captured them, two Flashes will appear, prompting you to draw a fire elemental spirit from the campfire in order to make them vulnerable. After you've gotten rid of all the ghosts, a chest containing the armory key will appear on the roof's left chimney, the top of which is covered over by grating, and once you have the key, you can head over to the right chimney and drop down it into a large room, simply called the Sealed Room, that's filled with treasure chests and money hidden in parts of the decorum. Some of the chests also contain ghosts, including a Gold Ghost, a Purple Puncher, a Blue Twirler, and a Purple Bomber, as well as the game's last Speedy Spirit. Capturing all of the ghosts here rewards you with the key to the second floor's sitting room and you can also go about grabbing as much money as you can once you're clear, but you might initially panic when you find that there's no door or mouse hole you can use to leave the room; if you pull off a cover that you find on the right side of the back wall, you uncover a mirror that you can use to warp back to the foyer. (The Sealed Room and the next two rooms I'm going to mention aren't necessary to explore in order to beat the game but if you're a completionist like me, who has to find everything a game can offer, you're not going to want to pass them up.) The sitting room is behind the locked door you find at the end of the second floor's center hallway, right before you reach the corridor leading to the stairs that head up to the third floor, and you have to use both fire and water here, in that order. When you walk in, the door behind you is immediately sealed and you then have to suck in a fire elemental spirit from the lit candle (if you don't already have the power of fire, that is) and use it to light all of the others in the room. As soon as you do, two Temper Terrors appear and you then have to pull in a water elemental from the fishbowl in the room and use it to make them vulnerable to capture. After you've illuminated the room, the door to the hall will unseal and you can then go into the next room through the door on the right. The sitting room's Boo, Boolivia, has 100 HP and, even though he doesn't have anything creative to say when you flush him out, he does live up to his line, "I hate you!" by attacking you. The next room is the guest room, inhabited by the ghost of a young girl named Sue Pea who's trying to sleep... and the room is upside down, as you're walking on the ceiling while the bed is fixed to the floor up above, with Sue Pea snoozing up there. You have to spray her with water three times to get her to wake up and expose her heart, which will prompt her to send her dolls flying at you. You can easily avoid and suck them up and then go after her, taking her with little trouble. When you've captured her, you receive a treasure chest that appears on the floor and initially seems out of your reach. But, if you leave the room, the mansion will shake for a second and when you go back in, you'll find you can now reach the chest, which is filled with lots of money and valuables, including a silver diamond. This room's Boo is Boonita, who also has a 100 HP but, unlike Boolivia, doesn't attack.


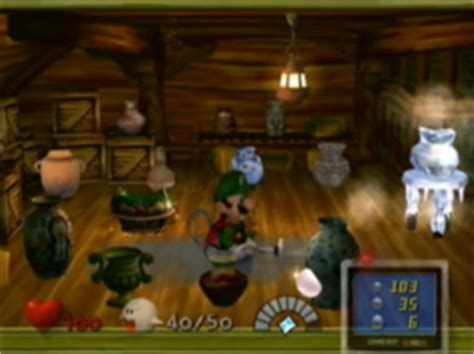
The armory is behind the door across from the telephone room on the third floor's west wing and there are six ghosts to be found hiding within. Two of them, Purple Punchers, can be found in two of the chests in the back of the room, while the other four are hiding in some of the suits of armor, running the gambit from a Gold Ghost and a red Grabbing Ghost to a Blue Twirler and a Garbage Can Ghost. When you investigate the armor, you'd better tap them either from the side or from behind, because if they're holding the maces up, they'll bring them down and will whack you if you're standing in front. Fortunately, there's health to be found in some of the armor, along with treasure in other spots and, when you get rid of the ghosts, a chest with a key to the pipe room down in the basement. UnderBoo is the Boo to be found here (when you flush him out, he actually says, "UnderBoos makin' a comeback!") and he says 150 HP and will try to hurt you. Before you head down to the basement, you may want to investigate the door in the back of the armory, which leads to the ceramics studio, wherein dwells the Gallery Ghost, Jarvis. When you encounter him in the back of the room, he'll challenge to a game that's in the style of Whack-A-Mole, where he appears out of one of the jars strewn throughout the room and you have to freeze him before he can disappear. This is hardly a challenge, because of how slow he is, and there's an ice elemental spirit to be found in the room, and if you freeze him seven times, you win... or, at least, you would if Jarvis wasn't a sore loser like the Twins were. As expected, he gets mad and starts flinging his jars at you, which you have to dodge until you have an opening to suck him up, which is quite easy, given some of the other ghosts you've encountered at this point, and you get a lot of treasure as a reward. Once he's been captured, you can then go after TamBoorine, who has 200 HP and will try to hurt you.


The pipe room is located at the end of the corridor beyond the cellar, on the left side (you have to watch out for some sparks floating around the door at the head of the corridor), and when you enter it, you're immediately attacked by some green-colored Flying Fish, as well as both red and white types of Grabbing Ghosts. The room is cramped and there's a stream of green-colored water, which I'm sure is meant to be toxic waste, that you do not want to touch, so capturing the ghosts can be tricky, albeit not too much so. When you've captured the ghosts, the room's lights come on and while you don't receive a key (it's hidden behind the small waterfall by the door), you can still proceed, with the aid of an ice elemental spirit found around a nearby frozen barrel. When you've got ice power, you can freeze the green water, enabling you to walk over it and reach the valve on the other side to shut off the running water. Once it's stopped, the chest containing the key to the cold storage room, which is at the other end of the outside corridor, will be revealed. The Boo in this room, Booffant, is really irritating to catch, as he has 300 HP and can very easily slip through the corridor's right wall and into the section outside the breaker room, forcing you to go back through the dust-covered cellar, slowing you down and giving you a chance to escape. In any case, the cold storage room is one of the trickiest rooms to get around, as the frozen floor will have to slipping all over the place and, even before you battle the Gallery Ghost here, you have to avoid the enormous stalactites hanging from the ceiling, as they can take off 20 hit points if they hit you. To awaken the ghost, Sir Weston, who's in a block of ice in the room's upper left-hand corner, you have to draw a fire elemental from the torch on the floor and then light the campfires on either side of him. Enraged at this, he'll attack with waves of ice stalagmites that he sends across the floor, which also inflict a lot of damage, and because of how unpredictable they are, combined with the slippery floor, this can be a tough battle. To make Weston vulnerable, you have to melt the ice he's encased in with the Poltergust's fire and, as you might expect, if he wriggles away, you'll have to repeat the process until you wear him down and capture him. Your prize for doing so is the key to the artist's studio, which is the one door on the third floor's east wing that's remained locked, and you can also capture Boolderdash, who's also a challenge because of the room's icy floor, although he only has 150 HP and doesn't attack. Heading up to the arist's studio, you confront the ghostly artist, Vincent Van Gore, whose creations you've been facing throughout the game, as he brings the regular types of ghost to life by painting them. Before you can catch him, you have to take on seven types of ghosts he conjures up three at a time, starting with Gold Ghosts and proceeding through Purple Punchers, Blue Twirlers, red Grabbing Ghosts, Shy Guy Ghosts, Garbage Can Ghosts, and Purple Bombers. You'd better have full health when you decide to take these guys on, because when get to taking on three of the more difficult types, you'll need all the health you can get! I actually find the Purple Bombers to be the hardest to catch, regardless of the fact that they have zero HP, because up until now, you've never been required to catch them and you have to dodge the bombs they drop and quickly illuminate them to suck them up. It's hard to get close enough to do that without getting bombed and if you illuminate them from too far away, they disappear. Once you've sucked them all up, you can easily capture Van Gore, who doesn't put up a fight, and you'll receive the game's last key, which allow you into the area where Mario is being held captive. This is also where you can capture the game's last Boo, Bootique, and if you get all 50 of them, you'll receive a big diamond as a reward.


Now, there's nothing left to do but head down to the basement, through the door at the end of the corridor you find past the cellar, and use the key to enter the golden room where you saw the painting Mario is trapped in earlier (if you attempt this before you've captured at least 40 Boos, though, King Boo will send you back to the foyer). This room, called the Secret Altar, is full of a lot of treasure in the decorum, in case you want to go after some more money before the final battle, but to get the treasure hidden in the sides of the room across from where King Boo is, you have to be sure not to get too close to him; otherwise, you'll begin the battle and lose your chance. In any case, when you approach the king, he'll insult you for falling for the trick that lured Mario and Luigi to the mansion in the first place before transporting you to the mansion's roof, where you're apparently faced with Bowser. Not surprisingly, this is the toughest confrontation of the game, and that's mainly because "Bowser's" attacks cause a lot of damage. He'll blast fire at you, try to suck you up into his mouth and then spit you back out, and chuck spiked balls at you that also happen to be explosive, but the latter is the key to winning the day. When he throws them at you, you have to wait for them to come to a stop, suck one up with the Poltergust (you can take damage even from simply touching it yourself), and then fire it back at Bowser's head when he charges at you, which is where the controls and the camera angle of the fight can really get annoying. What's worse, it can also be hard to simply come at one of the balls from the correct angle to suck one of them up and if Bowser hits you when he charges, it'll blow up in your face. When you do manage to score a hit, though, it's revealed that this isn't actually Bowser but a machine that King Boo has been controlling from the inside, as the head comes off and the ghost flies around the arena in a panic. This is where you have to attack King Boo the same way you did all the other Boos, by blasting him with the vacuum and gradually wearing his HP down. He has a whopping 500 HP, though, so don't expect to be able to defeat after the first hit, and while you're doing this, you still have to watch out for the Bowser head, which fires ice projectiles at you as it floats up in the air. After a while, King Boo goes back into the robot and the fight begins again, forcing you to repeat the process until you beat him. To complicate matters, when King Boo's HP drops below 200, he'll end up putting the Bowser head back on the body backwards when he returns to it and will stumble around the arena blindly for a bit, forcing you to avoid being trampled and prepare for the next attack. There are no health power-ups to be found anywhere in this arena, so don't be surprised if you have to replay this battle many times in order to finally win, which I found myself doing when I first beat it back in early 2002. Even though managed to beat it on my first attempt during my playthrough for this review, I had only 3 HP left, so I came very close to having to do it all over again, meaning that this final battle is difficult no matter how many times you've played it. Once you finally do win, though, getting King Boo's crown as a prize, relief doesn't even begin to describe the feeling you'll have.


Hi, Cody! My lgranddaughter has a question that she needs help with , but I’ll send it after I see you are still on here. Thanks! 😂
ReplyDeleteWhat's the question?
DeleteThank you, Cody! I sure hope you will be able to help us! I gave the game(Luigi's Mansion for Gamecube) to my granddaughter for Christmas. She was so excited, but now can't get past one of the first parts! Help?? She said near the first of the game, after Luigi talks to toad, she can't get the parlor door open for Luigi and Toad to find Mario. (She got the key when the ghost dropped it, and got in the first time and talked to the little professor guy. She saved the game when it said to do so, and also talked to Toad and gathered coins when she was supposed to. But after talking to Toad, when she tried to open the double doors to the parlor, they will not open. She has tried and tried. We watch videos, and Luigi just walks up stairs and turns the knob and goes in. When my granddaughter turns the knob, it won’t open. 🙂Thank you so much for your time! Right now, she can’t get into that room at all! She is only 11 and a huge fan of Luigi. I am just broken hearted and want her to be able to enjoy it. Thank you, Cody! I appreciate your time. I hope you know of something that makes that doorknob turn. 😊
ReplyDeleteHmm, that it is odd. Is she pressing the A-button in order to open the door? Also, is she getting the cinematic of Luigi trying to open the door but can't, because that shouldn't happen if she has the key.
DeleteAj
ReplyDeleteHi, Cody. Just wondering if you got my question 😊 No rush - I’m sure you are busy- but I just wanted to make sure it sent. (I’m not seeing it on my screen. )Thanks!
ReplyDeleteYour response just came through😊 Thank you, Cody, I will ask her tonight and then right you back before the evening is over. Appreciate your time!
ReplyDeleteHi, Cody. We watched some clips together and were discussing what you asked. When she makes Luigi go up to that door (after talking to Toad), she makes Luigi go directly in front of the door and pushes A. Luigi doesn’t even grab the door handle, he just stands there and bangs twice on the door. Nothing happens. Also, the B button is supposed to turn on the flashlight, but when she hits the B button, no flashlight comes in. We know for sure the controllers work because she uses them for other games.
ReplyDeleteThank you again! You are so kind to help us!!
Yeah, I hate to say it, but it sounds like the copy of the game you got her is glitched, because that shouldn't happen. (Although, regarding the flashlight, turning that on isn't an option in a room where the lights are on, as there's no need for it.)
DeleteSorry I couldn't be of more assistance.
Thank you, Cody. We appreciate your time!
Delete