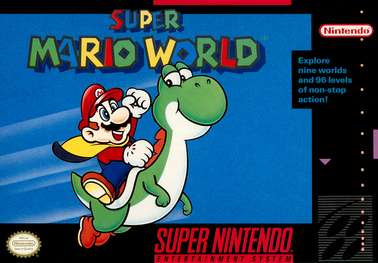
 Now we come to one of the most essential aspects of my childhood in the early 90's. This is a game that was so instrumental for me when I was growing up and came into my life at such an early age that it's virtually impossible for me to come up with any memories of a time in my life before I had it and those that I can are very hazy at best. In fact, this is the first video game I can remember actually owning. As I've said before, while I certainly played the original three Super Mario Bros. games when I was a little tyke and I do remember owning an NES at one point, it didn't create any concrete memories for me and, to this day, I don't know what happened to that NES. This, however, is a whole other kettle of fish. I was just four years old when this game, along with the Super NES, hit North America in 1991 and before I had a chance for my young mind to process that they even existed, I ended up owning them. I still don't know how that came about. It's possible that I might have asked my mom for it but I can't be sure. The only memories I have of actually getting it are being with my mom when she went in some store to buy it (I can remember the display box that was sitting in the window but I don't know what store it was) and then the next day, I was playing it. That's pretty much it. So, you can see what I mean when I say that it's hard to remember my life before I had Super Mario World. It's one of those things that's always just sort of been there. In any case, I, of course, played the crap out of the game as a little kid and those are some of the warmest childhood memories that I have. I didn't get very far in the game at that time, mind you, due to its rather complicated and tricky nature, and it would be many years before I came back to it and actually beat it but still, it holds nothing but good memories for me. And looking back on it now, it's still a really enjoyable game. While I now get more enjoyment out of Super Mario 64, Super Mario Sunshine, and even the original three Super Mario Bros., this is still a great game and playing it (I still have that original game cartridge from way back when and it still works like a charm) never fails to put a smile on my face... when I'm not tearing my hair out in frustration but then again, when is that anything new in a Mario game?
The story of Super Mario World is similar to that of Super Mario Bros. 3 in many respects: you're not only journeying to once again save Princess Toadstool from Bowser but also to save Dinosaur Land from his control as well, much like how you were also tasked with saving the Mushroom Kingdom as well before. This is where the character of Yoshi comes in: he was trying to save his friends from Bowser when he got imprisoned in an egg just like his buddies. Like Mario Bros. 3, every time you defeat the big boss of an area, you come one step closer to achieving your ultimate goal; in this case, you carry one of Yoshi's imprisoned friends out of the castle before Mario gets rid of it in some way. The only difference between the stories of both games is that here, you know from the beginning that you're ultimately going to have to rescue the princess as well as save the land, whereas in Mario Bros. 3 you learn near the end of the game that Bowser kidnapped her while you were out trying to save the Mushroom Kingdom. It's a very minute difference and I guess it's not that important since if you've ever played a Mario game before, you know that your goal will be to save the princess before you pop the game in or even know anything about its specifics but I just wanted to mention it.
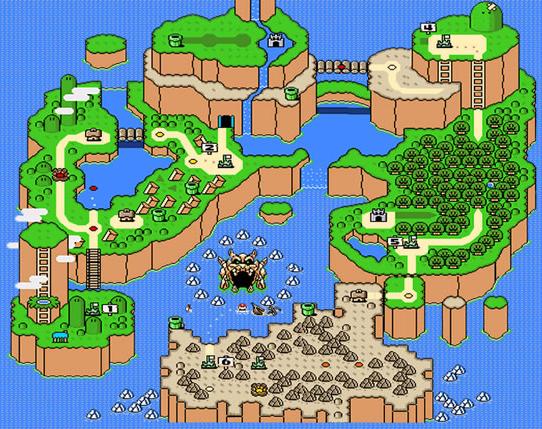 The basic gameplay is also similar to Mario Bros. 3, as well as most other games, in that you have a map screen that you move across and use to enter the levels in order to advance through the various areas of the game, ultimately leading up to you final battle with Bowser. You're probably thinking, "Well, duh!" but hear me out. The difference is that, while Mario Bros. 3 gave you different ways to reach the end of a given area, which you still have here, Super Mario World also gives you different ways to travel throughout the overall game. A lot of levels have secret exits which lead to different routes on the map screen, some of which allow you to bypass the normal path through a world, including having to battle the end boss. Moreover, there's a special area called Star World that allows you to bypass entire areas altogether when you use its various entry and exit-points, one of which leads right to Bowser's front door! It's actually possible to beat the game in only twelve levels using a route that lets you go through just a little bit of the first two worlds and head straight through Star World to your confrontation with Bowser. Mind you, doing so is pretty hard seeing as how you also end up bypassing certain areas whose completion can make the game a little easier and you don't get any special reward for doing so but I guess it's a way for you to show off to other players. I've never attempted that myself simply because I like to experience everything that a game has to offer me and so, my personal preference is to explore the worlds thoroughly and go through every last level.
 The controls and moves that you can perform are, for the most part, the same as past Mario games (running, jumping on enemies, carrying and throwing items to use as weapons, all that good stuff) but, as with any good game sequel, there's new stuff you can do here as well. You have the Spin Jump, which doesn't get you as much height as a regular jump but it can break through yellow blocks, allowing you access to items beyond them (that is, as long as you're not small when you do it), and it also kills certain enemies that aren't affected by the normal jump. You can also make Yoshi break through blocks if you Spin Jump while hopping onto him (unfortunately, it's impossible to slow him down or stop him during this except when he reaches something solid). Speaking of Yoshi, he's a really helpful little guy. While riding him, you can jump on enemies that you normally can't touch without taking damage, he can eat enemies as well as carry items and spit projectiles like Koopa shells (if you keep something in his mouth too long, though, he will eventually swallow it), and you can jump of his back while in mid-air for an extra bit of air mileage. The only real downside to Yoshi is trying to catch him when he runs off after taking a hit, which is really irritating and can lead to you losing a life if you're not careful. This is also the Mario game that introduces the neat trick of not only being able to climb on fences but the ability to smack Koopas climbing on the other side, crawl down on their heads when they're on the same side as you, and go to the other side of said fence through small doors that you come across.


 The levels in the game all fall into one of over a half-dozen categories. The most basic type is Above-Ground, which has little to no instant-death gaps in the ground and if you acquire a Cape Feather, you can fly up into the sky where secrets are often placed in these levels. Elevated levels involve a lot of platform jumping up high in the air and a lot of death spaces that you can fall into if you get careless. These are the types of levels that tend to make me the most tense, especially when it's a scrolling level and you're in danger of being pushed to your death by the screen or being crushed between it and another object. Underground levels are quite common throughout the game as well (the third world is made up almost entirely of these types of levels) and contain hazards such as cramped spaces filled with enemies (some of which appear solely in these levels) and areas where you have to navigate through rising and falling sections that threaten to crush you like a bug. And it wouldn't be a Mario game without underwater levels, although I must say that I don't find the ones here to be as difficult as those in other games... most of the time. Some are pretty tricky, though, since, like Underground levels, they often have cramped spaces that are filled with a lot of enemies and if you don't have a power-up or Yoshi, you'll have a tough time getting around them. You can also access above-ground sections of some of these levels (the goal is always above-ground) and the same goes for non-swimming levels as well. An extension of water levels are bridge levels, where you either have to do a lot of platform-jumping while avoiding a bunch of jumping fish or you have to cross a large stretch of water while dealing with an invincible enemy that follows you throughout the level. Ghost Houses are without a doubt my least favorite type of level, due to the undead enemies such as Boos, which are nigh impossible to defeat no matter what kind of power-up you happen to have (thankfully, they only appear in these levels) and their exits being very hard to find, involving a lot of backtracking through the same area in order to activate the door leading to the exit, hitting switches at precise moments to make them appear, and so forth. These levels are the reason why I was unable to beat the game until years after I originally got it. My four-year old brain couldn't figure out how to navigate them correctly. Fortunately, though, you get the option to save your game once you make it through a Ghost House and the same goes for Castles and Fortresses. Not only are these levels, understandably, more difficult than the other types but none of them have secret exits, meaning you always have to defeat the boss in order to complete the level. The levels look the same in design and challenges but the difference between the two is that the boss of a Castle is one of Bowser's kids while a Fortress always has a boss known as Reznor. Finally, there are special levels known as Switch Palaces, which aren't really levels per se (though there are enemies present) but rather areas where you can activate special types of blocks throughout the game by navigating through the palace and stomping the giant switch you come across at the end of it. There are four palaces in all and trust me, it's best to find and complete all of them because the blocks make getting through some levels much easier (plus, you need some in order to activate certain secret exits).
 A good chunk of the levels have one thing in common: they have a halfway marker that you start at if you die after hitting it (these markers also power you up if you touch them when you're small) and, save for the castle and fortress levels, you end them by hitting a goal line. These goal lines function much like the classic flagpoles from the original Super Mario Bros. in that the higher you are when you pass through them, the more points you get (although have to touch the lowering and rising middle portion in order for it to count) and when you get 100, you get to play a bonus game. The game consists of eight cycling blocks traveling around one that already has a determined power-up. You have to wait for the blocks to pass over you and when they do, you jump and stop them on any random power-up. The object is to get as many 3-in-a-row matches with the items as possible and you get a 1-Up for each one. It sounds complicated but once you get the hang of it, it's pretty easy to get a lot of extra lives, with the occasional flub here and there. If you're starting to run low on lives, it's a good idea to go for this bonus stage. There's also another type of bonus stage pops up randomly throughout the game; you go up through a series of floors while hitting the three "?" Blocks that are contained in each one. If you hit them in the correct order, you get a 1-Up. However, the correct order is always random and getting it simply involves being very lucky with your guesses. There are plenty of times where I've left this game without a single 1-Up. And also, be careful where you jump when try to hit the blocks because you can very easily go right past them and up through the platform, with no way to get back down and finish hitting them. I've done that countless times and it's always frustrating because I might have missed a potential 1-Up (it's especially frustrating when you know you've got the right pattern and you do this while trying to hit the last block).
 Along with the classic Mario power-ups (Mushroom, Fire Flower, Invincibility Star), Super Mario World introduces the Cape Feather, which gives the moniker "Super Mario" a whole new meaning seeing as how he suddenly develops a yellow cape once grabbing it. It basically serves as a substitute for the Raccoon Suit from Mario Bros. 3 in that it enables you to fly and can also be used as a weapon if the need arises (some enemies can only be taken out by the cape). Flying with the cape, however, is a bit more complete than it was with the Raccoon Suit in my opinion. You can drift by pushing in the opposite direction that Mario is flying after you've taken off and pushing forward while flying will accelerate your fall back to the ground but the thing, I've always found it a little difficult to control Mario while drifting. Many times I feel like no matter what I do, I can't get him to go as slow as I need him to in order to keep from crashing into obstacles or falling down and into oblivion. I've accidentally died many, many times while using the cape and as a result, I try to avoid flying as much as I can while I'm equipped with it and just use it as a weapon. I'm sure a lot of you are much better players than me and are able to fly with relative skill but I just plain suck at it for the most part. Speaking of power-ups, this game has a much simpler version of the extra items menu from Mario Bros. 3. If you grab an another power-up while you already have said power-up, such as a Mushroom, the extra item will appear in a small blue box at the top of the screen. The same goes for grabbing a lower type of power-up when you have something more advanced, like if you come across a Mushroom when you have a Cape Feather and such, and if you grab a Fire Flower while you have a cape (or vice versa), you'll switch. In any case, when you take a hit, the extra item will drop down from the box and you can grab it to make up for the hit you just took. You can also deploy it manually by pushing the SELECT button. While it is convenient, it does have some drawbacks. When it drops down, you have to react quickly in order to catch it or you'll end up losing your second chance. The Cape Feather is okay since it floats down but the Mushroom and Fire Flower drop down rather quickly and can be rather difficult to catch if you're in a spot where you can't get to them as fast as you normally could. Another drawback is that, unlike most games where you have temporary invincibility after taking hit, Super Mario World doesn't give you much time before you become vulnerable again (it feels like less than a couple seconds) and so if you're unable to quickly get away from whatever damaged you, you can end up taking another hit or die before you get a chance to grab the extra item. That happened to me in a few levels and I was quite flustered when I realized that was the case. And, of course, in the heat of the game, it's possible to accidentally hit the SELECT button and waste an item, which always frustrating. Bottom line, while this extra item window can be helpful, you have to be careful about becoming dependent on it because the game can screw you over as a result.
 An odd power-up that you come across every now and then is the P-Balloon, which fills you up with hot air and allows you to float through the air for a short period of time. This is sometimes the only way to reach certain secrets or items (in one of the levels in Special world, it's the only to progress through it) but when you see that Mario is starting to deflate, you'd better make sure you're over something that will safely break your fall. There have been times when I've started to deflate and I've panicked since I couldn't find anything to land on, ultimately leading to me falling to my death. One item that I actually thought was pointless for a while was the Yoshi Wings: a pair of angelic wings that come slowly flying out of a "?" Box when you activate it them. If you have Yoshi with you, you will enter a coin heaven when you grab the wings and after it's completed, Yoshi will turn blue and acquire the abilities that the normal blue Yoshi that you find in Star Road has. The reason I used to think this item was useless was because every time I happened upon it, I didn't have Yoshi and so, nothing ever happened when I tried to grab them. It wasn't until I read up on it that I learned that they do indeed have a function and aren't just for show as I originally thought.
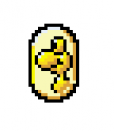
.png) Besides the normal coins which are a staple of Mario games, you also have Dragon Coins, which are big, oval-shaped, golden coins with Yoshi's face on them (are they trying to say that Yoshi's a dragon?) For the most part, there are five in each level and collecting all five will earn you an extra life. Even better, if you have 99 regular coins and you then grab your fifth Dragon Coin, you will get two extra lives as a result. The only thing, once you've collected five Dragon Coins from a specific level, they're gone until you reset or turn off the game and come back. In addition, there are silver coins that appear when you hit gray P-Switches that you come across (in fact, they come from enemies who are nearby when you hit said switch). These are very rare but when you do find them, they give you more and more points and after you hit 8,000, you can earn up to three extra lives. Naturally, since this was caused by a switch, it lasts for only a limited amount of time and you'd better watch out if you're about to grab a coin and the timer is about to run out because you could end up slamming into an enemy. Speaking of P-Switches, the normal blue ones that you often come across turn nearby coins into blocks and are often useful for crossing large gaps; however, some can hinder your path to a secret exit or an item if you hit them too soon. Fortunately, you can carry them around and scope out the area to see what's up ahead before deciding to hit them. You can also carry around the small trampolines that you come across in case there's no other way to get around an obstacle other than to use the boost they put into your jump. Koopa Shells actually act as power-ups for Yoshi, weirdly enough. While green ones can only be used as projectiles that he can spit out, red ones enable Yoshi to shoot out three fireballs (I guess he is a dragon in some ways), blue ones will make him sprout wings and enable him to fly until you make him spit it out or he eventually swallows it, yellow shells give him a stomp attack whenever he jumps, and shining shells give him all three. Speaking of Yoshi, the eggs that you typically find him will hatch out a 1-Up Mushroom if you already have him when you come across them. The rarest item in the entire game by far is the Crescent Moon, a small, smiling moon that give you three extra lives when you grab it. Typically, there's only one present in each world and they're hidden in places that are either hard to reach or you wouldn't think to look. In fact, I didn't even know they existed until I was playing through the game again for this review and just happened upon one by pure luck. Since it gave me three extra lives, though, it was a nice surprise. But, like the Dragon Coins, once you get one, it won't appear in that level again until you reset the game.
Besides the normal coins which are a staple of Mario games, you also have Dragon Coins, which are big, oval-shaped, golden coins with Yoshi's face on them (are they trying to say that Yoshi's a dragon?) For the most part, there are five in each level and collecting all five will earn you an extra life. Even better, if you have 99 regular coins and you then grab your fifth Dragon Coin, you will get two extra lives as a result. The only thing, once you've collected five Dragon Coins from a specific level, they're gone until you reset or turn off the game and come back. In addition, there are silver coins that appear when you hit gray P-Switches that you come across (in fact, they come from enemies who are nearby when you hit said switch). These are very rare but when you do find them, they give you more and more points and after you hit 8,000, you can earn up to three extra lives. Naturally, since this was caused by a switch, it lasts for only a limited amount of time and you'd better watch out if you're about to grab a coin and the timer is about to run out because you could end up slamming into an enemy. Speaking of P-Switches, the normal blue ones that you often come across turn nearby coins into blocks and are often useful for crossing large gaps; however, some can hinder your path to a secret exit or an item if you hit them too soon. Fortunately, you can carry them around and scope out the area to see what's up ahead before deciding to hit them. You can also carry around the small trampolines that you come across in case there's no other way to get around an obstacle other than to use the boost they put into your jump. Koopa Shells actually act as power-ups for Yoshi, weirdly enough. While green ones can only be used as projectiles that he can spit out, red ones enable Yoshi to shoot out three fireballs (I guess he is a dragon in some ways), blue ones will make him sprout wings and enable him to fly until you make him spit it out or he eventually swallows it, yellow shells give him a stomp attack whenever he jumps, and shining shells give him all three. Speaking of Yoshi, the eggs that you typically find him will hatch out a 1-Up Mushroom if you already have him when you come across them. The rarest item in the entire game by far is the Crescent Moon, a small, smiling moon that give you three extra lives when you grab it. Typically, there's only one present in each world and they're hidden in places that are either hard to reach or you wouldn't think to look. In fact, I didn't even know they existed until I was playing through the game again for this review and just happened upon one by pure luck. Since it gave me three extra lives, though, it was a nice surprise. But, like the Dragon Coins, once you get one, it won't appear in that level again until you reset the game.
 They're a lot of different blocks and boxes that pop up in the game as well. Of course, there are the classic "?" Boxes which have items in them but there's another common type of block in the game called a Turn Block, which are those yellow ones with the small black eyes on the front. These differ from the blocks you encountered in past Mario games because they don't break when you hit them from the underside but rather just spin around, giving you a way to jump through them. You can break with a Spin Jump when you're big, though, and while they often act as obstacles, they can also contain items as well. One useful bit of information is that if the block contains an item that moves around, like a Mushroom or an Invincibility Star, the item will always travel in the opposite direction of whichever side of the block you hit. Some of these blocks also deploy a line of coins that will continue traveling for a short period of time or until they come into contact with something. You can manipulate these lines into going in a specific direction but that's a little more difficult for me to do than it sounds. They're supposed to move in the direction that you're pressing on the control pad but I've found that sometimes just plain won't do what I tell them. Sometimes they go in the opposite direction that I want and other times they just go straight up. It's even worse when you activate them on a small, narrow platform and you can't go far enough to make them move where you want. Very tricky stuff, these blocks. In any case, after these Turn Blocks that contain items and "?" Boxes have been hit, they turn into solid bricks which can't be broken at all. However, P-Switches can turn them into coins for a brief amount of time and nearby coins will also turn into these bricks. There are points in the game where you need to turn those moving lines of coins that come out of some Turn Boxes into these bricks to use them as platforms but like I said, controlling them can be rather difficult. Even worse, those boxes don't re-spawn unless you re-enter the level so if you mess up with those makeshift platforms, you'll have to kill yourself and try again when you come back.
  Other blocks include the Roulette Block, which contains an item that keeps changing every second and will continue to do so after you've freed it. In other words, if there's a specific item you need, you'll need very good timing in order to get it before it changes into something you don't want. If you're riding on Yoshi when you come across one, you can get the item with his tongue without hitting the block. "!" Blocks are the kind that are activated once you hit one of the giant switches at a Switch Palace and each type does something different: yellow ones give you Mushrooms, green ones give you Cape Feathers, and while the red and blue ones don't produce any items, activating them can prove useful as they can be used as makeshift platforms that make progressing through a level easier and sometimes, are also necessary to reach a secret in a given level. Grab Blocks basically look like blue Turn Blocks and, like all objects that can be picked up, can be used as projectile weapons once you grab them. Once you do grab them, though, they begin flashing and eventually disintegrate so you have to make use of them quickly. The Note Blocks that appeared in Super Mario Bros. 3 return here and as before, they serve mainly as a way for you to jump higher than normal (the gold ones allow you to do so much higher than the white ones) but sometimes, items pop out of their tops or undersides, depending on how you hit them. They never give coins, though. Triangle Blocks that you find against walls and other obstruction allow you to run right up the side if you head towards them and keep going. You can't do that with Yoshi but they can be used as a trampoline in that instance. Star Blocks are rare blocks that either give you a single coin or a 1-Up if you hit one after you've collected thirty or more coins and haven't gone down a pipe or entered a door (random criteria, I know). Power Blocks allow you to control the path of a moving platform (which is necessary to keep from falling off a wire path into oblivion in those cases) as well as the crushing ceiling traps in some castles, which can be a real life-saver. Those ceiling traps, however, reset to their normal function once the ceiling gets back to its highest point so you have to get out of the way quickly. As per usual, there are also invisible blocks that you often find by accident but always deploy something useful; however, they can block your path as well, which isn't so useful. And finally, you have the Message Blocks, which often display gameplay hints but also give you messages from other characters in the game (like when you go to Yoshi's House in the first world and the block there gives you a note he left for any visitors).
 Going back to the subject of Yoshi, there are also some special, multi-colored Yoshis that you come across in the special world known as Star Road. When they first hatch out of their eggs, they're little tiny babies and require food in order to become fully grown. They'll instantly change into adults if they eat one of the power-up items but if you don't have any handy, you'll have to feed them five enemies or other objects. In any case, you feed them by carrying them around and walking into the would-be meal with them facing it. While all of these Yoshis have the same abilities as the normal green one (including the powers that the Koopa shells give them), they also each have their own special power that comes about when they eat any shell. The blue Yoshi is the best since he gains the ability to fly when he eats any kind of Koopa shell, not just the blue one. The same principle applies to the red Yoshi, who gains the ability to spit fireballs despite what colored Koopa shell he eats and the yellow one gains the stomp ability no matter what shell he eats.

 One thing that developers of Super Mario World didn't skimp on was the enemies. I think it's fair to say that this game is full of more enemies than any of the previous games that came before it and could have more than those combined as well. The most common enemies are the Koopas, who come in more varieties here than they have before and also display some new characteristics. Unlike before, jumping on a Koopa in this game will cause it to slide out of its shell, where it's then vulnerable to any type of attack, including getting hit with its own abandoned shell. Also like before, jumping on winged Koopas simply clip their wings rather than kill them. That said, Koopas can be killed in one hit using either a Spin Jump or jumping on them with Yoshi, fireballs from Fire Mario will turn them into coins (as happens with most enemies), and swiping them with the cape will make them retreat inside their shell, which can then be used as a weapon. As they did in previous Mario games, Koopas come in different color varieties. As always, the green-shelled Koopas walk (or hop if they're of the winged variety) in a straight line, even falling off a ledge, and will only turn around when they hit a barrier. The red-shelled Koopas also retain their traits from past games: they turn around when they come to a ledge and, unlike their green cousins, the winged variety can actually fly and do so in a small area in a level. A new type of Koopa is the blue-shelled, which moves a little faster than the others and once knocked out of its shell, will proceed to kick any shell than it comes across instead of going back in. As a result, using a shell as a weapon against them doesn't work since they will simply catch it and use it against you. There are winged varieties of blue-shells, though. Yellow-shelled Koopas are similar to blue-shells in that they walk faster than the other varieties and when knocked out of their shells, their behavior pattern changes. The winged type of these Koopas is especially tricky because they track your movements and will jump to avoid projectiles that you throw at them. In any case, when a shell-less yellow Koopa comes across another shell, it hops into it and becomes what's known as a shiny-shell Koopa. It moves around like a kicked shell but the big difference is that it tracks your movements and the Koopa cannot be removed from the shell. The same thing happens when a shell-less green or red Koopa finds a discarded yellow shell. The shiny-shells aren't invincible, though, and can be destroyed with a stomp from big Mario and can also be eaten by Yoshi. Shell-less Koopas can also be hazardous to your health even when there are no shells nearby since some, which are officially called Beach Koopas, slide down sloped hills and platforms at you and can catch you off-guard. Let's also not forget about the Koopas that climb along the grating in some castle levels. And finally, you have the Super Koopas, which are shell-less, caped Koopas that can actually fly right at you in a straight line. While they can be killed rather easily and those with a flashing cape will give you a Cape Feather when you jump on them, a big swarm of them can be hard to deal with it and can result in your taking a hit.


 Even though they do pop up, the Goombas' presence in this game is actually quite-limited, with them appearing in only a handful of levels. That said, they're much more resistant to attacks this time than they have been before. Now, jumping on one will simply knock it upside-down rather than squish it and while it can be used as a weapon when it's in this state, you have to use it before it gets back on its feet and if you're holding it when it does so, you'll take a hit (the same goes for other enemies that can be turned into makeshift weapons). You also run into the Para-goombas but as before, one hit will clip their wings. In any case, they can both be taken out permanently by Spin Jumps, being hit with projectiles, or being stomped or swallowed by Yoshi. (Don't they kind of look like walking tomatoes rather mushrooms this time around?) Also appearing briefly in this game are the Bob-Ombs and thank God because, while they can be used as projectiles, it seems like every time I've tried to do so, they've blown up in my face, either damaging or killing me. You also run into Para-Bombs, which drift down on parachutes and once they hit the ground, act like regular Bob-Ombs. Wait until they land and Spin Jump on them or jump on them with Yoshi before they do so. Just use the Spin Jump on these suckers. The Bullet Bills are back as well and are as difficult to deal with in large numbers as they were before. And this time, they've brought along their larger cousin, Banzai Bill, which takes up a large amount of the screen and is immune to fireballs, the cape spin, and anything Yoshi can do. While Banzai Bills can be taken out with a simple jump (providing you have a vantage point from where you can jump directly on top of them instead of hitting the side of their face), it's sometimes best to duck underneath them as they pass, which is simple to do since you can sometimes find small gaps in the ground when you come across Banzai Bill. Unfortunately, another returning enemy is the every annoying Lakitu, those little assholes who bomb you from above with Spinies. The good thing is that they're vulnerable to most attacks (except for being swallowed by Yoshi) but getting them is easier said than done since they fly around in such an erratic and fast pattern. If you manage to defeat one without damaging his cloud (and on a side not, they make rather ugly, crying baby faces whenever they take a hit from a jump), you can ride on it and use it to reach secrets that you couldn't get to before. There's another type of Lakitu that flies in with a 1-Up Mushroom at the end of a fishing line, baiting you to take it. Once you do, though (which is hard not to since he flies down so low, often in the path of your jumps), that's when he starts throwing the Spinies. Fortunately, he's no more invulnerable than the normal Lakitu but, again, trying to catch him when he's zipping around like mad is easier said than done. As for the Spinies, while they typical appear after being thrown by Lakitu, you can also encounter them on their own. Like before, jumping on them will damage you, and the cape spin and jumping on them with Yoshi don't do anything either (although those attempts don't hurt you). They can be taken out with fireballs and can be eaten by Yoshi (no doubt giving the poor guy a very painful case of indigestion) and if you somehow manage to flip them, they can be used as projectiles. And it wouldn't be a Mario game without Piranha Plants, which jump out of those pipes they appear in and can also shoot fireballs. They can be taken out with fireballs, cape spins, and being hit with projectiles but don't try jumping on them with Yoshi because that does nothing. The little black Munchers from Super Mario Bros. 3 also make a return appearance.


This game introduces a new type of plant enemy called the Volcanus Lotus, a plant that spits four small fireballs up into the air which slowly float back down after reaching their maximum height. These things are pretty pesky in that they're often placed in spots where they're hard to get around their fireballs as well as their bodies without taking it. If you don't have a cape or Yoshi with you, you're going to be in for some frustration when you meet these weeds. A fairly common enemy is Monty Mole, which comes flying out of dirt from the ground or from hillsides and proceeds to follow you wherever you go until you kill him or outrun him. Killing him is easy in that he's vulnerable to every attack imaginable (you can even have Yoshi swallow him before he bursts out of a hill by aiming his tongue at the rippling spot of dirt that indicates the mole's location) but when one brings a lot of his buddies along in a big swarm, things can be a bit more tricky. And while you can outrun them, if you return to the area where they popped out after doing so, more will spawn out of the hole they left behind. While the regular Hammer Brothers don't appear in this game, their equally troublesome relatives, the Amazing Flyin' Hammer Brothers, show up in certain levels to make getting through their sections quite difficult. They stand on winged platforms that swoop back and forth and fling hammers to either side while doing so. While a hit from underneath the platform will knock them off and you can then use said platform for your own benefit, it's best to be powered up when you come across them because it's very easy to take a hit from one of their hammers. One rather difficult (and, unfortunately, common) enemy is Chargin' Chuck, a football player-dressed goon who takes three jumps (including Spin Jumps and doing so with Yoshi) or five fireballs from Fire Mario to take out, making him very difficult to deal with when he's on a narrow platform. He can, however, be quickly disposed of by a swing of the cape or by two of Yoshi's fireballs from a red Koopa shell. Normally, he either charges straight at you once he sees you or tries to sneak up on you but as you go throughout the game, you come across other Chucks with different attacks. Some throw baseballs at you, oftentimes doing so while jumping, and the fact that they often throw two or three at a time can make said baseballs tricky to avoid (the baseballs can be dealt with a cape swipe but it's hard to do that without taking a hit); some actually punt footballs at you and while those can also be eliminated with a cape swipe, it's best to dodge them and head straight for Chuck; one particularly hazardous Chuck is able to make a long jump across the screen towards and it's best to wait until he reaches the ground before attempting to deal with him; one underground level has Chucks that use shovels to bomb you from above with rocks; one type of Chuck jumps up and down while clapping his hands but, given the other types, he's rather easy to contend with; another Chuck signals a bunch of flying Koopas to come swooping down at you; and, worst of all, there's one Chuck who can create two clones of himself, forcing you to deal with three very tough and hard to kill enemies (you can stop from doing so if you get to him before he replicates, though). All of these different Chucks revert to their typical charging attack once they've taken a hit but again, you still have to hit them two or four more times to off them for good.


 In one of the later levels, you come across the Dino-Rhino, a very big and imposing-looking enemy who is actually vulnerable to a simple jump attack. However, once they take a hit, they become the smaller but much more hazardous Dino-Torches, which shoot big streams of fire either to the left or the right or straight up in the air. They can be taken out with a jump and can be eaten by Yoshi but they're invulnerable to fireballs. You also run across them even if there aren't any Dino-Rhinos around so you have to stay on your toes. Then there are Pokeys, the tall, yellow cacti that slowly crawl around a given level. While they're not very common and are very slow, their large size and prickly bodies can make them a fairly formidable foe. The only way to get rid of them is to have Yoshi eat them but you have to swallow all five sections to vanquish them; all other attacks either don't work or hurt you instead. Rexes are a common enemy throughout the game who look like dinosaurs that have taken one too many hits to the head, what with their dopey expressions and glazed-over eyes. They take two jump hits to kill and after the first jump, their head becomes flattened down and they move faster. Any other attack gets rid of them instantly, though. Sumo Brothers are big Koopas whose stomps on their platforms create a line of flames on the ground. You can either dodge the flames and get away from the Brothers or you can hit them from the underside of their platform while they're walking around, preparing to stomp again. This game marks the first appearance of Fuzzies, those little fuzzballs with crazed faces who, in their first game, do nothing more than circle around on small wire loops that appear in the path of the platform that you're traveling on. They can't be killed in any way so you have to jump around them but fortunately, they only appear in a few levels. In one the levels in "Special," you come across an enemy known as Bound Fire, which is basically a jumping fireball that leaves small fires in its wake. However, it's actually not that serious of a threat. Yoshi can eat it, you can take it with a spin of the cape, and you can safely jump on it using the Spin Jump. And then you have Wiggler, the yellow caterpillar who looks friendly enough but once you jump on him, he turns red and angry. He can't be taken out with jump attacks but projectiles, fireballs, and Yoshi are effective against him.


 There are a fair amount of enemies that appear primarily in underground levels. One of them is Blargg, a red, dragon-like thing that comes roaring out of lava pits at you once approach him on the moving skull-platform that you have to use to cross the pits. However, despite his rather freakish look and loud growl, he's not that much of a threat since he's not that difficult to jump over and he always sticks his head out of the lava ahead of you before he lunges so you always have an opportunity to prepare for him. Plus, if you're riding Yoshi, you have even less to worry about Yoshi can jump on Blargg without taking damage and if you turn around quickly enough before he disappears back down into the lava, you can actually get Yoshi to eat Blargg! (I've never tried that myself, though.) Underground levels is also where you find Buzzy Beetles, those hard-shelled insects that act like the subterranean equivalent to Koopas. Fireballs from Fire Mario don't do any damage and hopping on it will only make it retreat inside its shell, although you can then use the shell as a weapon. A Spin Jump or stomp from Yoshi, however, will kill it in one go. In a couple of underground levels, you come across Mega Mole, the much larger cousin of Monty Mole. While they don't seem to actively attack you, it's very easy to get cornered by a large number of them in the narrow passages of these levels and if that happens, their large size makes it nigh impossible to escape without taking a hit or dying. While they can't be killed by being jumped on, they are vulnerable to cape spins and to being eaten by Yoshi. You can also use them as makeshift rides to reach places you couldn't get to before. Spike Top is fundamentally an even more formidable version of Buzzy Beetle, with a large spike on top of its shell that makes jumping on it impossible and, like Buzzy Beetle, it can't be killed by fireballs. It's also able to climb walls and there are sections of levels where you have to get around groups of two or three that are climbing around a platform, making for quite an obstacle. However, if you have a cape or Yoshi, then they shouldn't be a problem. And since these are cave levels, it's not surprising that you come across bats. Swoopers are green-colored bats who live up to their name by flying down at you when you get close to where they're hanging upside down on the ceiling. While they're vulnerable to all attacks, a large group of them can be annoying, especially if you're unable to see where they're coming from. There are some levels where they come flying down from the top of the screen where you can't see the ceiling and if charge ahead without watching what you're doing, you will take damage. When dealing with a large number of them, it's best to simply duck down and let them pass over you instead of risking a hit by jumping on them or doing so in order to kill them in some other way.


 While there are the classic Cheep-Cheeps here, some of which jump out of the water at you in some areas, another very common type of underwater enemy in this game are Blurps, green fish who, for some reason, find it necessary to wear scuba masks (due to the lack of detail in the game graphics, I always thought they actually had one enormous eye in the front of their head). While they simply swim in one direction and don't actually come at you, they do tend to swim in schools and if you don't have a power-up (fireballs are the best), you'll find yourself having to navigate around them. Fortunately, they're vulnerable to all attacks save for jumping, which I would hope goes without saying. Just as common as Blurps and far more annoying are Rip Van Fish, purple fish who usually can be found snoozing in corners of the level but will immediately start chasing you if you get too close, all the while have a maniacal look on their faces. What makes them more irritating than Blurps is that they swim at you rather quickly and you often have to navigate around walls and platforms of corals while swimming away from them. And, like Blurps, it's not uncommon to find yourself dealing with a lot of them at one time. Fortunately, they're vulnerable to most attacks (again, it's best if you have fireballs to use against them) and once you get far enough away from them, they give up and go back to sleep. In some above-water levels that have small streams running beneath them, mines appear floating with the current. If you don't fall in the water, you won't have a problem with them. Yoshi can jump on them without being injured but they can only be taken out by an Invincibility Star. However, they reappear in the Sunken Ghost Ship level near the end of the game and there, Yoshi can actually eat them. In several above-water levels, you have to deal with Porcupuffer, an enormous puffer-fish who follows you wherever you go. While you can Spin Jump on them in order to keep from being injured (Yoshi can also jump on them), there's no way to defeat them so it's best to do what you can to keep from falling in the water altogether. Torpedo Ted is an underwater version of Bullet Bill that only appears in one level and thank God, because they can't be defeated at all and come at you from all sides. The only good thing about them is that their launchers do wait a few seconds before firing, giving you just enough to get out of the way. And finally, you have Urchins, which are only found in one world and while not exactly the hardest enemy to contend with, can be effective obstacles since they move around the middle of your path in fixed patterns and can only be taken out by Grab Blocks.


 As I said earlier, the most frustrating levels in the game for me are the Ghost Houses and the reason for that, besides their tricky navigation, is because the enemies you come across are either hard or impossible to kill and more often than not, you simply have to maneuver around them. The most common, of course, are Boos, who will come at you the minute you turn your back on them but hide their face when you actually look at them. Again, no way to defeat them and they tend to travel together in large groups (just wait until you get to the sunken Ghost Ship level late in the game), sometimes forming snake-like lines or a swirling ring with one narrow opening that you can jump through in order to continue onward (in those instances, it is interesting to look at the different faces that each Boo in the group is making). Some can also turn themselves into stones and return to their normal forms to chase you once you turn away. These types can be used as stepping stones and you can make them follow you in order to get them into the necessary positions but just be careful not to jump on them before they become stones or you'll take damage. There's also the Big Boo, who doesn't appear that often but when he does, he is a bit of a nuisance since he's so big and hard to get around. When he's blocking your way, you need to lure him somewhere else in order to pass; if you try to jump over him, it's almost guaranteed that you'll take a hit. He can be taken out with three Grab Blocks but the downside is that they don't appear very often in these levels. I've heard that hill-sliding (or stair-sliding in this case) is also effective against the Big Boo but I've never bothered to try. In these levels, you also come across big green bubbles that float around rooms in a fairly easy to memorize pattern but, like the Big Boo, their enormous size makes them hard to get around; it's best to duck rather than try to jump over them. They can be taken out by sliding moves, though. And finally, Eeries are Koopa-like ghosts whom you find floating around in fixed formations and they often do travel in groups. While they pretty much ignore you, they can be a nuisance and can only be defeated by an Invincibility Star (good luck finding one, though).


 Finally, we have the enemies that appear in the castle and fortress levels and they're, naturally, the most difficult. You have Ball 'n' Chains, which are exactly what their name suggests and they rotate around the blocks that they're chained to. While they can't be disposed of in any way, the chain itself doesn't damage you, so you can use that fact to your advantage when attempting to get around it. Bony Beetles act as these levels' equivalent of the Buzzy Beetles. They walk around rather slowly and then, when you least expect it, they withdraw inside their shells and spikes protrude out of their backs. You can jump on them when they're walking around but, like Dry Bones, they crumple and reform themselves after a few seconds. They can be taken out with a cape swing or an Invincibility Star but if you don't have either at hand, they can be a real pain in cramped corridors with other enemies. And speaking of Dry Bones, they're present too. As before, jumping on them only incapacitates them for a few seconds and like the Bony Beetles, they're immune to fireballs. But, also like the beetles, they can be taken out by a swing of your cape or an Invincibility Star. You have to be careful, though, because some Dry Bones can actually throw bones at you and some jump while doing so. In the swimming areas of some castle levels, you come across Fishbones, which are exactly what you expect them to be: skeletonized fish. Unfortunately, unlike the other fish enemies in the game, they're invulnerable to all attacks so your only choice is to swim around them (and, of course, they tend to travel in big schools). They swim in a quick, darting pattern, forcing you to wait until they've momentarily stopped before attempting to get by them. Grinders are saw-blades that travel long wire paths, often on the same ones that the platform you're riding on at a given time uses (there are chainsaw-like variants of them that also appear on wire paths in other levels). Not surprisingly, they can't be defeated. Your only option is to dodge them. The same goes for Hotheads and Lil' Sparkys, which are balls of fire that circle around stone platforms in the levels (Hotheads are the much bigger variety): can't defeat them, so you can only jump around them. And yeah, the classic Podoboos reappear in this game as well. Magikoopas, fortunately, are very rare but that doesn't change the fact that they are very hazardous, with their whirling, erratically moving spells (if they hit a block, it'll either turn into a coin or an enemy) and ability to teleport around a room. While they're vulnerable to all attacks, getting rid of one doesn't guarantee that another one won't take his place. Oddly enough, even though are no Shy Guys in this game, Ninjis, those jumping black stars from Super Mario Bros. 2, do appear in the backdoor entrance to Bowser's castle at the end of the game. Fortunately, despite their sometimes unpredictable jumping, they're vulnerable to all attacks you can throw at them so their inclusion here is nothing more than a curiosity piece. Mecha-Koopas, little wind-up versions of Bowser, also appear in the very last level, especially during your battle with Bowser, but they're actually more helpful than they are harmful, getting paralyzed when jumped on and becoming useful projectiles. And finally, you can't have Mario castle levels without Thwomps, those self-aware, rectangular stones that attempt to crush you when you get too close (notice how they come to realize that you're approaching them before they attempt to do so). As before, you can't defeat them in any way so you have to dodge them instead. There are also some miniature versions known as Thwimps that are also invulnerable but instead of going up and down, they jump in an arc from one position to another. This makes them a smidge trickier to maneuver around but, to be honest, I've rarely ever been hit by them.
When you play Super Mario World, one thing that becomes apparent right away is how gorgeous the game's visuals are. The colors are very lush and rich, much more so than those of any of the previous games that were released on the original NES, and the advanced nature of the Super NES becomes apparent when you compare the graphics to those of the previous game. To me, it looks as if they took the graphics from Super Mario Bros. 3 and simply updated them, putting in more detail and, like I said, adding more richness to their color. In fact, as I've read, if it weren't for the Super NES, Yoshi never would have made his debut. Mario-creator Shigeru Miyamoto had wanted to give Mario a dinosaur companion from day one but the limited nature of the original NES had prevented that. The Super NES, however, made it possible. So, all you Yoshi-lovers out there should give full credit to the system's developers and designers for making him possible. Speaking of Mr. Miyamoto, it's interesting to note that he actually wasn't entirely satisfied with the final product of Super Mario World. Even though the game took three years to develop, Miyamoto has said that he felt it was actually "incomplete" and that development was rushed near the end. I'm really not sure what he's talking about, personally. The game looks fine all-around to me. However, I do have one minor criticism about the graphics, even though it doesn't affect me personally: when you play in two-player mode, it's obvious from the get-go that Luigi's look is nothing more than a palette-swap of Mario. Granted, that was the case in the original Super Mario Bros. but by the American version of the second game, Luigi had been given his own distinctive design and that was back on the original NES in the 80's. And yes, Luigi was back to simply being a recolored Mario in the third game but since Super Mario World was on a much more advanced system, they should have been able to give him back his own character design from that second game. However, there was a special version of the game in a 1994 re-release of Super Mario All-Stars that did give Luigi his own sprite but I think that version is extremely hard to find nowadays (weirdly enough, the Wii edition of All-Stars didn't come with any version of World, let alone that one). All in all, this little thing about Luigi is hardly a major issue. I only point it out because it's an odd curiosity in what is an otherwise very well-designed game.
Once again, Koji Kondo created the score for the game, this time relying entirely on an electronic keyboard. What's interesting is that, save for a few seconds on the map screen for the world known as Special, you never hear the original Mario Bros. theme (in fact, I think the only piece of music from the original games here is the Invincibility theme); the main theme you get instead is actually another catchy tune that certainly holds its own with the original and I would say is probably just about as well known. I'm, of course, referring to that upbeat, energetic theme that you hear during the first couple of levels in the game. Just like the original Mario Bros. theme, when you hear that music, you can't help but smile from ear to ear. It's hard to explain. It's simply one of those things that instantly makes you happy. In fact, if you listen closely, you'll find that a lot of the game's music consists of variations on that same theme: it's slow and echoing in the underground levels, slow and gentle-sounding, one would almost say soothing, in the underwater levels (doesn't make them any less tense, though), quick and full of energy in the levels that involve a lot of platform-jumping, no doubt to fit with the more hazardous nature of those stages, and absolutely ominous and creepy, sounding like something you'd hear in The Phantom of the Opera, in the castle and fortress levels. You also have to love how these level themes are accompanied by bongo drums whenever you ride Yoshi. It's a subtle but smile-inducing detail that I think does fit with Yoshi for some odd reason. There are other different themes, though, like the high-pitched, almost whimsical theme on the main title screen, the various pieces of music for the different map-screens, which range from light-hearted to ominous and mysterious depending on the world (I really like the theme for Bowser's world at the end of the game), the freaky music that plays during the Ghost House levels, some appropriately tense music for when you're fighting a boss, special threatening music for the final fight with Bowser, and finally, the cheerful, triumphant music that plays during the end credits after you've defeated Bowser. Needless to say, not at all a bad music score for a video game.
It's interesting the motivation that doing these reviews for this blog tends to distill in me, especially when it comes to video games. Up until I decided that I was going to do this review, I had never completely explored Super Mario World. Oh, I had beaten the game many times, yes, but I never activated all of the secret areas, nor had I completed all of Star Road and activated the final world known simply as Special. In fact, it's quite possible that if I didn't have this blog, I never would have even bothered to try to complete the game fully, which would have been rather unusual for me since, as I mentioned earlier, I always try to unlock every secret that a game has to offer. Maybe that attitude comes from the game's extreme age and as a result, I felt that there was no point in fully exploring it or something similar. Not that it's a life-altering goal or anything but it's just interesting to think how wanting these reviews to be as rich and detailed as they possibly can be has motivated me to do things that I otherwise wouldn't have even given a second thought. It's actually a good feeling. But that's enough that. Let's go on to the walkthrough.
 Yoshi's Island: Oddly enough, the game's first world is actually called Yoshi's Island, making the fact that Nintendo would develop a sort of sequel to this game with that title several years later a strange coincidence. As per usual, the levels present in this first world are very easy and serve as an introduction to the gameplay mechanics, the controls, the different power-ups and abilities Mario is capable of earning, and so forth. And while the later worlds become much more complex in the paths you can take to navigate through them, this one is very straightforward. There are no secret exits in any of the levels, one isn't really a level at all, and while you can choose to journey either to the left or to the right, only one path will lead you to the next world. The first Switch Palace can also be easily found here but that said, don't expect the others to be as easy to come across. In other words, if you fail in this first world, you might as well give up now because you're hopeless.
 Yoshi's House: Like I said, this doesn't even qualify as an actual level. There's no time limit, all you have to do to exit is walk off the screen, and really, the only purpose it actually serves is for you to find the message that tells you that Yoshi has gone off to rescue his friends from Bowser. After you find Yoshi, you can come back here and get a different message as well as have Yoshi eat all of the berries in the tree, eventually getting extra lives if you keep entering and re-entering. Otherwise, there's no purpose to this level. Interesting note, though: I used to think that the little creatures you see hopping around on top of the tree were baby Yoshis but I think that they're actually just little birds that happen to have the same colors as the different Yoshis.
  Yoshi's Island 1: The first real level of the game is, naturally, a piece of cake. There are only a couple of death pits (after you activate the switch at the Yellow Switch Palace, you won't have to worry about them at all upon subsequent playthroughs), the enemies are not at all difficult to contend with (though you'll have to watch out for a hill-sliding Koopa the minute the level starts), the power-ups are as easy to come by as you can get (there's one part where a Mushroom instantly pops out of a bush when you walk past it) and so is this level's sole bonus area as well as items like 1-Ups and the five Dragon Coins. Moreover, when you find your first Cape Feather, you can come back here and take off in the middle of the level in order to find the game's first Crescent Moon sitting on a cloud platform up in the sky. Easy as can be.
Yellow Switch Palace: The first Switch Palace in the game can be found by simply following the path that appears to the left of Yoshi's Island 1 on the map screen. Completing the level itself is even more simply than finding it. It consists of two rooms, the first of which has a P-Switch that makes close to 500 coins appear, giving you only ten seconds to grab as many as you can (easy way to get many extra lives), and the second room requires you to simply jump on the gigantic switch to end the level. I don't think it was actually necessary for me to write about this but hey, I got be a thorough.
 Yoshi's Island 2: We leave the open, hilly look of the first level for a more forest-themed stage here. Again, this level isn't difficult in the slightest; in fact, right off the bat it gives you an opportunity to mow down a huge line of Koopas with an empty shell that you immediately come across in order to get an extra life. There's only one pitfall in this area and if you've activated the yellow blocks, it's no concern at all, you encounter Yoshi for the first time early on, making the level even more simple, and, again, the items, power-ups, and sole bonus area are very easy to come about. Said bonus area, however, requires you to throw some Grab Blocks up in the air in order to hit some winged "?" boxes in order to get the items hidden within them (most have coins but one of them has a 1-Up). Granted, that's not the only to hit the blocks but I find it to be the simplest method by far. All in all, another simple early level.
 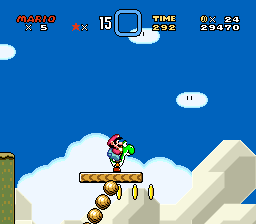 Yoshi's Island 3: The first elevated level, this is another one that will be easier if you completed the Yellow Switch Palace. The activated yellow blocks will cover most of the pits, saving you from instant death. Even if you didn't activate the blocks, this level shouldn't be that problematic. The jumps are quite easy to make, the rotating wooden platform swings aren't hard to maneuver at all (all you have to remember is that they'll in the direction of whichever side of the platform you're standing on), the only enemies are various types of Koopas, and the power-ups, items, and the bonus level aren't hard to come by. Speaking of the latter, you'll get more power-ups if you activated the yellow blocks and they also make getting to the bonus level just a bit more simple. The only obstacles that can be a bit troublesome are these turn blocks that horizontally and vertically expand into platforms before contracting back into one single block. You'd better make sure you're jumping on the original block when they contract or you'll end up falling to your death and it's much easier to jump on them when they expand horizontally. Other than that, though, this level shouldn't be too hard.
 Yoshi's Island 4: This level acts as a combination of a couple of different level types, with the main section acting as a combination of "elevated" and "bridge" in that you have to use a series of platforms to cross over a stream of water instead of a bunch of pits and you must also deal with some jumping Cheep-Cheeps at certain points. It's best to stay out of the water as much as you can because not only will the current pull you right into the Cheep-Cheeps but there are also mines that drift downstream that are hard to avoid when you're in the water with them. That said, though, the items aren't hard to get and there's even a trick to getting an extra life at the beginning if you use Yoshi to jump up onto the highest platform at the start and run back and forth a few times; the only thing is, once you hear the 1-Up pop up, you'll have to act quickly to get it or it'll fall into the water. The blue pipe you find here leads to an alternate, water-less section of the level but if you don't have Yoshi with you, you might want to bypass this area because without him, the Pokeys can be hard to get around and the only real prize you find here is a "?" Block with some coins inside it. But no matter what decision you make, reaching the end of this level isn't hard. Either way, you eventually come across a lone Turn Block that contains an Invincibility Star, enabling you to jump in the water and plow through the Cheep-Cheeps and mines without worrying about taking a hit and, as before, getting the items isn't difficult at all.
 Iggy's Castle: Even though it's the first castle level, this one can still be a bit tricky. The first section forces you to climb along a large wire net with Koopas climbing doing the same in order to get across some pits of lava, some quite small and others fairly large. Needless to say, you really have to watch where you're climbing and jumping here to avoid smacking into a Koopa or falling into the lava. There are Podoboos at some points so you must watch out for them as well. There are no power-ups to be found in this first section and the P-Switch that you come across does absolutely nothing so there's no point in hitting it. You can earn some extra lives if you crawl down on a bunch of climbing Koopas several times in a row without falling to the ground or smacking them from the other side of the fence. The second area is an auto-scrolling section where you have to dodge enormous parts of the ceiling that come down in an attempt to crush you. You have to time when you're going to run and where to very carefully and there also a couple of pitfalls, though one of them will be covered by yellow blocks if you activated the switch. There's a lower section of the floor where you can duck down in order to avoid being crushed. You also come across a winged "?" Block that contains a Fire Flower but you'd best go for it only if you're desperate because that can get you crushed if you dawdle. Once you get through this section, you then fight Iggy, whom you must push off into the lava that surrounds the slanted platform the two of you are fighting on. He moves in whatever direction the platform is slanting towards and you can push by either jumping on his head or hitting him with fireballs (the latter method is easier). If you don't touch Iggy for a while, he'll shoot fireballs of his own at you but if you keep hitting him, he'll never have a chance to do so. When I'm not Fire Mario, I find it a little hard to get Iggy to go into the lava with the jumping and coordinating the slanting platform; otherwise, he's a piece of cake to deal with and after you beat him, you get an animation of Mario blowing up the castle before moving on to the next world.
 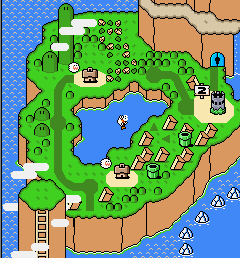 Donut Plains: Now, we start getting into the more challenging areas of the game. This second world introduces more variety in the types of levels you have to journey through (you play through the first underground and swimming levels as well as Ghost Houses here), more difficult enemies to contend with, and is also where you come across secret exits in the levels that allow you to journey through the world using several different paths. It also contains a very well-hidden link to Star Road as well. In short, this world really tests the skills that you practiced with on Yoshi's Island and you'll need as much as you can get as you continue through the game.
 Donut Plains 1: This level is notable in that it serves as your introduction to the Cape Feather, courtesy of the Super Koopas. The minute you start the level, several Super Koopas come flying at you, with the first one having a blinking cape which indicates that he'll drop a Cape Feather when you jump on him. As a whole, though, I don't this level is all the difficult. Granted, you have to be careful of the swarms of Super Koopas as well as the normal Koopas, Chargin' Chucks, and Volcanus Lotuses that are abundant here and there are a couple of pitfalls but that pretty much becomes meaningless when you acquire a Cape Feather and are able to fly up into the sky to reach the cloud platforms that have coins on them. There's also an upside-down pipe that leads to a bonus game where you can earn some extra lives (you can only get to it if you activated the yellow blocks) and when you come out of said bonus game, the pipe next to you leads to another bonus area where you can test out your flying skills by running up the side of the enormous pipes that you find and use the momentum to take off and collect a bunch of coins that are floating up in the air (too bad you're on a time limit because you'd be able to get quite a few extra lives if you had free reign). As for the secret exit, it's right before the normal exit but until you activate the green blocks later on in the area, you won't be able to get to it. Once you do, a wall of green blocks that you can run up the side of appears, leading straight to the key and keyhole. You should know the drill.
 Donut Secret 1: Taking the secret exit in Donut Plains 1 leads here, the first underwater level of the game. And as the first swimming level, this one is mildly challenging. There are a lot of walls and floating platforms that you have to navigate around and there are some fairly tight spaces but the most annoying aspect by far is the number of enemies. While the Cheep-Cheeps and Blurps can be easily maneuvered around, it's the damn Rip Van Fish that give you problems. As I said earlier, when they wake up, they swim after you rather quickly and given the obstacles you have to get around, it can be hard to outrun them. If one is on your tail, your best bet is to hope that they tire from chasing you and go back to sleep (grabbing an object like a P-Switch helps you to swim faster). Fortunately, there aren't many that are right next to each other so it's a slim chance that you'll get more than one chasing after you at a given time but it never hurts to be cautious. Needless to say, entering the level as Fire Mario or with Yoshi makes this a lot easier (the former is the best); the cape can work too but trying to swipe a swimming enemy without taking a hit is tricky. While the items and power-ups aren't hard to come by, getting a couple of the Dragon Coins and Fire Flowers involves risking getting a Rip Van Fish after you. Fortunately, there's a blue pipe that leads to a water-less bonus area right at the beginning of the level, giving you opportunities for power-ups and extra lives. You have to use a series of P-Balloons to reach them, though, and you'll have to sacrifice getting all of the items if you choose to go for the power-up because they're on opposite sides of the room and once you grab said power-up, you lose the power from the balloon. Getting both Dragon Coins at the top of this area is also difficult given that they're on opposite sides and you might not have enough time to get both before the P-Balloon wears off. The main level also has a secret exit that leads to a Ghost House right before the normal one but in order to get to it, you have to take the P-Switch with you and hit it in order to turn the blocks covering the keyhole into coins so you can reach it; the key is in the "?" box right above it.
 Donut Secret House: Note: this isn't the game's first actual Ghost House but since we're going through the world's secret path, I decided to talk about it first. That said, though, this one does have the same attributes as all the other Ghost Houses: it's tricky, confusing, filled with enemies that are either extremely difficult or just plain impossible to defeat, and finding both the normal and secret exits can be quite a task. The first room has a rotating semi-circle of Boos beneath the staircase you immediately come across, a Big Boo after that, and an Eerie. There's a P-Switch in front of the Big Boo that will drop a trampoline next to you but other than perhaps using it as a way to get over the Big Boo without taking a hit, there's no point to it. It won't help you reach anything special. The second room of the house is even trickier. The door at the end of it leads you back to the first one while the door that you see floating in mid-air, which you can access by hitting the P-Switch you find which creates "?" Boxes around it that serve as a makeshift bridge, takes you to the box underneath the door at the end of the first room. The box contains a 1-Up but it doesn't bring you any closer to escaping. Both real exits can actually be found in the second room. The main exit appears in the middle of the small coin formation that find on the platform past the floating mid-air door and appears when you hit the P-Switch; however, you have to collect the coins in order to reach the door or they'll turn into impassable blocks once the switch is hit. The secret exit that leads you to Star Road also becomes visible when you hit the switch but it's up on a big, hidden platform near the ceiling. If you have a cape, you can simply fly up there after hitting the switch; if not, you have to activate the switch and hit the "?" Box directly above the floating door to sprout a vine that you can use to climb up to the platform. However, the exit is guarded by a Big Boo whom you must defeat using the Grab Blocks that act as the floor in this room. You have to hit him three times while he's visible and at the same time, you must contend with two little Boos who act as his bodyguards as well as watch what you're doing while grabbing the blocks because if you grab too many, you'll soon have nothing left to stand on and fall to your death. Best advice is to just keep a cool head and keep your mind on what you're doing the whole time.
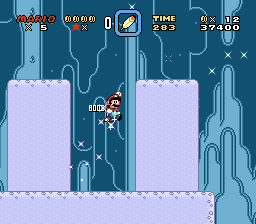 Donut Secret 2: One of the first underground levels in the game, this level is also one of only a few that involve icy conditions. I don't think I have to say that the ice makes running and walking very difficult and while there aren't many pitfalls until the last 1/3 of the level, you can still easily fall to your death. The ice also makes it hard to keep from bumping into enemies, which mainly consist of Koopas but there are also quite a few Spike Tops here as well, making jumping on the icy platforms quite a hazard. There's also a spot where you have to use some pipes with Piranha Plants inside them to get across several rows of Munchers on the ground (the pipes are as slippery as the ground so you have to watch your step). There aren't any power-ups here save for two Invincibility Stars and the first one at the beginning requires using a trampoline to activate a vine that leads to the platform where you can find it. It's possible to keep this invincibility all the way to the end of the level, where another block that typically contains a coin will have another one if you make it, but you have to be really skilled to get over there quickly enough and avoid slipping into one of the pits while doing so. There is a bonus area here as well but it's also tricky to get through because of the moving platforms and having to use the pipes containing Piranha Plants as stepping stones. It's much easier to get across with a cape and even if you don't have one, there's a P-Balloon in the block are the beginning of the area, allowing you to float over the hazards and pick up some coins. Right before the exit goal, there's a row of Paratroopas that make for an easy 1-Up if you jump on all of them. Just don't fall down the hole before you can head to the exit.
 Donut Plains 2: Getting back to the main path through the world, this is the game's first real underground level. It's an auto-scrolling level that's filled with spots where the floor or ceiling continuously moves up or down, forcing you to carefully judge how and when you can move in order to avoid being crushed. The most common enemies are Buzzy Beetles and Swoopers and while you wouldn't think they'd be much trouble, the cramped, tight spaces of this level can make them a fairly big nuisance. It's possible to actually get stuck in a space with a rolling beetle-shell if you jump on one and kick it right when the floor in one section is rising up to the ceiling (believe me, I've accidentally done that to myself numerous times). Overall, though, this level isn't too tricky. There are a fair amount of power-ups and while a couple of Spike Tops appear at the pipe leading to the main exit, there's enough space there to where you can easily avoid them. There's a pipe in the mid-section of the level that leads to a non-scrolling room where the only enemy is a punting Chuck. This place bypasses the rest of the main level and eventually drops you at the exit. You can also find the secret exit that leads to the Green Switch Palace here. You can use a blue Koopa shell that you find near the exiting pipe to activate the vine that leads up to the key and keyhole or, if you have Yoshi, you can have him eat the shell and use the wings that he sprouts to fly right up there.
 Green Switch Palace: Like the yellow one, the Green Switch Palace is pretty straightforward. All you really have to do is run straight ahead to pipe that leads to the room with the big switch. However, you can use the Koopa shell and P-Switch that you find to get some extra points and a 1-Up if you're lucky by jumping over the shell, hitting the switch, causing the shell to fall down below and in front of a shell-less blue Koopa who will then kick it and knock out a row of Koopas on the ground beneath his platform. Again, you have to be lucky and hit all of them to get a 1-Up but even if you mess up, it's no big deal. There are plenty of extra lives on the road ahead.
 Donut Ghost House: The first Ghost House may not have a lot of enemies but it introduces you to the fact that making your way out of these levels is never as easy as you would think. The first room is straightforward: keep heading right, avoiding the Boos that swoop down at you from the swarm up above you, and the pits to reach the next room. The second room contains the exit on a ledge up near the ceiling but right now, you can't get to it (unless you have a cape, of course). You have to go through the door at the end of this room to reach the third one, which is very similar in design to the second one but here, you actually start beneath the staircase. The block above you contains a P-Switch and if you knock it free, you can jump through the stairs in order to reach it. However, the hidden door that the switch activates leads to a dead-end room that won't get you anywhere. Instead, you have to go through the door at the top of the stairs, which leads you to the area below the stairs in the second room (confused yet?) Here, you can hit the block that's above you to release a vine that you can use to climb up to the door leading to the exit. If you enter the house with a cape, you can use it to fly up to the ceiling of the first room and find a hole at the very beginning that allows access to a hidden corridor. This leads to a small room with four blocks that each contain a 1-Up and another door that leads to an exit.
 Top Secret Area: This is where the secret area in that Ghost House leads to. It's not really a level but a bonus area where you can stock up on some useful items. There are five "?" boxes here that contain Fire Flowers, Cape Feathers, and a Yoshi egg. It's a nice place to revisit later in the game as the levels start to become more difficult and you start losing your lives more often.
 Donut Plains 3: An elevated level with a lot of moving platforms, this stage's risk factor comes not from the enemies, which consist mainly of just Koopas, but from the ever-present risk of falling to your death. There are two types of moving platforms here: gray ones which have three places to stand and rotate either clockwise or counter-clockwise and wooden ones that follow on visible paths. In the case of the latter platforms, you sometimes have to hit on an On/Off Switch in order to get the thing moving in the direction that you need or to save yourself from falling off the end of a wire path. And just to make things a little more difficult, later in the level you run into Fuzzies who travel on either wire paths near the one a wooden platform runs on or the very same one, forcing you to do some dodging and quick jumping to avoid them. The jumping in this level is made much easier with a cape since it makes your falling slower and easier to control. If you don't have one, you'll have to use the R-button on the controller to make screen move forward so you can see what's in front of you. There are actually some instances where having Yoshi can almost be to your detriment since he makes you a bigger target and you have to jump in order to avoid certain enemies rather than ducking as you could if you didn't have him. There's one part where you can choose to either take a low path or a high path: the high path doesn't require you to jump over gaps but you have to contend with Paratroopas nonetheless and the lower path has no enemies but requires some tricky jumping to cross. I say go with the higher one since it leads to a pipe with a bonus game where you can make up for some of the lives you've probably lost in the level. The only other thing I can say about this level is that, since there's no secret exit, it's straightforward enough to where you can focus on getting from one end of it to the other without worrying about any detours. Still, it can be a tricky one.
 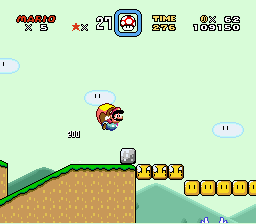 Donut Plains 4: You may not be up in the treetops here but you're still going to have to do a lot of jumping regardless. A lot of pitfalls, a multitude of enemies consisting of Koopas (the level starts with a shell-less Koopa who is coming up to a yellow shell and, if you don't stop him, will become one of those invulnerable, flashing shelled Koopas), Goombas (from the normal variety to the winged types and even some that come down at you from above on parachutes), and, worst of all, the Amazing Flyn' Hammer Bros., who pop up quite a bit here, make this quite an annoying level at points. Needless to say, you have your hands full here but, on the bright side, so many enemies means chances to hit a bunch in a row and earn extra lives and if you enter here with a cape, you can fly up to the cloud platform in the sky that has the game's second Crescent Moon (that's the one I discovered purely by accident). Unfortunately, there aren't a lot of power-ups, with the ones that are present being guarded by a bunch of enemies, and the first bonus level that you come across has nothing valuable and only presents more challenges in the form of rising and lowering pipes, tiny pipes whose ends make for very narrow platforms, and Paratroopas. The second bonus level gives you a better opportunity for some 1-Ups, which you can score by jumping on enough of the Paratroopas that are inhabiting this room (it's much easier if you have a cape). In short, you'd best get your nerves up for this level because you're going to need them, especially with all of the jumps and those Amazing Flyin' Hammer Bros.
 Morton's Castle: The second castle level in the game and we're already starting to head into higher difficulty. This castle has three rooms leading to the boss, with the first two consisting of your having to go up a sloping section. In the first room, you have to watch out for some Thwimps who drop down from the ceiling and when you go up the escalator leading to the door, you have to duck to avoid some Ball N' Chains. If you enter this level with a cape, you can fly up to a secret passage at the very beginning hear to reach a pipe leading to a bonus game that also allows you to bypass the second room. Speaking of which, the second room requires you to dodge some Thwomps while making your way up some ledges in order to reach the next door. You also have to watch out for the lava pit in the middle of the ledges, the Podoboo that jumps out of said pit, and a Dry Bones that walks back and forth at the door. However, these two levels are nothing compared to what comes next. The third room is a long, vertical area with slowly moving ledges that you must use to get to the top. On the way up, you have to avoid being crushed by the ledges as well as deal with some Dry Bones, an alternate path that leads you to some coins but doesn't help you get any further up, and some instant-death spikes right before the door that you have to jump over using some very narrow stones as platforms (if you've completed the Green Switch Palace, a green block will allow you to cross over one of the spikes without having to jump). Fortunately, there are some power-ups here, with a cape-housing green block being right next to the door leading to Morton, and there's one section where you can activate a vine that leads to a hidden 1-Up. In contrast to the actual level, Morton himself is quite easy. He attacks by climbing up the walls and attempting to crush you from above by stomping down from the ceiling but all you have to do is jump on him three times. If you're quick, you can jump on him all three times before he can even climb up the side of the wall once; if not, it's still not that hard to get out of the way before he lands in order to jump on him. The only thing is you have to lure him to a part of the room with enough space where you can jump on him and if you're standing on the floor when he lands, you'll be momentarily paralyzed. He also moves faster after each hit he takes so you have to be aware of that too. Otherwise, he's not at all hard to take down once you know his attack pattern.
 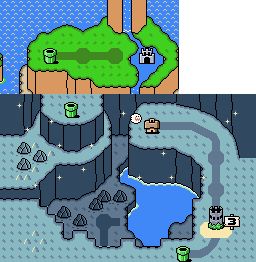 Vanilla Dome: The third world in the game is located in a large cavern underneath a mountaintop and, as you can probably guess, is primarily made up of underground levels (although, oddly enough, there's still a Ghost House and a castle to be found here). A lot of the levels here also tend to be really long. Like Donut Plains, this place not only has a connection to Star Road but it also has two paths you can take. However, while the alternate path in Donut Plains didn't affect how or where you would come out of the world, the same can't be said for the one here. The main path in Vanilla Dome takes you to the castle level and afterward, leads you outside to the lower part of the Twin Bridges area, which will eventually lead you to the Forest of Illusion. However, the alternate path bypasses the majority of the world's levels, including the Ghost House and the castle, and leads up to the surface where you instead fight your way through a fortress and head through the upper section of Twin Bridges. Both paths lead you to the castle level of Twin Bridges and to the Forest of Illusion but we'll talk about that presently. Needless to say, the game starts to get complex at this point.
 Vanilla Dome 1: This underground level is one of the longest by far, although fortunately, save for the secret exit, it's straightforward for the most part. It's made up of three sections, each of which involves something different. The first one leads to a maze made up of Turn Blocks, which you can easily get through by Spin Jumping through the top next to the orange pipe and after hitting the second or third level, using the Buzzy Beetle's shell, or a cape spin if you have one, as a way to create an opening through the wall (it's so small that you have to run and duck at the same time in order to make it through). There are some power-ups in several of the blocks but they're so hard to find that, unless you're desperate, it's best not to waste time trying to find them (even though this levels' time limit is four minutes instead of three because of its length). After the maze is an alcove in the ceiling that contains the key and keyhole for the secret exit but, until you've completed the Red Switch Palace later in the world, it's really hard to get up there. It is possible to use Yoshi by having him eat the blue Koopa shell you find at the beginning of the maze but getting through the maze with him takes a very long time since you have to keep jumping off him and getting back on and reaching the spot with the alcove before he swallows the shell is almost impossible. It's best to just wait until you've activated the blocks. In any case, the second section of the level is the shortest. Once you step on the main, yellow section of the floor, it starts sinking into lava beneath it and you have to race to get to the other side before you get fried. There's a "?" Box with an Invincibility Star right before this part so you can use it to breeze through all of the Buzzy Beetles and the Paratroopa that you come across instead of having to jump around them (and possibly earn an extra life in the process). The third section, which is even longer than the first, starts off with the halfway marker but if you miss the platform it's sitting on, you'll have to go on without it (there's a pitfall right before it as well). After the marker is a section with two paths. The upper path is the easier one but you can only squeeze through it if you're small; otherwise, you'll have to get around a couple of platforms with Spike Tops crawling on them, with the latter one forcing you to wait until the enemies crawl on the underside in order to cross over it. Fortunately, if you take a hit, there's a "?" Block right after this section. The section leading to the finish goal is another maze but it's easy to navigate through and it contains some coins and a Dragon Coin in certain spots as well as some Grab Blocks you can use to defeat the punting Chuck that's sitting right in front of the finish line. All in all, this level isn't necessarily hard; it's just really lengthy.
 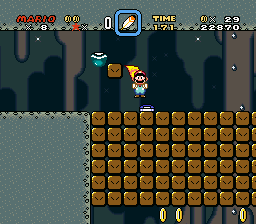 Vanilla Dome 2: Here's another lengthy underground level, with this one being a combination of underground and swimming levels. The first half of the level involves swimming and jumping out of the water onto land and one section gives you the option of either jumping out of the water and taking a higher route (which is the better option since the halfway maker is up there) or continuing through the Cheep-Cheep-infested water you're currently swimming in. In addition, taking the upper route gives you a chance to reach the secret exit that leads to the Red Switch Palace by going up and left, carrying the P-Switch that you find past the blocks you find it sitting on, and hitting it to turn the blocks covering the path to the key and keyhole into coins so you can get to them. Whichever path you decide to take, you eventually come to a corridor with Chargin' Chucks and Buzzy Beetles that leads to a more open section of the cavern. There's a pipe that leads to a bonus room here but there's not much to it save for a few coins and in addition, there's a lot of ice there that makes it easy to slide into enemies. Even worse, the bonus room's exit throws in the middle of a section with a bunch of Swoopers that come charging down at you from the ceiling. In other words, it's best to skip that pipe and head straight for this section where you'll be able to deal with the Swoopers in a more calculated manner. There are also a couple of Chargin' Chucks here and the one before the goal is one of the cloning types so you have to be ready for that as well.
 Red Switch Palace: Like the previous Switch Palace, this one gives you an opportunity for an extra life. When you start, a Koopa leaps into a yellow shell and becomes a spinning, flashing shell. If you want, you can hit the P-Switch, freeing it and all of the other Koopas in the room from the small spaces they're blocked in, and then lure the flashing Koopa to the end of the room, mowing down all of his comrades and giving you a lot of points in the process. Of course, you'll have to avoid him and the other Koopas yourself in order to succeed. If you don't need an extra life, it's best to just jump over all of the Koopas and head into the next room in order to hit the switch.
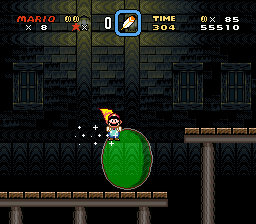 Vanilla Ghost House: This is the Ghost House level that had me stumped when I played this game as a very young kid. I absolutely could not figure out how I was supposed to make my way out of this stage. I'm kind of embarrassed now because, compared to the other Ghost Houses in the game, this one is pretty simple, but at the time my young brain couldn't figure out where the exit was. As a result, I had to rely on the secret exit back in Vanilla Dome 1 and the alternate path that opened up to continue with and eventually finish the game; I didn't beat the rest of Vanilla Dome until I was in my 20's! Regardless, there are only two rooms here, with the first one being an enormous one with a lot of platforms that you have to jump across, Turn Block bridges that you have to cross, and enemies such as Eeries, Boos (a circling chain of them appears at both the beginning and end of the room), and Big Boos that you have to get around. There's a block with a vine in it that allows access to a platform at the ceiling that enables you to pass over the latter part of the room, including a really bad section right before the door where you have to go down some stairs while dealing with a semi-circle of Boos in front of you and a Big Boo coming at you from behind. The second room is filled with those big green bubbles that are a bit hard to get around due to their immense size and they can make jumping across the platforms in this room more challenging than normal. Once you get past them, the game tries to trick you with an out-in-the-open door that does nothing but lead you back to the beginning of the level. What you have to do instead is uncover the P-Switch inside one of the yellow blocks before the door, carry it past the door to where there is a formation of coins, collect the coins, and then hit the switch to reveal the real door (if you don't collect the coins, hitting the switch turns them into blocks, preventing you from getting to the door). I still feel dumb for not figuring that out but then again, I was like four or five so I'm no doubt being far too hard on myself.
 |
| Look familiar? |
 Vanilla Dome 4: We're still underground so I don't know why we're seeing the sky here but in any case, this elevated level is full of Bullet Bills that come at you from both sides. It's more than likely that you'll take several hits here since the shear amount of them makes them hard to dodge. There are power-ups to be found here (at the very beginning, you come across a Mushroom that's just sitting on the bottom of a platform) but they can be taken away from you in an instant by the Bullet Bills so you have to keep moving as much as possible. Just to make it even more difficult, you're constantly using springs to get over high platforms as well as jumping across many short platforms in a row and dealing with other enemies like Koopas and jumping Piranha Plants. And just when you thought it couldn't get any more challenging, after the halfway maker (which is very tall and requires a running jump in order to reach it; I missed a couple of times, by the way), Bullet Bills start coming at you from all sides: yeah, from the top and bottom of the screen as well as from the left and right. Fortunately, you're near the end and the Bullet Bills stop coming once you reach a couple of Paratroopas hovering in the section right before the goal but, my God, is it hard to get through here in one piece. There is a pipe leading to a bonus area here and while you might panic when you see it's another lava river, there are no Blarggs or any enemies here, just blocks that you have to get around. Unfortunately, if you have Yoshi when you come in here, you'll have to leave him behind because you can't duck under one of the block platforms while sitting on him. Coming into this bonus area is actually a good idea because it skips the majority of that amped up Bullet Bill bombardment and drops you at the spot before the goal where they stop coming so you should count your blessings.
 Lemmy's Castle: Lava, water, crushing blocks, and a halfway marker that can't be found on the regular path: rather appropriate for the castle level of such an all-around difficult world, don't you think? The first section has you traverse across a bridge of yellow blocks to cross a stream of lava, then use several platforms to get across some water, and finally jump across some lava pits with some very high-jumping Podoboos in order to reach the door... all while Magikoopa is shooting spells at you. If one of his spells hits those blocks at the beginning, it will either turn into a Koopa or a Thwimp (the latter happens if you're below the block that got hit and since you start at the top, you'll actually need him to hit one below you in order to make your way down) and while you can jump on Magikoopa, it will only get him out of your hair temporarily. The section with the water has a floating door that leads to the halfway marker but you have to first get ahold of the P-Switch, collect a couple of the coins that are floating around the door, and then activate the switch to turn the rest of the coins into blocks that you can use to reach the door. While tricky, it's worth it not only because of the marker itself but because you'll bypass the part with those high-jumping Podoboos and you'll also get a 1-Up before moving on. The second section that leads up to the boss is even more challenging, involving crossing another stream of lava using those shifting blocks that will crush you if you're standing in the wrong place at the wrong time. And not only do you have to worry about not getting squished or falling into the lava but there are also a lot of Dry Bones and Podoboos to add to the difficulty. When you finally get to the end of this difficult part, you get a Cape Feather as a power-up before moving on to the boss, Lemmy. The fight with him takes place in a room filled with pipes where you have to play a game of "Whack-a-Mole" as Lemmy continuously pops out of the pipes along with two fakes. While it's easy to tell Lemmy apart from the fakes, it's hard to predict where he'll pop his head out and sometimes, you'll be standing far away from him and might not be able to reach him before he sinks back down. While Lemmy doesn't attack you himself, there is a fireball bouncing around the room that can prove to be a nuisance. But, like the previous bosses, he's not that hard. It just takes some patience.
  Vanilla Secret 1: This is the first level in the path that you take after going through the secret exit in Vanilla Dome 1. It's a vertical cave level requiring you to make your way up to the top using green springs, vines, trampolines, an occasional jump off an enemy, and your cape, which you get plenty of chances to acquire here. While some of the jumps here can be a little tricky and it does take a while for you to fully explore the level and find everything, I've never found this one to be too hard. Heck, the only enemies, aside from a punting Chuck right before the goal whom you can easily pass under, are Koopas and the only point where they're really a problem is near the end when you have to use a trampoline to jump through a gap between six Paratroopas that are hovering underneath the hole in the ceiling that leads you on upwards. There's also a pipe on the left side of the level that leads to the secret exit and opens up a portal to Star Road that you can access either by flying to it with a cape or waiting until you've activated the blue blocks later on and use them to reach it (you have to carry the trampoline over there for it to work, though).
  Vanilla Secret 2: Isn't nice to finally be back aboveground? This one is straightforward, with no secret exits and one bonus area (which really is one in this case) that you come across right at the end. However, this place is loaded with enemies, especially Paratroopas, who are an absolute swarm during the first half of the level (if you have a cape, you can easily fly over them), and Parabombs, which start raining down on you after the halfway marker. In addition, not only are there the typical Piranha Plants hiding in some of the pipes but a couple of them actually have Lakitus, who, as usual, throw Spinies at you, and there's also a pit that's crawling with those little spiked pests. There's also a cloning Chargin' Chuck right before the goal but if you dispense with the Lakitu hiding in the pipe right before him, you'll access the bonus stage and its exit will shoot you out of the diagonal pipe here, right over the Chuck, and through the goal. It helps that you come across Yoshi early on in the level; he really proves indispensable in dealing with all of these enemies and there's a useful Fire Flower and Cape Feather here as well as a trick to earn a bunch of extra lives by taking a silver P-Switch back to the beginning with those Paratroopas and then turning them all into silver coins by hitting it. Best overall advice for this level is to just power on through.
  Vanilla Secret 3: When you first enter this level, you might panic at the sight of all the jumping dolphins that immediately come at you but fortunately, they're actually friendly creatures that you can use as makeshift stepping stones that you can use to get across the stream as well as to avoid the Porcupuffer who begins following you who starts following a little bit before the halfway marker. It's a good to have Yoshi with you when you enter this stage in case you fall into the water because he jump on the Porcupuffer without taking damage; if not, you'll have to Spin Jump to avoid getting hit and that's hard to do when you're in the water. This level can be annoying with the spots where dolphins jump straight up and you have to land on top of their narrow heads and the fact that there are long spaces between the actual platforms but the bright side is that this is another very to-the-point level that has no secret exits or even bonus levels, so all you have to worry about is getting to the end in one piece.
 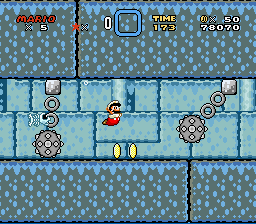 Vanilla Fortress: The only underwater fortress level in the game, the water actually makes it easier to avoid some obstacles like Ball N' Chains and spikes since you can just swim around them. The Fishbones can sometimes be problematic when they're swimming around in a small space but on the whole, they're not too bad. However, other enemies are just as dangerous here as they are on dry land, like Thwomps, which move just as fast as well as Dry Bones, who can now throw bones at you. This level also introduces Bony Beetles, who can damage you if you land on the spikes on their shells (they're not as annoying if you have a cape). You also have to watch it because some of the spikes on the ceiling in certain spots will fall down when you get close. There's a passage at the beginning that you can only reach if you're small but it only leads to a dead end so you bypass it. The section leading up the boss is another instances where you must choose which path you'll take and, again, the upper path is the best since it has fewer enemies (although, it's still best to at least be Big Mario when you go up there). You also get one last power-up before you fight Reznor, which is four fire-ball-spewing Triceratops that stand on a rotating platform. The easy part is that their fireballs move very slowly and you can defeat them by hitting the underside of their platforms; the not so easy part is the fact that once you've taken care of two of them, the floor starts to fall apart, threatening to cause you to drop into the lava beneath it. You have to stand on the empty rotating platforms in order to defeat the other two dinosaurs. To be honest, I've never found Reznor to be that hard in any of their fortress level. The attack patterns don't change at all and it's a lot easier than you would think to keep from falling down into the lava (not trying to brag but that's never happened to me). So, you should easily be able to get rid of Reznor and move on.
 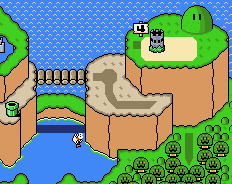 Twin Bridges: This is by far the shortest area in the entire game, with only two levels leading up to the castle level and six in total, including the castle. As I said earlier, whichever part of it you're able to explore depends on how you came out of Vanilla Dome: if you come from Lemmy's Castle, you'll be on the bottom section (which is the only part of it that's visible when you first see it on the map screen), and if you take the alternate route to Vanilla Fortress, the top bridge will appear after you've completed that level. Since we're talking about a couple of bridges, you'd expect those to be the type of levels you play through here but, despite its small size and location, Twin Bridges has quite a diverse mix of levels, with a couple of elevated ones, a typical aboveground level, and even a swimming level. There's also a connection to Star Road to be found here as well.
 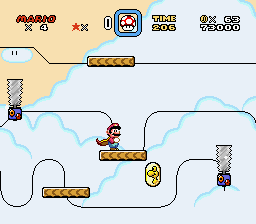 Cheese Bridge Area: Once you get a load of this level, you might wish that you had taken the other route through Vanilla Dome instead. This elevated level is one of the trickiest yet, forcing you to ride on moving platforms and dodging hazards like buzz-saws that also run on the wire paths that the platforms travel on. There are so many of them that you'll almost be constantly jumping throughout the majority of the level. Fortunately, there's a block at the beginning of the level that contains a Cape Feather that makes this a whole lot easier. Yoshi, on the other hand, despite the fact that he can jump on them safely, can be a bit of liability in some spots where the concentration of buzz-saws is heavy and you normally have to hang onto ropes in order to get across. However, he does come in handy after the first section because he gives you the option of heading to a bonus area and skipping the really tough parts of the levels by activating the wings that you find in the box near the halfway maker and flying up into the bonus area in the sky (he also becomes a special blue Yoshi in the process). Speaking of which, the marker is up in the air so if you decide to play fair, you'll have to take the upper path in order to reach it. After the halfway marker is a pipe that leads to an extra area but it's not worth entering because there are no bonuses to be found, you'll have to dodge a bunch of Bullet Bills, and it doesn't allow you to bypass the tricky last part of the area that involves hanging onto some moving ropes while dodging buzz-saws (this is where you're forced to jump across them if you have Yoshi, which is very difficult). Finally, the secret exit that leads to Soda Lake is actually right past the normal goal but you have to float underneath it and then jump up when you're behind it... not an easy feat, although Yoshi makes it a little bit easier since you can jump off of him while floating under the goal. You do a Crescent Moon for your troubles before going through the alternate goal.
 Soda Lake: The only good thing about this swimming level is that it's very, very short. Otherwise, though, it's absolute hell. This is where you run into Torpedo Ted, Bullet Bill's underwater cousin, who can pass through walls in order to come at you and they fire so rapidly that they're very hard to get past. The layout of the level doesn't help, with a lot of tight spaces that can easily become congested with enemies (there are a lot of Blurps in this level as well) and parts of the wall that you have to swim around while avoiding the torpedoes. There's also only one power-up at the very beginning and it's Fire Flower, which doesn't hurt the Torpedo Teds (nothing can defeat them) but does help in clearing out the Blurps.It's a very good idea not to bring Yoshi into this level. He's completely useful against the Teds and will more than likely just slow you down. And finally, at the very end, the only way to get to the exit pipe without taking damage is to walk underneath the Torpedo Ted turrets as small Mario; you'll take hit if you're bigger or try to swim through. While there are no secret areas or exits to be found here, which means you can just concentrate on completing the level (which will activate the portal to Star Road), you'll be really lucky if you don't get killed once before you do so.
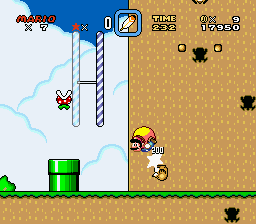 Cookie Mountain: This aboveground level might be a breath of fresh air after all the underground and elevated ones that you've been playing through lately but nevertheless, it's filled to the brim with enemies. Besides a large infestation of Monty Moles and jumping Piranha Plants, this level also introduces the Sumo Bros., who send fire-causing lightning down at you when they stomp on their platforms. While they can be defeated by smacking the underside of their platforms, there are sections where there are either two in a row or they're so high up that it's best to simply run past them. There are chances for 1-Ups here, including a bonus area that is a bit challenging to get through but leads you to a high cloud platform where you can eventually come across one (you have to jump across some Munchers, though) but, on the whole, there isn't much nice about this place. You'll be regretting not completing the Red Switch Palace here because the red blocks make it easier to deal with certain enemies and without them, you won't be able to hit the block that contains a Yoshi egg either. The section leading to the goal is where the game really gets cruel: you come across a Roulette Block that you can't activate without a cape, a jumping Piranha Plant that can also spit fireballs at you, and a jumping Chuck right before the goal (the developers like to place them there, don't they?) It's safe to say that at this point, the game has officially become difficult and believe me, it's not going to get any easier.
 Butter Bridge 1: This is where you end up after taking the alternate path to Vanilla Fortress. This is an auto-scrolling, elevated area where it's best to enter as powered up as you can be because there are very little power-ups to be found here (only one near the end that I can think of, which can be hard to snag due to the level's scrolling nature and the fact that the block containing it is amongst a row of block platforms that you have to get up before the screen catches up to you). The trickiness of this stage isn't really due to a large abundance of enemies or to their types (the only enemies here are Paratroopas) but rather due to a lot of tricky platform jumping and the level's scrolling nature. The small mushroom platforms that you come across from the beginning act as scales, with one rising while you stand on the other, forcing you to continuously jump in order to get the other up to the right height necessary to get across. There are a lot of these platforms 2/3 of the way through and you have to use them as a series of constantly sinking stairs, which can be quite difficult. Besides these platforms, there are also gray platforms that sink as soon as you jump on them and instances where you have to use Paratroopas as makeshift stepping stones, often in very trick spots, or to make your descent from a high platform much safer. This is another level where having activated the red blocks makes your job easier since they save you from having to use a whole row of Paratroopas to reach a platform in one spot. And as usual with scrolling levels, you have to be careful not to get pushed off or crushed by the screen. Fortunately, since there are no bonus areas or secret exits here, this is another level where you can just worry about getting to the goal without dying (again, it's best to enter this level with a cape rather than enter it powerless and attempt to grab the tricky to get feather near the end).
 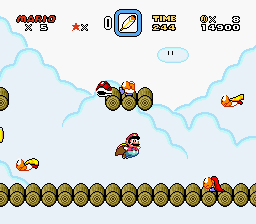 Butter Bridge 2: Another elevated level, this one doesn't scroll but makes it up for it with a freaking swarm of Super Koopas (they must be flying south for the winter and you've ended up slamming right into them) and the type of shell-less Koopas that kick shells at you. As usual, it's best to be as power-up as you can and the good news is that, with so many Super Koopas around, you get ample chances to grab Cape Feathers and there are a couple of blocks containing them as well (there's one containing a Yoshi egg about the 3/4 into the level but you have to hit it with a shell to activate it). However, the enormous amount of these enemies can make jumping across the platforms a real headache. Not only do they come swooping down at you or fly straight at you from the side of the screen but there are also sections where a vertical row of them comes at you, forcing you to either duck or jump on the top one (the former strategy is the safer one), and another stretch where those shell-less Koopas kick shells down onto you from above (once each one has kicked his shell, though, you don't have to worry about them). The one bonus level here has a fair amount of coins as well as a Dragon Coin but if you don't have Yoshi with you, you have to use a moving rope in order to get the coins that are above you. And as you can guess, Yoshi makes this level easier with his ability to swallow the Super Koopas that come at you. One last group of them will come down at you right before the goal but by this point, you should adept at avoiding them.
 Ludwig's Castle: First, we get another taste of what the underground levels in Vanilla Dome were like. You have to navigate some cramped corridors filled with Bony Beetles (if you have a cape, then they're no problem) and Ball N' Chains. The latter are especially tricky near the end of this room when there are like five in a row, with three on top and two on the bottom, and you have to have great timing to get through without taking a hit (I very rarely accomplish that feat). Before the door, though, there's a part of the ceiling that you can knock to access a bonus game where you can earn some extra lives and there's a right beside the door is a Mushroom that's just sitting there so the game rewards you for your efforts. The second room is a very long one where you have to run from right to left as the spiked ceiling slowly descends. There's one On/Off Switch that makes the ceiling temporarily rise back up but you have to cross over a couple of Podoboo-spitting lava pits in order to reach it and even then, the ceiling will start to come back down after it's reach its highest point so you have to use the time to get across four more lava pits (if you rush, you'll crash right into the Podoboos) and once you're past, run like crazy to the end where the door is. The final room leading up to the boss is a vertical one where you have to climb up a series of nets in order to reach the door. The nets are infested with climbing Koopas and there are often spikes beneath them that threaten to kill you instantly if you fall off of them while climbing. There's one Cape Feather hidden in an alcove to the right of the first net and if you need it, you'd best grab it because you won't get another one before you get up there to fight the boss. Ludwig's attack pattern is pretty simple: he shoots some fireballs and then pulls himself inside his shell and attempts to ram you with it. You have to hit him while he's shooting his fireballs after you and after he takes a hit, he tries to ram you again and once that doesn't work, he repeats his usual strategy. Like the other bosses, Ludwig is pretty easy. Getting to him when he's spitting fireballs at you can be a bit tricky since your dodging them might make you miss an opportunity to jump on him but otherwise, he's not hard and like before, it only takes three hits to trounce him.
 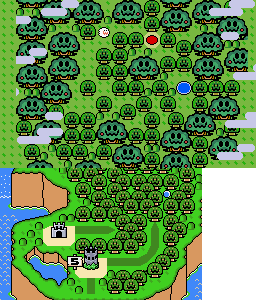 Forest of Illusion: This is quite possibly the trickiest world to navigate through and find everything because there are so many secret exits in these levels and the straight path just makes you go in circles. It's probably a good thing that I didn't reach this world when I was a little kid because I know I would have never, ever figured out how to get out of here. Moreover, there are two paths that lead out of the area: one leads to the castle level which, naturally, leads to the next world whereas the other leads to a fortress that opens up an entryway into Star Road. This is how I first came across Star Road, in fact. I hadn't discovered any of the other entry-points beforehand and I was just exploring one of the Forest's levels when I came across the secret exit that led there. Needless to say, I was surprised to find it because up to that point, I had no idea that Star Road even existed. That's why it takes so long to talk about Super Mario World fully: there are so many surprises that it has for anybody who hasn't read up on it.
  |
| Best to have a very sturdy umbrella here. |
 Forest of Illusion 2: You wouldn't expect a world that's forest-themed to have a swimming level but, as it turns, this place does. Other than the introduction of Urchins, which only appear here and are so slow that you can easily get around them, there isn't much special about this level. It is full of all types of fish enemies, though (Blurps, Cheep-Cheeps, and Rip Van Fish) it's a good idea to once again break out the Fire Flower (best have it ready when you enter because the only one to actually be found here appears after the firth third) or enter the level with Yoshi and since it's not as useful when dealing with these types of baddies, it's best to avoid the feather-housing Green Block you find at the beginning of the level. There is a Grab Block here that you can use to swim faster as well as a makeshift weapon if you don't have a power-up on you at the moment. Like a lot of swimming levels, this stage is very claustrophobic and there are a bunch of cramped spaces filled with enemies that can be tricky to navigate through without a Fire Flower. The middle of the level becomes a bit of a maze, with one low route leading to dead-end, so you have to be careful and keep your eye on the timer. The secret exit leading to the Blue Switch Palace can be found in a hidden alcove to the left of the path to the goal. It's behind a fake wall that you can easily swim through and there's a Rip Van Fish guarding the exit and the key but if you've kept your Fire Flower, he shouldn't be a problem. Going back to the normal exit, there's an underwater Chuck who, when you get close to him, whistles and awakens a swarm of Rip Van Fish that are floating down from up above you. However, by that point, you'd already be within reach of the goal so it's best to just quickly charge straight at the goal like a torpedo instead of contending with the fish.
 Blue Switch Palace: The final Switch Palace, this one's first room has a bunch of Spinies walking on a platform of blocks right below the ceiling as well as two P-Switches and a bunch of coins for you to collect. After doing so, you can hit the blue P-Switch to have the Spinies drop down towards you, which may seem like a stupid thing to do but if you then hit the silver switch, you'll turn them all into silver coins which you can collect for a 1-Up. After that, as usual, all you have to do is go into the next room and hit the switch.
 Forest of Illusion 3: Unlike the world's first aboveground level, this one is much typical of its type since there isn't any platform-jumping and instead, you just have get over the usual pitfalls that pop up in these levels. What isn't so typical is that the enemies, which mainly consist of Goombas and Bob-Ombs as well as an occasional flopping Cheep-Cheep, are floating around the stage inside bubbles that pop and free them when they hit blocks. In fact, a lot of the blocks in this level are merely here for that reason and don't contain items, although you can find Yoshi in a "?" Block early on and there's a spot where a Mushroom actually appears inside a bubble. There's a spot with many "?" Blocks where you can get a 1-Up by hitting them in a particular order; otherwise, they just expel coins. You can also find a bonus game by going down one of the pipes that appears early on too. While this is another level that isn't too hard overall, the amount of enemies can get overwhelming and there are a couple of spots where you have to use either a trampoline or makeshift stepping stones to get around some very large pipes. The latter scenario happens right before the goal and, just to make things harder, guess who's there along with the bubble-encased enemies? Yep, a Chuck, and this one is of the cloning variety so you have to really watch it. And the secret exit leading to the castle is actually the large pipe in question. You just have to go down it to reach the area containing the key and keyhole.
  Forest Ghost House: Being in the middle of the woods seems like an adequate location for a Ghost House in my opinion. This one actually opens in the same way that Ludwig's Castle back in the previous world did, with some cramped corridors filled with enemies. In this case, you have to navigate through them while avoiding Boos (of both sizes) and Eeries. Some Eeries come straight at you so you have to be quick to jump over them, there's a spot where you have to lure a Big Boo away from the mouth of one corridor in order to reach it, and you have to get around groups of little Boos and Eeries (the latter are harder to get around due to their movement patterns; jumping is a sure-fire way to take a hit) in order to get to the larger section containing the door to the next room. This room has a ceiling filled with Boos that swoop down at you so you have to keep moving (there are power-ups to be found here but, as you should know by now, they're useless against these enemies). As usual with these levels, the visible door that you come across at the end leads you back to the beginning. To find the real door, you have to grab the P-Switch that you find, jump through the row of coins to the right of the fake door, and then hit the switch to reveal the silver door. Going through this door puts you on top of the beginning corridor and you just have to walk left to find the door that leads to the goal (in the big open area after this corridor, there's a Cape Feather that you can use to fly up to the top of it without having to do this stuff with the doors). The secret exit is right past this door and you get a Crescent Moon right before its goal (if you've activated the secret path from Forest of Illusion 1, opening this one doesn't do anything).
  Forest of Illusion 4: I don't know how we could still be in the forest when this level suggests that we're in an area outside of it but in any case, this place is infested with Lakitus. A Fishin' type appears at the beginning, just baiting you to grab the 1-Up that he dangles down in front of you. It's tempting but unless you want to get bombarded with Spinies, you'd do well to try avoid it. However, the Lakitu also tries to force you to take it by putting right in your path as you're moving very quickly or in spots where it will be either hard or impossible to get around him without taking the mushroom. After you pass the halfway marker, this Lakitu will stop chasing you but you won't have much time to celebrate because another will soon take his place and this one has nothing but Spinies for you. There are also Lakitus hiding in a lot of the pipes in this area, just waiting to throw Spinies at you when you get too close. Besides the enemies (there are Koopas of all kinds to be found here as well), there are a lot of pitfalls in this level and while none of them are necessarily hard to get across, it's easy to fall to your death when you're too busy dealing with the crap the Lakitus are throwing at you to watch where you're going. One green pipe may not have a Lakitu hiding in it but when you get close, it suddenly extends and if you don't get by it quick enough, you'll have to wait until it returns to normal before you can get past it. There are opportunities for power-ups here, though, and there's a Roulette Block at the beginning that gives you the opportunity for an Invincibility Star so you can breeze through a good chunk of this stage. There is a bonus level here but it doesn't give you anything besides coins (you have to swim around a bunch of Blurps in order to get them) and it actually takes you a little in the level when you exit it so it's best to just ignore it. The section before the goal has a Chargin' Chuck in-between two pipes with Piranha Plants but right before them are plenty of Grab Blocks that you can use to get rid of them without much difficulty. And the secret exit leading to Forest Secret Area is inside a pipe that's hovering just out of your jumping reach, requiring either a cape or using a Lakitu's cloud.
  Forest Secret Area: This short level is like the Top Secret Area back in Donut Plains in that it gives you an opportunity to get some helpful items, including 1-Ups, but this one makes you work for it more. You use one of two winged platforms to cross a large canyon filled with hovering Paratroopas (which aren't hard to avoid), with each one taking a different course to the goal at the end. Both paths have power-ups (the top one has a Cape Feather and the bottom a Fire Flower) and you get an opportunity to snag a 1-Up from a Turn Block too (it's easier to get if you've completed the Blue Switch Palace). Speaking of 1-Ups, there are three of them sitting behind the goal but they turn into coins once you cross it. To get them, you have to enter the level with a cape, take off from the beginning, and fly over the goal.
 Forest Fortress: The fortress that guards this world's entrance to Star Road opens with a familiar sight: an auto-scrolling room where parts of the ceiling occasionally come down to crush you to a pulp. While you can use the same technique as before to avoid getting flattened, it's more difficult this time due to a bunch of Grinders that you have to get around as well and it's nearly impossible to concentrate on both without taking a hit. This is also where it pays to complete the Switch Palaces because if you haven't, there will be pits in the floor that you have to jump over as well. The second room doesn't scroll but it has Grinders that, instead of following a strict path, go all over the place and a lot of Podoboo-spewing lava pits too. I had a lot of difficulty with this section because those Grinders often come out of nowhere and there's one especially tricky section where you have to cross a bridge extending over some lava while avoiding both some Grinders and the Podoboos coming up from beneath you. Just when you think you're in the clear, something appears unexpectedly and hits you, so you have to keep your wits about you throughout this part. There is a "?" Block that contains a feather a little bit before the door that leads to Reznor but only go for it if you need it because you'll have to get around Grinders to reach it. And if you want a real challenge, go around the door to find a very long stretch of lava with numerous Podoboos shooting out of it. You can either fly over it and hope that you don't hit a Podoboo or arc down into the lava or, and this is just insane, Spin Jump across the Podoboos! If you manage to accomplish this hellish task, you'll be rewarded with a whopping nine 1-Ups. I, however, have never had the nerve or the patience to try it and besides, even if you do get across, you still have to fight Reznor so it's not a difficult shortcut by any means. As for Reznor, the only difference here is that the floor disappears at a much faster rate, so you have to be ready to jump on one of the empty sections of the platform.
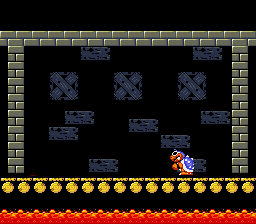 Roy's Castle: Going back to the main path, the first 2/3 of this castle has you riding on a moving, snake-like block platform, much like those coin trails that sometimes appear out of "?" Blocks. First, it takes you over a long stretch of lava and, yes, you do have to dodge Podoboos here. After the lava, it goes through a section where there are spikes on both the floor and ceiling, forcing you to be careful where and when you jump (the platform's twisting, snake-like motion often puts you very close to the spikes). You also have to watch out because some of the spikes on the ceiling fall when you get close and after that section, you have to get off the platform quickly or it will plummet into a pit and take you with it. The last leg leading to Roy forces you to go on foot and it throws a lot of stuff at you during this very short bit. You have to walk across a bridge while dodging Podoboos coming out of the lava beneath as well as the fireballs some Bowser statues shoot at you and after that, there are some of those vertically and horizontally expanding and contracting platforms that you have to get across while dodging fireballs from two more statues and Podoboo-like fireballs that are bouncing off the walls. There's a Cape Feather to be found here so you'd best take it while you can before things get too thick. Roy himself fights a lot like Morton did: he runs up the side of the wall and attempts to jump down on you from the ceiling and you have to trounce him three times to defeat him. While the same rules that applied to that fight are in effect for this one, the walls of this room move closer together as the fight goes on, threatening to crush you if you don't defeat Roy quickly. But even so, it's not a difficult fight.
 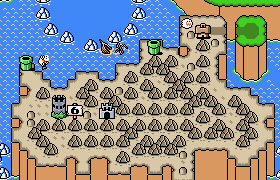 Chocolate Island: We're getting close to the end of the game and, as a result, this is where the game really ratchets up the difficulty on you. You encounter new enemies and trickier puzzles in this world as you journey onwards toward the Valley of Bowser. This world is also similar to the Forest of Illusion in that you have to find the secret exits in the various levels in order to reach the end; in fact, unless you find a secret exit in the third level, you have to progress through a good majority of them in order to reach the castle. In other words, the road's getting trickier and there's no turning back now so you'd best hold your breath, count to ten (yes, that is a lyric from SkyFall by Adele), and prepare to journey onward.
 Chocolate Island 1: This level introduces you to two new enemies right away: the large and harmless Dino-Rhinos that, when jumped on, turn into the smaller but far deadlier fire-breathing Dino-Torch. You really have to watch out for those little walking flamethrowers because they spew fire when you least expect it, in various directions depending upon on the individual, and you can run across them even if you haven't jumped on a Dino-Rhino. Other than that, though, this level isn't that difficult (it's not on the actual Chocolate Island so maybe that's the reason). That said, you will have to play by its rules in order to partake in some of its luxuries. There's a part where you go down a small yellow pipe in order for the green, diagonal-positioned pipe next to it to shoot you over the gap it's sitting next to. You can just leap or fly over the gap but if you do, the Halfway Marker (which you have to use a trampoline in order to reach), all further Dragon Coins, and the Crescent Moon that you can find by flying up to a cloud platform 3/4 of the way into the level will all disappear. But, there are still a couple of blocks where you can find useful Fire Flowers and Yoshi can be found in a block near the end of the level as well (he comes in handy in the bonus area that you find in a pipe near the end where you have to cross over a stream that has a couple of Porcu-Puffers swimming in it). There is one part where you have to activate a P-Switch in order to cross over a row of Munchers as well as get around a leaping Chuck that the switch drops in front of you but that's not too difficult either. Don't let this level's fairly easy nature fool you, though; this world is just getting started.
 Choco-Ghost House: We're only in this world's second level and we're already having to navigate through a Ghost House. The good news is that this one is quite short; the bad news is that the first room has some tricky aspects to it. There are gaps in the floor that move back and forth, groups of Eeries that you have to dodge, and, worst of all, a Fishin' Boo who dangles a flame in front of you, really restricting how much you can jump in order to avoid it and the other obstacles. There's a block containing a Cape Feather near the door to the next room and you'd best take it for, if nothing else, an extra hit. The second room has rows of Boos that move diagonally, bouncing off the walls as they travel, and Boos that disguise themselves as blocks when you look at them but come after you like normal when you turn your back to them. There's a block containing a 1-Up at the end of this room and the door leading to the goal is up on a ledge that can be reached by having those Boos move into position and then use their block forms as makeshift stepping stones to jump up to it (that's actually quite an easy feat). Not one of the hardest Ghost Houses, actually, but then again, there aren't any that I would actually consider out and out easy.
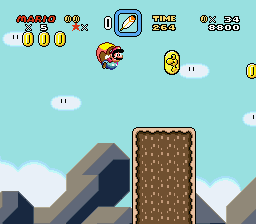 Chocolate Island 2: Now, here's where things get tricky. How you exit this level and where you go next depends on how long it takes you to go through the level and how many coins you have with you as well. The first section of the stage is always the same, with you jumping up some stacked platforms while dealing with some Dino-Rhinos and -Torches and running across a flat area atop those stacked platforms to reach the pipe leading to the next area. The layout of the second area is dictated by how many coins you have. If you've collected at least 21 coins, you'll be in an area with two big gaps that can only be crossed by flying with a cape (this section does provide you with a feather) and you eventually reach a platform with a pipe on it; eight or less coins will put you in an area with a bunch of sloped platforms that you must use to cross over a gorge to the next pipe; and 9 to 20 coins will put you in a difficult spot where you have to get around platforms with Rexes on them (haven't seen them in a while, have we?), jump across pits using narrow platforms and trampolines, and jumping up another stack of platforms and across two pipes with Piranha Plants in them to reach the pipe leading to the next area. The look of the third area depends on how much time is left. If you have 250 seconds remaining, you will be an area with several Chucks, "!" Blocks of all colors hanging in the area, some stacks of Grab Blocks, and the key and keyhole leading to Chocolate Secret past the second yellow pipe here; 235-249 seconds lands you in a sloped area with a bunch of Dino-Rhinos and -Torches leading to another pipe; and 234 seconds or less puts you in a section with no enemies, platforms needed to cross over some water, and a bunch of Mushrooms floating around in bubbles. And finally, the fourth area depends on how many Dragon Coins you've collected, although there are only two variations of this place. Three coins or less will put you in a section where you first have to use a trampoline to get over a pit and then, you must get around five platforms with Rexes walking on them to reach the goal; four or more Dragon Coins leads to an area where you must either use coins-turned-blocks courtesy of a P-Switch or a row of "!" Blocks to cross over a big gape leading to the goal.
 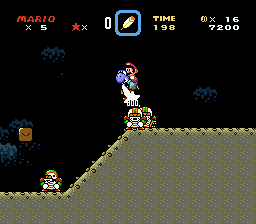 Chocolate Secret: Unlike the previous "secret" stages, this one is actually a level that you must complete. It's located in an area overlooking the Valley of Bowser and completing it leads you straight to the castle level on Chocolate Island. It's a pretty hazardous level as well, forcing you to work for the option to bypass the majority of Chocolate Island. It starts with you having to use a trampoline on a narrow block in the middle of lava in order to get across it (there's a Blargg waiting for you in there too) and get into the narrow corridor on the other side. The corridor has a couple of Buzzy Beetles in it and after that are a lot of Chucks who punt footballs at you from atop platforms and slopes (you have to get above one in order to reach the halfway marker). There's a pipe in this section that leads to an aboveground area that has no bonuses in it at all, doesn't give you much of a shortcut through the actual level, and you have to jump across some falling platforms while dodging the hammers from an Amazing Flyin' Hammer Brother. Back in the main level, the pipe at the end of this first room leads to a vertical passage where you have to drop down a series of slopes while avoiding a bunch of Buzzy Beetles that are crawling around on them. This is made difficult because of the way the camera moves downward: you can't see what's below you until you're almost on top of it so you have to wait until one of the beetles appears onscreen before you can safely take it out along with its companions (one of the slopes has a pit with a couple of Munchers in it). The final section is by far the worst. You have to navigate across raised parts of the floor that have Spike Tops crawling all over them as well as cross a large lava stream with some platforms that sink into them the minute you touch them. After the first set of these platforms, you have to cross a hilly section of the floor with six Chargin' Chucks and after that, there's another set of platforms that sink into the lava and these are mostly sloped (some of them are quite narrow as well). You can finally take a breather after this section because the goal is after the pipe here.
  Chocolate Island 3: Getting back to the main course through Chocolate Island, this is a tricky elevated level where you have to cross a gorge using platforms, many of which rotate around a single block and have either Koopas standing on them or Fuzzies rotating around them. A lot of tricky jumps to be sure, especially with so many enemies getting in the way, so prepare to fall to your death a fair amount of times here, especially if you don't have a cape, which is advisable. A little bit before the Halfway Marker is a vertically-positioned blue pipe that leads to a bonus level with a lot of coins and a Dragon Coin and the exit brings you out near the end, where the only thing standing between you and the goals is a series of rotating platforms with Fuzzies. I said goals because there are two for this level. The main exit can be reached by simply activated a beanstalk out of the block that contains it; to reach the other goal that sits on a platform behind the main one, you have to use either a cape or have Yoshi eat the blue Koopa that you find walking underneath the main goal in order to sprout wings. You get three 1-Ups for reaching this alternate exit and, as I said earlier, it's necessary to reach the next level.
  Chocolate Fortress: We're really into the difficult stuff now. The first room here has pointy, pencil-shaped platforms that you have to get around, several Dry Bones (one of which throws bones at you), fireballs being spewed from off-screen Bowser statues, and pits of boiling chocolate pudding (I've heard other sources refer to it as the typical lava but I like to call it chocolate pudding because that's honestly what it looks like!) Fortunately, there's a block containing a useful Cape Feather as well as a Halfway Marker (the only one to appear in a fortress level) before the door leading into the next room. The second room is a very long hallway filled with Thwomps, Thwimps, and pits with spikes. This is particularly difficult since there are parts where you have to deal with both of those enemies at the same time as well as get over pits (both spiked and normal) while contending with them. However, if you activated the red blocks many worlds back, they will trap one of the Thwimps and beside the boss door (which is brown this time instead of the usual red), there's a green block containing a Cape Feather, which can come in handy in the fight with Reznor if you took a hit while getting here (which is a possibility). In any case, defeat Reznor as you always have in order to move on.
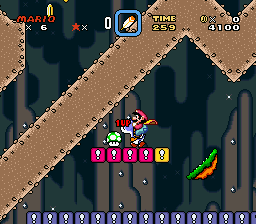 Chocolate Island 4: An underground level featuring more boiling hot chocolate pudding, angled platforms that you must use to reach the other side of the pits of the stuff, and enemies such as Mega Moles and Chargin' Chucks may not be what you want by this point but you just have to grin and bear it. The problem with those diagonal platforms is that there are so many of them hovering over the pudding that you have to be careful about which ones you jump on because some will uselessly head to the ceiling and others will head down straight into the pudding. The Halfway Marker can be found down a pit and you'll be cursing yourself if you didn't activate the blue blocks because without them, you'll have a tough time getting where you need to go and will have to use those angled platforms. You have to use a P-Switch in order to reach the pipe at the end to get to a bonus area. This area has a bunch of power-ups but is full of all kinds of pipes, areas where you have to use a trampoline and actually take it with you, Mega Moles that drop down on you, and other such obstacles. If you don't enter this room, you'll walk along some cliffs, get around a couple of Mega Moles, jump across a stream of the pudding, and come to a hill with a leaping Chuck behind it as well as the goal. Get past that Chuck to get the hell out of here.
 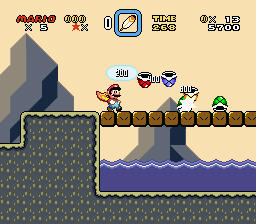 Chocolate Island 5: An aboveground level, this one's gimmick is enemies and items trapped by both normal blocks and used blocks. The first one of these traps that you come across has a bunch of Spinies and a P-Switch that's just baiting you to press it so you'll fall down into them; there is a silver P-Switch nearby that can only be accessed with a cape. There's a block with a Yoshi egg inside of it that you might want to go for as well. After this spot with the Spinies is a pipe leading to a bonus game as well as a Roulette Block before you get into a part that has water as well as Paragoombas and Parabombs descending towards you (it's a good idea to take the Invincibility Star from the Roulette Block in order to deal with these pests). After this is the Halfway Marker where you can find a pipe that leads to a bonus area with Mushrooms floating around in bubbles. These bubbles also contain Cheep-Cheeps as well, which can be defeated instantly when they flop around on land. As you can guess, it's best not to fall in the water with them. Back in the main level, you'll find some moving green pipes that provide access to one of the Dragon Coins, more of those blocks that expand and retract vertically and horizontally, a Dragon Coin guarded by a Chargin' Chuck on top of a pipe, and finally, three more Chucks waiting for you in front of the goal. You should know what to do by now.
 Wendy's Castle: This level is a pain in the ass, especially when it comes to the first section. You've got a long corridor filled with Grinders, a large lava pit with Podoboos that you have to get across, and, worst of all, enormous thorny pillars that come down through the ceiling to skewer you. I absolutely hate this pillars because if one of them gets you, you're screwed figuratively and literally. Those things retract so slowly and your temporary invincibility after taking a hit in this game is so short that you can almost never move away from the pillar before you die. I was absolutely frustrated and angered when I realized that was the case. I actually died that way quite a few times in this level. What makes it even worse is that they often come down in groups and they have this pattern where a couple will stay up while two others come down and it's never two in a row either; it's always one comes down, one stays up, one comes down, and so on or vice versa, so trying to get around these obstacles and keeping the timing straight in your head while avoiding the Grinders that tend to accompany them can be pretty challenging. The good thing is that the level has mercy on you when you reach the end of this section because there's a Halfway Marker before the door and there are none of those pillars in the second section either. The second section, instead, consists of moving platforms and Lil' Sparkys and Hotheads as the enemies. While not nearly as hard as that first God-forsaken room, this is still another case where you have to be so careful about where you jumping and how long you can stay on one of those platforms before you get squished. The fight with Wendy is the same setup as the fight with Lemmy back in Vanilla Dome, except here the pipes are all straightly aligned and there are two Podoboos that bounce around the walls, adding a bit to the challenge. But, in the end, Wendy's not much harder than Lemmy was and if you keep your wits about you, you'll take her down without much trouble.
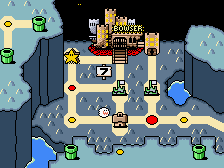 Valley of Bowser: Here we are. This is the last world leading up to the final battle with Bowser, although it's not the last world we'll talk about since we still have Star Road and Special to get to but we'll cross that bridge when we come to it. If you took the Chocolate Secret path in the previous world, you've already gotten a glimpse of this place but now, you must journey through it to reach Bowser's castle and save Princess Toadstool. Oddly enough, the first level that's said to be of this world, which is the Sunken Ghost Ship off of Chocolate Island, is actually the entrance to it; completing it allows you access to the enormous stone Bowser head in the sea that leads to the actual world (and by the way, if we're underground or under the floor of the ocean or whatever, then why is there lightning on the map screen?) I don't think you'll be surprised to know that the game pulls out all the stops in making the last leg of your trek to Bowser as difficult as possible. Prepare to die a lot before you finally reach the castle. This world is also quite long so and you only get a Ghost House as your chance to save before the castle so you'd best rest up before tackling it. So, let's not waste time.
 Sunken Ghost Ship: This is not only the one level outside of the Ghost Houses where you encounter Boos but it's also the sole haunted level where you're actually allowed to enter with Yoshi (not that he's much help since he can't eat any of the undead enemies here). It's a pretty short level but not without its hazards. The first section has you actually swimming into the ship while dodging Bullet Bills but that's simple compared to what you have to face when you actually enter the ship: a room that's absolutely infested with Boos (look at the image to see what I mean) that disappear and reappear in different spots, forcing you to really watch where you're swimming. Some random Eeries and other Boos, including those annoying ones that make up a moving semi-circle, don't make it any easier. My only advice for this part is to stay calm and watch what you're doing with the utmost care. The pipe here leads to a long drop where you fall along with other objects like an Invincibility Star and some Dragon Coins as well as some Koopas and Paratroopas (did they forget how to fly?) After a ledge that contains another star, there are big bunches of coins and some falling mines. Once you see those mines, you'd better aim yourself to the right or you'll fall into some water with them and take a hit. Once you've landed, all you have to do is touch the green "?" Ball (a holdover from Super Mario Bros. 3) to complete the level and enter the Valley of Bowser for real.
  Valley of Bowser 1: You've been in underground mazes before in this game but never one as intricate as this. To get to the goal, you have navigate a complex series of passageways filled with Mega Moles (they're everywhere in this level and become quite a nuisance with how difficult it is to avoid them in these narrow spaces), Chargin' Chucks, and big stacks of blocks that tend to keep you from going further into the level. Those latter instances are really annoying because once you hit them, you either have to hope that there's a Chuck on the other side who will smash his way through the blocks, giving you access in the process (you still have to get around him, though), or you'll have to turn around and go back. There's one spot where you run into a dead end and then have to go back but you have to watch out for the Mega Moles, who seem to regenerate on the level above you to no end (I slammed right into one of those dickheads and got killed several times; when one actually dropped down on top of me one time, I almost came unglued). Of course, dealing with the Chargin' Chucks, often two or more at a time, in those narrow, cramped spaces is just as bad and difficult to do without getting hit. And going back to the issue of letting them create a path for you through stacks of those blocks, sometimes you'll do that and still wind up at a dead end on the other side or arrive at a passage you've already explored, so you have to choose your paths carefully. There are some extra areas to be found here but honestly, I got so frustrated with getting killed and getting turned around that I completely ignored them and just focused on try to find the goal. That said, though, fully exploring this level for items such as Dragon Coins and for those extra bonuses is advisable since it allows you to learn every inch of the place. You just have to keep your eye on that timer, though, and stay patient and you will eventually find the goal.
 |
| That was how I looked when I reached this part without Yoshi due to those Swoopers. |
 Valley Ghost House: The game's final Ghost House, this one is short but not exactly sweet. The first room is simple enough, with Boos and coins, but the second room forces you to hit a P-Switch and choose between going left or right (both paths have enemies that you have to avoid). The left path leads to a room with two Boos, a block with a coin snake inside, a Dragon Coin, and a door that leads back to the room you just came from. This room contains the secret exit leading to Larry's Castle, which you can access by activating the coin snake, using a P-Switch to turn the coins into blocks, and directing it to the right part of the room and have it travel up and right to reach the passage with the key and keyhole (this isn't very easy to do since these coin snakes are so unpredictable). The right path leads to five doors, each leading to a different room. The first door takes you back to the first room; the second door takes you to the same room as the door on the left side of the room; the third and fourth doors both take you to the goal; and the fifth door (which has a 1-Up sitting beside it) leads you to a room with a P-Switch, a Dragon Coin, and some normal coins. I think the right choices are very clear.
 Valley of Bowser 3: You can tell that the developers had an idea for another elevated level but, because Valley of Bowser is inside a large cavern, they decided to just put it inside a very tall cavern (I don't know why since they didn't exactly follow logic beforehand when it come to level placement). In any case, this level's main gimmick is a type of platform with a number on it that collapses once the number reaches zero as you stand on it. It's actually not as difficult as it sounds to navigate through here with these platforms, although it doesn't hurt to have an ever useful cape to make it that much easier, especially since you often find yourself using Paratroopas as makeshift stepping stones to reach the platforms and pipes. Other than that, there's not much else to say about this level. It's a simple A to B level with no secret exits, only one bonus room whose location is very obvious, and there's a useful trampoline right below the high-hanging Halfway Marker. The last section of the level can be a bit tricky, though, especially if you don't have a cape and are forced to jump on the Paratroopas. Banzai Bills make a return appearance here as well so watch out for them. Fortunately, a 1-Up sits on a platform right before the goal so you can use it to replenish one of the lives you may have lost during that last section. But still, considering what you've been through and wait lies ahead, this level isn't that hard.
 Valley of Bowser 4: Another underground level involving you having to cross over pools of lava of all sizes. Get the idea that the developers were running out of ideas by this point? This level introduces a new type of Chuck who typically stands on top of platforms that you walk under and then digs up and throws rocks at you with a shovel. While it is possible to get up to them and jump on them to make them quit shoveling (some you don't have a choice since they're standing right in your path), it's best to just avoid the rocks and continue onwards... doesn't mean you won't get hit, though. I was pretty irritated during one playthrough when a rock came down and hit me right before the Halfway Marker and while the marker, as it always does, made me big again, there were no more power-ups to be found after that and I didn't have an extra one so I wasn't a happy camper (and I did end up falling in the lava thanks to another Chuck, in case you're wondering). There's a pipe near the beginning that leads to an icy cavern with Spike Tops crawling on small platforms suspended over water with Cheep-Cheeps swimming in it and also in the water is a platform with a block containing a Cape Feather. If you need it, it's best to go for it, although you'll have to use it in order to reach the pipe that leads out of this area. Before the Halfway Marker is a spot where you have to climb up a vine in order to continue onward and up there is a block with a Yoshi egg inside it. He comes in handy in activating the level's secret exit. After the latter section where you have to cross over lava while dodging the rocks from the shoveling Chucks as well as a random Paratroopa (the last obstacle is one where you have to use a lone trampoline to jump up to a Chuck in order to avoid his rocks), you find the key right before the goal, underneath some blocks that you can get through no matter what. Yoshi, however, can use his tongue to get the key and once you have it, you just have to hop to the keyhole.
 Larry's Castle: Accessed by either completing the previous level or going through the secret exit in the Ghost House, this is the last typical castle level before you go on to fight Bowser. The first room is another one of these instances where you have to ride on a block snake throughout it in order to reach the door... and, of course, it takes the most dangerous route, getting close to lava, spikes, and Ball N' Chains that are placed throughout. After riding through these hazards, you have a choice as to how you'll go on. You can immediately jump to the door on the top right or you can continue riding the block snake, reaching a lower corridor with a Halfway Marker, two Dragon Coins, and a Mushroom. Both doors lead to the same place but at least this route gives you more lineage. In the second room, you'll get chased Magikoopa again while avoiding Dry Bones, Podoboos, and more of those sharp-pointed pillars that look like pencils. There are two walls of blocks here where, if you don't have a cape that you can use to flip them, you'll have to wait until Magikoopa creates an opening for you with his spells while avoiding the enemies that he tends to create in the process (sometimes he creates 1-Ups). You get a Cape Feather from a block right before the door that leads to Larry so take it if you need it. The fight with Larry is the same as it was with Iggy at the beginning of the game, except this time you have to watch out for three Podoboos that rise out of the lava. It's a bit trickier and, as it was with Iggy, it can be hard to get the platform in the proper position to make Larry fall into the lava but, as per usual, it just takes a little bit of patience.
  Valley Fortress: The final fortress level in the game, this is where you arrive after taking the secret exit in Valley of Bowser 2 and leads to the backdoor section of Bowser's Castle. As the last of these levels, it's pretty difficult. In the first area, you have more of those horrible thorny pillars that come crashing down, more spikes (both those that stay in place as well as those that fall), Dry Bones, and Bony Beetles. There's a block containing a Cape Feather here too and if you take it, you'd better be careful in trying to keep it because, believe me, this level will try to take it away at every opportunity. After that, we have lava, Podoboos, more Dry Bones and Bony Beetles, and, in the final stretch leading up to the door that Reznor waits behind, you have jump across lava and avoid Podoboos while dodging those pillars. Even worse, they move faster here than they did before, upping the difficulty, and the last one actually juts out of the ground instead of coming down from the ceiling in an attempt catch you out. I got killed several times during this last part. It is freaking hard. After getting through this bit, you're really not in the mood to fight Reznor, especially if you took a hit and lost your power-ups, despite how simple the fight always is. But, you got to do it in order to move on to the backdoor of Bowser's Castle.
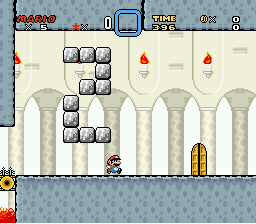
 Front Door/Backdoor: The main route through Bowser's castle leading to the battle with the Koopa king, this gives you a choice as to the path you take to get to him. You first come across a bright hallway with four doors present. The first door leads to an auto-scrolling room with sections of the ceiling that come down to crush you and pits of lava that should be covered by all the blocks you've activated; the second door has a series of wire fences with climbing Koopas and Podoboos bouncing around the room; the third door has a maze of blocks and has some Mecha-Koopas roaming around as well; and the final door has floating platforms with Lil' Sparkys and Hotheads as the hazards. All of these doors eventually take you to another hallway with four more doors. The first door here has more of those thorny Pillars and some Thwomps that you have to get around too (best to avoid this room); the second door leads to an underwater area with bone-throwing Dry Bones, Fishbones, Ball N' Chains, and spikes (I remember getting hit quite a bit here so this is another one you might want to bypass); the third door has gray Bowser statues that shoot fireballs at you as usual and gold ones that actually chase you(!); and the fourth room is simply full of Chargin' Chucks that jump at you (I'd take that one since it's the simplest to deal with, especially if you have a cape). After going through one of these rooms, you wind up in a very dark room with a red block that switches on a light at the top of the screen, enabling you to see where you're going. This light, however, only illuminates what is directly in front of and behind you, meaning most of the room is still dark so you have to tread lightly. The only enemies here are Mecha-Koopas and Ninjis, neither of which are difficult to deal with. This room serves as the entirety of Backdoor, with the only difference being is that there, you come across a Halfway Marker right before the door that leads to Bowser.
 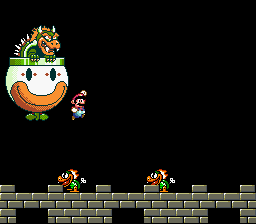 And here we are at the final battle with Bowser. Now, you'd think since he's the final boss of the game, Bowser would be infinitely more difficult than all of the Koopalings were. But, surprisingly, he's very easy. When I played the game in order to do the review justice, I hadn't done so in a long time and yet, in both of my battles with Bowser (I went through both routes that lead to him), I only got hit once and that was just due to stupidity on my part! During the first phase of the fight, Bowser flies around in his Koopa Clown Car, throwing Mecha-Koopas down at you. All you have to do is jump one of the Mecha-Koopas to immobilize them and then toss them straight up into the air so they hit Bowser on the head. You have to get in front of Bowser so his vehicle doesn't block your shots but, despite how he quickly he moves, it's not that difficult. After he takes two hits, Bowser flies off-screen and you have to dodge a couple of series of fireballs that rain down on you. While this is the only part of the battle that I would consider to be tricky, I never got hit. After Bowser comes back, Princess Toadstool pops out of the Clown Car and throws you a Mushroom, which you can put into your inventory. Bowser now tries to drop enormous metal balls dubbed Big Steelies but they're a cinch to jump over. These are what I did take a hit on one time since I stupidly jumped on one of them, thinking that wouldn't hurt me. I learned my lesson pretty quick. After two Big Steels, he drops two Mecha-Koopas down at you again and you just have to hit him on the head twice with them again. After another round of fireballs and another Mushroom from Princess Toadstool, Bowser then attempts to crush you by bouncing around with the clown car but, like the Big Steelies, it's easy to dodge him. Eventually, Bowser throws more Mecha-Koopas down at you and it only takes one hit to put him down. I was truly surprised by just how easy this fight was. Maybe this and the repetitive nature of the levels in this world is what Shigeru Miyamoto when he said that the game's development was rushed during its final stages. But, whatever. The game's been beaten and before we sign off, let's talk about the two alternate worlds here.
  Star World: I know I've been calling it Star Road throughout this review but I've just found out that Star Road are what the portals you find across the map that lead to this place are called. Not that it matters but please disregard all past instances where I've called it Star Road. Anyway, Star World is a bonus world in the game that can be accessed by any one of those portals and completing all of its levels leads you to another bonus world called Special. Star World is interesting from all of the worlds in that it's very likely that you will complete all of its levels out of order, depending on which portal leading to it that you come across first (the first one I played was the fourth level, which you can access outside of the Forest of Illusion; then again, until I thoroughly played the game for this review, I never even knew it existed). These levels also are where you find some different-colored, baby Yoshis whom you must feed to make them grow big and useful. The secret exits are essential to fully completing the world as well; the normal exits don't open up paths to the other levels.
 Star World 1: This one is simple. It's a vertical underground level (yet, it doesn't have the theme for underground levels playing in it) stacked with blocks that you have to make your through using either the Spin Jump or cape spins. This level also has a lot items, ranging from Invincibility Stars, 1-Ups, and Cape Feathers among others and which ones you find depend on which side of the cavern you choose to explore. Unfortunately, when you use the Spin Jump, you just go straight down and can't stop until you break through the blocks. If you see some items anywhere other than directly in your path, you won't be able to get them. Having Yoshi doesn't make the Spin Jumps any easier; in fact, I think he makes it just a little bit worse. That's why it's best to have a cape with you when you enter the level and not have Yoshi. Speaking of which, there is a red Yoshi near the bottom of the level and since there aren't any more really important items down there, you might want to grab him. While there are Koopas and Paratroopas of all colors here, they're not much of a nuisance and they come in handy when feeding the red baby Yoshi. Finding the normal exit is simple enough; just make your way to the bottom of the level by going through all of the blocks and go through the pipe you find down there. If you want the secret exit, you have to Spin Jump down through the right part of the level until you find a section with the key and the keyhole.
 Star World 2: A swimming level, this is another one that's fairly simple: just swim forward while avoiding the abundance of fish enemies, including Blurps and Rip Van Fish. As per usual, a Fire Flower works great here but at the very beginning, you're treated with an Invincibility Star and an egg containing a blue Yoshi. You can either take the star for yourself (if you do, the "?" Block you encounter later in the level will have another one for you) or you can feed it to the blue Yoshi, causing him to instantly grow into an adult; either method works well. If you're not well equipped to deal with the enemies or you're just not in the mood, you can swim up to the top of the level and stay up there as you journey through, bypassing the enemies. The normal exit can be found by just falling the level to the end. The key and keyhole of the secret exit can be found directly underneath the pipe leading to the normal exit; you'd better not swim down too far while trying to reach it, though, or you'll lose a life.
  Star World 3: A ridiculously short elevated level, the normal exit can be found by simply heading right as soon as you enter the level. However, the secret exit is a little bit tougher to get to. You have to knock out the Lakitu that's bombing you with Spinies with one of the many Grab Blocks that make up the path of this level or with a fireball if you're Fire Mario. But, the thing is, that's not as easy a task as you would think. First, when you're getting the Grab Blocks, you have to be careful about how many or which ones you grab because you could end up falling to your doom. Second, the Lakitu is tricky to hit, particularly with the blocks, because of how fast he moves and his constant bombardment of Spinies can pile up and become a hazard if you don't get him quick enough. And third, even if you get the Lakitu, you have to be sure that you whack him when his cloud is in a position to where you can reach it; if not, you'll have to wait for him to respawn and try again. Once you finally succeed, you use the Lakitu's cloud to go straight up through a gap in the blocks above you, get the key out of the "?" Block on the top left part, and then bring it to the keyhole on the right.
 Star World 4: Another elevated level, this is the first Star World level I played and it's one goes back to basics, being a simple platforming stage where you have to dodge enemies. The only baddies here are Koopas and Paratroopas, there are no Dragon Coins to be found (in the original Super NES version, anyway), and there's one "?" Block that gives you a Cape Feather, which comes in handy throughout a majority of the level, allowing you to bypass a good number of the obstacles. There's an egg containing a red Yoshi at the beginning and you can also have him eat a blue Koopa shell and fly throughout most of the level that way. As usual, the normal exit can be found by simply following the level through to the end. Getting to the key and keyhole requires a jump that is so much easier if you've completed the red and green Switch Palaces. It is possible to jump off the platform and reach the section containing the key and keyhole but it's pretty difficult, especially so if you don't have a cape (actually I don't even know if that is possible). In addition, you have to bring a Koopa shell with you if you don't have a cape in order to get the key out of the block that contains it.
 Star World 5: To me, this is the most difficult Star World level by far or, at the very least, the most annoying. It starts off okay, with you crossing over some falling platforms while getting around Paratroopas (although, to be fair, I did mess up and fall to my death a couple of times, though that was mainly because I was getting impatient due to what's ahead) but the trouble starts when you get to the next solid platform. The "?" Block you find there has a coin snake in it that you must turn into a block snake using the P-Switch you find there as well in order to get across the very long gap that follows. As I've said before, the coin snakes are often very hard to manipulate into going the right direction and what makes it even more difficult here is that you have to make sure that, when it first comes out of the block, it doesn't go straight up too far or you won't be able to get on it to begin with. So many times the damn thing either went up too high for me to reach or I ended up making it go left instead of right and by the time I finally got it turned around the right way, the P-Switch either ran out or the snake wasn't able to get far enough to be useful. And if you mess up, you don't get a second chance. You have to kill yourself and reenter the level to try again. After a lot of trial and error, I finally was able to make it across the gap, although it sometimes ran out to where I had to use the Paratroopas you come across as stepping stones to reach the next platforms. Eventually, you come to a yellow Yoshi egg and he comes in quite handy since afterward, you'll have to deal with Spinies and Koopas walking around in-between the pipes you find. There's one spot where you have to carefully go up some falling platforms that are placed in a stair-like formation but other than that, the rest of the level isn't too hard. Getting to the secret exit, though, takes some effort. I got to it by simply going back to Star World 2, getting the blue Yoshi you find, and using him to fly up throughout the level, reaching the platform where you can find the key and keyhole (he can fit through the cramped, platform sections that lead to them, though). You can also fly up there with a cape, either from the beginning (which isn't easy) or from the block snake but I find using the blue Yoshi is much easier. It's best to have completed all of the switch palaces too since those blocks make reaching the exit less difficult.
  |
| Incidentally, that symbol above the name is that of the Super Famicon, the Japanese version of the Super Nintendo. |
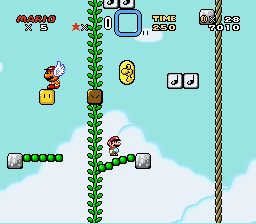 Gnarly: The Hint Block at the beginning of this level expresses surprise that you've made it this far and tells you that if you complete the Special Zone, you can explore a, "strange, new world." I said up above, that's really not true but regardless, I knew I was in for it when I first tried this level and kept messing up. The first part of this level is a vertical section where you have to use springboards on the walls as well as trampolines to work your way up and over to the right. While getting up there for the most part isn't a problem, it starts getting tricky when you reach four blocks that all activate vines and you have to choose which one is the right one. When I got to the part where a red Paratroopa is flying in place, I somehow messed up and was unable to journey farther up. I can't remember exactly what I did but I know I was irritated because, since I'd accidentally taken out the Paratroopa, I couldn't get myself killed and since I hadn't beaten the level before, the Pause/Select tactic didn't work so I was forced to wait for the timer to run out. In any case, while you do activate a vine at that spot that leads to the top, the best method is to take the P-Switch you also find, use the nearby Note Blocks to spring up to the top, hit the switch, and use the "?" Blocks that it activates to head down the other side of the stage. Just be careful when you get down there because there's a lone Koopa there and the first time I finally managed to get down there, he walked right into me as soon as I landed. You have no idea how angry I was when that happened. After you go through the pipe down there, you end up in a grassy plain area where an Amazing Flyin' Hammer Brother, a pit of Munchers, and a Lakitu are all that stand between you and the goal. If you have a cape, it's as simple as flying over to the right (there's nothing but an empty space over to the left); if you're like me and were unable to keep that power-up by the time you made it here, you'll have to use another P-Switch to activate a bridge of "?" Blocks to cross over the Munchers, get rid of the Hammer Brother, use his platform to make it over to the ledge, and dodge the Lakitu and his Spinies to make it to the goal.
 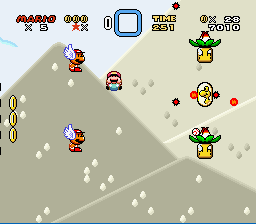 Tubular: The first level was annoying but this one is just evil. The first part is easy enough, with some pipes that house Piranha Plants and some jumping Chucks that you have to get across (best to avoid landing on one of the Chucks because you're likely to get bounced down the pit), but after that, things get very, very unfair. The majority of the level consists of a very large gap and you have to use the P-Balloon to get through it. The first one requires you to jump off the right side of a pipe, use a trampoline down there to hit the block, and then use it again to jump up into the balloon. Getting through this level is a pain because you have to dodge baseballs and footballs thrown by Chucks, fireballs spewed by Volcanus Lotuses, and Paratroopas who hover right in your path and are actually much more annoying here than they have been before. That first P-Balloon won't get you through the entire section so you have to find two more in the various "?" Blocks you find hovering in midair throughout this part... of course, try to concentrate on doing with all of this crap you have to dodge. And even worse, if you don't know where the balloons are, you can run out of hot air while trying to find them, which I did several times. Grabbing power-ups out of the blocks is not advised either since you'll immediately lose the air from the P-Balloon. I did this level quite a few times because I kept getting hit and by the time I finally managed to reach the goal, I was really losing my patience. My only advice is to stay patient and keep trying.
 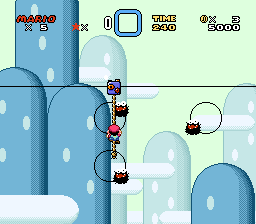 Way Cool: This level is anything but, "way cool." In the first part, you ride on a series of platforms traveling along a maze of wire paths and you have to hit On/Off Switches along the way in order to find the correct path. This is where the difficulty comes in because you have to be very careful in which path you take and when you hit one of the switches because you could end up either falling or going back the way you came. And you have to avoid Fuzzies and buzz-saws on the paths as well. This is another part that I found to be very frustrating. It seemed like during every attempt, I either took a bad path or ran into an enemy. There is a pipe up near the top of this part that leads to a block containing a Yoshi egg and the exit pipe of that room leads you to another block that contains wings, allowing you to skip the rest of the level. If you're unable to get to Yoshi or you don't have a cape on you, you'll have to go through that awful first section and then the other one, where you have to hang on moving ropes and jump on moving platforms while avoiding Fuzzies (this section isn't nearly as bad as the first, to me) in order to reach the goal. Starting to realize why that Hint Block said that few had made it to this world, yet?
 Awesome: A platform-filled level that uses the gimmick of ice, this one is straightforward since there are no bonus areas but the frozen platforms and ground make for difficulty in keeping your traction. It doesn't help that there are a lot of enemies here, mainly Koopas and Rexes, and a lot of the Koopas are the shell-less type that kick other shells at you. They often show up at the end of very curved platforms and areas of ground, with the slippery nature of the level making it very difficult to dodge these projectiles. There are also a couple of Koopas who turn in whirling shiny shells here as well and definitely don't want to be around them on this type of terrain. The latter portion of the level introduces some slippery purple arches as platforms as well as random frozen blocks and pipes that are a nightmare to get across because they're so narrow. And guess who shows up to greet you here? Banzai Bill. Yep, those overstuffed Bullet Bills suddenly start coming at you and while they go right over you when you're on the first series of arches, the frozen pipes, blocks, and latter put you right in their path so you have to do some fancy jumping in order to get over them without slipping off to your doom. After the last purple arch, you have to be very nimble to first jump on the Paratroopa there and then off of the frozen block he allows you to reach in order to get to the goal. Isn't winter just grand?
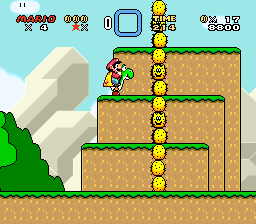 Groovy: They really must have been running low on ideas because this level is very, very brief and doesn't have that much challenge to it. It's a typical aboveground level filled with Koopas and, most prominently, Pokeys. You find a block containing a Yoshi egg right at the start and you can use one of the Koopas' shells to access it; good thing too because Yoshi is what makes dealing with all of the Pokeys in the latter half of the level so simple. You can just slurp them all up or simply jump on their heads with Yoshi in order to get around them. There are some Volcanus Lotuses above the Pokeys, as well as one that's down on the ground, but if you keep moving and quickly deal with the cacti (heck, you can even bounce on the Pokeys' heads to get up and eat the plants), they shouldn't be that much of a problem. And even though there are three baseball-throwing Chucks, a Volcanus Lotus, and a Pokey all right before the goal, I don't remember having much trouble with them. I may have lost Yoshi due to getting hit but when that happened, I just ran for the goal like mad. Really not much else to say about this level since it's so simple and familiar.
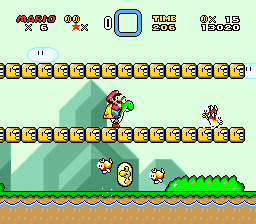 Mondo: This starts out as a seemingly normal level but once you start journeying through it, you will immediately become aware of its gimmick: it systematically fills up with water and then drains just as quickly. This adds a layer of difficulty to the proceedings since you become much more vulnerable to some of the enemies present, especially the Amazing Flyin' Hammer Bros., when you're stuck trying to swim and there are a lot of Muncher pits here so you have to be careful about being close to one when the water starts drain. And, as you'd expect, the Cheep-Cheeps that you find harmlessly flopping on the ground here will become a pain once the place fills with water, especially if you don't have a Fire Flower to use against them. There is a Cape Feather to be found in the first "?" Block (which is suspended over a Muncher pit, I might add) as well as a Yoshi egg. If you want to put the cape to use, you can use any of the long stretches of dry land that you find to take off after the water has temporarily drained and fly over a good chunk of the level. The second blue pipe that you find does lead to a bonus level but unless you're going for Dragon Coins, you might just want to bypass it since it has nothing else aside from regular coins. All in all, I wouldn't say this is a very difficult level. It can just be a little annoying (I do remember dying a couple of times here).
 Outrageous: Outrageous is right. This level is awful! It definitely ranks as one of the hardest in the entire game. As with past levels in this world, the first part is the worst. You have to navigate through a myriad Bullet Bill turrets, often having to deal with two or even three at a time from each direction, and there are some that are so tall that you either have to use one of the bullets it fires to jump over it or take the trampoline you find at the beginning with you. Neither method is particularly easy, especially when you're getting continuously shot at, and it only gets worse from there. Trying to dodge all of these bullets is a bitch and a half, there are other enemies like Wigglers, jumping Piranha Plants, and hopping fireballs, and, trust me, you will have to take a trampoline with you in order to finally get out of this part when you come to a tall orange pipe that you can't get around normally. The only other way to get past this spot is to fly with a cape but I always ended up not having one when I entered this level and if you do, good luck keeping it long enough to get through here. There are enemies on every stretch of land that make trying to take off harder than it should be. The second part of the level isn't much better and, much to my frustration, I actually got killed here a couple of times and had to do the whole freaking level again! You must contend with more Wigglers, Amazing Flyin' Hammer Bros. whose platforms you have to use to get around more tall pipes, more jumping fireballs, Goombas and Cheep-Cheeps that explode out of random blocks hanging in the air, and Piranha Plants that spit fireballs of their own as well as jump. There's a block containing a Yoshi egg in-between two pipes housing those Piranha Plants and a Wiggler but, despite the frustrating location, you will definitely want to go for Yoshi since he makes this a bit easier. The Bullet Bills do come back in the bit leading to the goal (though not nearly as many) and there are two of those as well as a Wiggler and a Hammer Brother right before it. Perfect way to cap off such a pain in the rear level.
 Funky: The final level of the entire game, this one is extremely long and you're only given two minutes to complete it. What I didn't know is that if you enter with Yoshi (you can find an egg early on in the level but it's very high up and hard to reach), you can have him eat the green berries to add to your timer. I really wish I had known that because I cut it very, very close when I finally got to the goal. At one point, the level begins a pattern of having you deal with two Sumo Bros., two Chargin' Chucks, some Grab Blocks, and another Sumo Brother standing on some Note Blocks. It repeats this pattern until the end, with some Koopas thrown in here and there. There are three baseball-throwing Chucks right before the goal as well. I didn't have time to deal with them so I just jumped over them and ran like a maniac to the goal. I'm not kidding when I say that I almost ran out of the time before I reached the goal. I was able to read the words, YOU ARE A SUPER PLAYER!, but still, I was so under the gun that I wasn't able to take them in. But, in any case, when I crossed that finish line, it was quite satisfying to think that I had finally fully completed Super Mario World over twenty years since I first played it!
After completing Special, you will notice the changes that occur to the game's graphics. The map screen's colors change, becoming fall-themed and orange rather the green, springtime feel it normally has; the Koopas and Paratroopas now wear Mario masks; the Piranha Plants develop pumpkin heads and so do the beanstalks; and the Bullet Bills become Pidgit Bills, modeled after that enemy from Super Mario Bros. 2. The changes aren't drastic or anything and they don't serve much purpose other than being amusing but they are still fun to see when you enable them.
 What else can I possibly say about Super Mario World that I haven't already in this extremely long review? It was simply one of the cornerstones of childhood and I think it still holds up to this day. It might not be my absolute favorite Mario game but it's still undeniably a classic of the 16-bit era of gaming and one of the highest points of the Nintendo mascot's legacy. If you're a gamer that was born around the same time I was and you never owned this game or even played it, then I don't think you had a complete childhood. That's a bold statement, yes, and it's no doubt to the fact that I simply cannot remember a time before I had this game, but I'm willing to stand by it because that's just how it is to me. In any case, thanks for sticking with me through this extremely long review (if you've read this whole thing, then you're truly a fan) and we'll see you the next time I tackle a game from my childhood.