 You ever have that Christmas present that you asked for, not because it was something you really, really wanted, but it was just something you felt that you should own simply out of necessity or loyalty, whatever the case may be, to the franchise that it was part of? That's what this game was to me. When I received it as a gift in 1996 when I was nine years old, it was hardly the present that I was most eager for. Not only had Donkey Kong Country 3, the latest entry in that game franchise that I absolutely adore, been one of my other presents but I also received the revolutionary Nintendo 64 along with its launch title, Super Mario 64, which was what everyone was talking about that year and I thought was the most amazing thing I had ever seen. With those amazing games for me to play, Yoshi's Island took a very distant backseat. While I did fire it up for the first time fairly early on, I didn't really start playing that game until quite a while after the Christmas holidays had ended. Although I do remember liking it when I finally got into it, that first little playthrough didn't impress me that much. Maybe it was just because I was more excited for those other games or that it looked rather old-hat in terms of graphics compared to them but I do remember my attitude about it being something along the lines of, "Whatever." But, like I said, when I finally did get around to playing it seriously, my opinion of it did change and while it's not one of my absolute favorite Super NES games, I can safely that if I ever did a list of my all-time favorite video games, it would be on there. It's enjoyable to play, has an appealing visual aesthetic to it, the gameplay is quite unique in many aspects, and one thing it's definitely not lacking is challenge. In fact, I'll go ahead and say that while I do very much enjoy this game, the difficulty of it often reaches unbelievable levels. The original Super Mario World definitely had some frustrating and challenging levels but I don't remember getting as irritated and angry at that game as I often have with this one. The later levels of this game, as we'll see, are so difficult that it'll make you wonder if the developers weren't sadists! That's what we'll mainly be discussing in review: how Super Mario World 2: Yoshi's Island is a good game but it's also one difficult and ruthless son of a bitch!
Even though the American title suggests that this was intended to be a sequel to Super Mario World, what becomes immediately obvious upon just looking at the cover art for the box as well as reading up on the game's story is that this is more of a prequel, taking place when Mario and Luigi are just little babies. Indeed, despite the Super Mario World 2 moniker, most people that I knew growing up, as well as myself, and even people that I talk to today often simply refer to this game as Yoshi's Island and for good reason. This is very much Yoshi's game. He and his brethren are whom you play as and baby Mario is mostly just a MacGuffin that the baddies of the game are after and that you're trying to keep out of their hands. Therefore, I don't think putting the Super Mario World name on the game was necessary and it would have done just as well and be as beloved as it is if it were actually just called Yoshi's Island. But I digress. The story of the game is that one night many years ago, while delivering the twins Mario and Luigi to their parents, the stork is attacked by Kamek, a Magikoopa and guardian to the then infant Bowser, in an attempt to kidnap the babies. While Kamek manages to get ahold of Luigi, Mario falls from the clouds and lands on Yoshi's Island, more specifically on Yoshi's back. Immediately afterward, the stork's map falls from the sky as well and Yoshi, unable to read the map himself, takes it to the other Yoshis to see if they can help. However, baby Mario himself knows where to go due to the bond he shares with his brother and the Yoshis, in turn, decide to take him to Luigi's location using a relay system where one carries him through a different part of the island. However, the journey isn't going to be without danger because Kamek realizes that he only got one of the babies and sends his minions to finish the job. And thus, the adventure begins...
When I was a kid, I, for some reason, didn't like the idea of Mario, for the most part, being nothing more than a helpless infant whom you have to piggyback across the island. It was due to two things: one, since the game was called Super Mario World 2, I expected that meant that you could play as Mario as well as Yoshi (which, as we'll see, isn't exactly wrong but wasn't enough to satisfy me) and two, the thought of seeing Mario as a baby kind of hurt his cool factor for me. Maybe kids just don't like seeing the characters that they love as kids themselves, let alone babies, but whatever the reason, I tried to pretend that this baby was Mario's son and that the baby Luigi was his adult namesake's child as well. Of course, that meant I would have to say that the baby Bowser whom you battle at the end of the game was simply Bowser's kid too and that would no doubt be too much of a coincidence for this theory to hold water. But, actually, I wasn't entirely wrong since this infant form of Mario became a separate character in many games to follow, appearing in other games like Mario Golf and Mario Tennis (I think he may have been in some of the Mario Party games too) alongside his adult counterpart. It shows that there really is no continuity with all of these games: in this instance, baby Mario is simply Mario as a baby and yet, in future games, he's his own character, possibly Mario's own son (does that mean Princess Toadstool is the mom?) or just an infant relative of his. As fun as it can be to try to figure some of this stuff out, it's best not to dwell on too much or be very serious in trying to decipher it because you'll drive yourself nuts.
Technically, this isn't the first game to feature Yoshi as the star. He'd been in a few little known games beforehand but, while I've never played them myself, I've heard that they were hardly worthy vehicles for him. Yoshi's Cookie and Yoshi's Egg (the latter commonly called just Yoshi) were Tetris- like puzzle games released for the NES, Super NES, and the Gameboy (the latter game was only released for the NES and Gameboy), whereas Yoshi's Safari was a Super NES game which, weirdly enough, was a rail-shooter (the only Mario that I'm aware of that was of that genre) featuring both Yoshi and Mario and was one of the few games to make use of the bazooka-like Super Scope. Shigeru Miyamoto didn't care for these games (I don't think he was involved in their development) and said that his incentive for creating Yoshi's Island was to make a game that was authentic and true to Yoshi's character. Well, I can definitely say that he succeeded in that regarded because, not only was this game more critically and commercially successful than those other games combined but it started a franchise belonging solely to Yoshi, with a Nintendo 64 sequel called Yoshi's Story coming two years later, a Gameboy Advance remake of this game titled Yoshi's Island: Super Mario Advance 3 being released in 2002, a Nintendo DS sequel to this game simply called Yoshi's Island following in 2006, and at this time, a 3DS follow-up called Yoshi's New Island is scheduled for release in 2014. This is why Yoshi went from a mere sidekick to now being just as popular and well-known as Mario himself.

In terms of their gameplay, Yoshi's Island and Super Mario World remind me of the relationship between the first two Super Mario Bros. games. While it took a lot of its gameplay cues from Mario Bros. 3, Super Mario World kept the tradition that was started by the original Mario Bros.: you can run, jump on enemies, you're dependent on power-ups to be able to make it through levels more easily, and if you take a hit from an enemy, you lose the power-up and if you get hit again when you're at your weakest, you die. Yoshi's Island, however, is vastly different in those aspects. While there are power-ups and other such items that we'll get into later, you don't lose them if you get hit by an enemy. In fact, the only way you actually die in this game is if you fall down a pit or touch lava or instant-death spikes. When you take a hit from an enemy, baby Mario will become separated from you and start floating around in a large bubble while continuously crying (you will grow to really hate the sound of his crying in time, I assure you). As he does so, a timer will start counting down and if you don't get baby Mario back before it reaches zero, Kamek's Toadies will come in and take him away, causing you to lose a life in the process. It stops as soon as you get Mario back and the timer has fallen below ten when you do so, it'll slowly reset to ten, which I think is fair. The only problem with that is if you get hit again before the timer is able to reach ten, you'll have less time with which to save Mario. This idea of a timed "life-meter" is what makes the gameplay of this game distinctive. Adding to that distinction are the moves that you can pull off. Of course, you have the usual stuff like running, jumping (including a useful hover move that save you from falling to your death), and stomping but just as, if not more important than, those basics is Yoshi's ability to swallow most enemies whole and turn them into eggs. You can carry up to six at a time and you can use them in a throwing move that you must master in order to progress through the game and to get a 100% score at it. When you first attempt to throw the eggs, it seems a bit tricky since the aiming cursor, for the most part, moves around on its own accord, especially when you have to hover and throw since it tends to aim straight up in those instances (although you can lock it in place with the R/L buttons), but as with everything else practice makes perfect and the more you play the game, more adept you become at throwing eggs. And like I said, this technique is essential in getting through the game and acquiring a high score because, not only can you use the eggs as projectiles against enemies, you can also use them to acquire items that are out of reach and, in some instances, to clear a path for you when you seemingly have nowhere to go.
Like Super Mario World, most levels have a halfway marker (in this case, a ring that you jump through) where you'll start at if you die and like that game, jumping through it also does something special for you: it adds ten seconds to your Countdown Timer, which can go up as high as thirty and is significant in a way that I will explain presently. And like before, at the end of each level (save for boss levels) is a goal that not only ends the level once you pass through it but also gives you the chance for a bonus challenge, although activating it is a bit different from accumulating a large sum of points across levels as it was in Super Mario World. Again, I'll talk about those differences soon. However, journeying through the worlds of the game is a more simplified version of what was employed in both Super Mario World and Super Mario Bros. 3. There's still a map screen but it has no twists and turns or different paths to take to complete a specific world. It's as straightforward as you can get: you move onto the next world after you complete all of the levels of the one you're currently playing. There is, however, one extra level (and bonus) to each world that can be unlocked by getting a perfect score of 100% on all of the world's normal levels but completing all of them isn't necessary to progress through the entire game. They're mainly meant as challenges (which they definitely are) for players who've really mastered the game's most complex skills and techniques and are also necessary to get a perfect score for the entire game, although the only thing that gives you are bragging rights. But, given how difficult this game is near the end, it might be worthwhile for you to tell your friends that you got a perfect score on every single level.

Getting a score of 100% on a level requires you to pass through the goal with thirty stars, twenty red coins, and five flowers, all of which you can find strewn throughout the level, in your possession. This is easy enough to accomplish in the first couple of worlds but as the game goes on, it becomes much more difficult, with the items either being placed in hard to reach or find areas or the enemies and the levels' own attributes making it difficult for you to collect them. Getting through the goal with thirty stars in tow can be a big headache in particular because the stars are tied to your Countdown Timer. You can have thirty stars when arrive at the goal but, before you know it, you could take a hit from an enemy and lose a couple, ruining your chances for a perfect score. Even worse, you could have no way of exiting and re-entering the level or killing yourself in order to try again so you'd just have to jump through the goal anyway. Also, while a lot of the levels seem to hand stars out like a candy, you can't afford to get cocky because, even if you're stacked with stars and are a fair distance from the goal, you could still take hits from enemies, lose some stars, and then, in the last leg of the level, there could possibly be no more to be found and, unless you had one of the special items that gives you more stars, you'd be screwed. Trust me, those stars will really become the items you will hate to have to collect after a while. Not only are red coins hidden in secret places but they often hide in plain sight, disguised as regular coins and only reveal their true nature after they're grabbed. In the image I've posted at the top left, you can see the different looks of coins throughout the game. The middle one is typically what a red coin looks like when it's disguised as a normal one... typically. Sometimes, though, they don't look that obvious, meaning that color twinge is not something you should totally rely on and you should simply try to grab as many as you can when you find them in a row (you can also tell them apart by the fact that they twirl in the air just a little bit slower than normal coins). And as for the flowers, not only is collecting all five of them required to get a perfect score but it's actually something you might want to do anyway since getting all five will give you an extra life and if you have all of them when you jump through the goal, it'll increase your chances of being able to play a bonus game where you can earn some more lives or very useful items, depending on the game.


The items and other useful objects to be found in the game are quite varied. The most common are your eggs, which most often are just green and don't do anything special. However, if they get banged around a lot when you throw them and you manage to get them back into your inventory before they get knocked out of existence (this happens if they get hit one too many times), their color will change from green to yellow and to red if they take another hit and items will come out of them after they break: yellow eggs produce a couple of coins and red ones hatch out two stars (if you already have thirty stars then the red eggs, as with everything else that has the potential to contain stars, will have coins instead). Every now and again you'll come across a silver egg that actually houses one of that level's red coins and if you're going for a perfect score, you'd better be careful where you throw it. As with most other Mario games, coins are also in abundance here and accumulating a hundred throughout various levels at a time grants you an extra life (red coins are included in the amount of coins that you currently have). And, weirdly enough, watermelons prove to be very useful items in this game. Like the eggs, they come in three different colors and while they can all be used as weapons, each does something different. The normal green watermelon enables you to spit seeds at your enemies and while some are only momentarily stunned or flung backwards by them, others can actually be taken out by these seeds, which makes me wonder what kind of watermelons these are. Swallowing a full watermelon gives you a full compliment of seeds, while swallowing one that's been half-eaten only gives you a few. And like eggs, the seeds can also be used as a way to reach items you can physically get to or to break your way through certain blockages in your path. A red watermelon enables you to spew fire out of your mouth and not only does this take out most enemies but in the game's arctic-themed levels, you can melt blocks of ice with this ability. You only get three blasts per watermelon, though, and the same goes for the blue watermelon, which gives you icy breath that can freeze enemies solid, enabling you to walk over or jump on them and smash them to pieces! I think that's probably my favorite type of watermelon, even though you can't do the reverse of the red one and use it to extinguish flames or freeze lava. And finally, you have Super Stars, which enable baby Mario to actually do something than act like a crying piece of luggage. Grabbing one of these stars turns him into Superstar Mario, granting him temporary invincibility, the ability to run straight up walls and across ceilings without falling, touch and walk on spikes that otherwise mean instant death, and a small yellow cape that enables him to float and glide across long distances. All this time, Yoshi gets placed inside a huge egg and is dragged around behind Mario! However, while there are often other stars to be found in these sections to make the change last longer, they don't last long at all so you'd best grab the next one the minute you see it.


 In addition to the regular items, there are special ones that can be won in many of the bonus challenges you come across throughout the game. After you've acquired them, they can be used at any time during a level (save for when you're fighting a boss) by pausing the game and selecting one from the menu at the bottom of the screen. You can carry up to 22 of them at a time. The best ones in my opinion are the 10-Point and 20-Point Stars since they are such life-savers when you take a hit before you reach a goal and don't have any other way to acquire more stars. It is a shame, though, when you have to waste one of these when you're only missing one to five stars, as I've often had to, but still... If you're out of eggs, have no way to get more, and need some in order to accomplish a task, the Full Egg is what you need. As the name suggests, activating this fills your egg supply up to the maximum of six. Another useful method to acquire stars as well as to clear out a swarm of enemies is to use the Anywhere POW item, which turns all onscreen enemies into stars. A similar item is the Winged Cloud Maker, which turns all onscreen enemies into Winged Clouds. However, this is mainly useful in getting rid of a bunch of troublesome enemies because all these clouds will give you as items is a single coin each (there was one time when I used it because I was hoping that the enemies-turned-clouds would contain stars, which I needed, but I was severely disappointed). If you're sick of looking for red coins that you just can't seem to find, you should use the Magnifying Glass, which makes them completely visible, including those that are hiding amongst groups of regular coins (they also reveal invisible Winged Clouds). Finally, we have the Super Watermelons, which come in all three of the different colors and instantly put one of the melons into your mouth. You also have a lot more ammunition than you do when you come across one of the melons in a level.
 In some levels, you come across Morph Bubbles, which transform Yoshi into one of five different vehicle forms. These forms are not only useful but are often essential in acquiring all of the important items in a given level such as red coins and flowers. However, these transformations are all very temporary, lasting up to twenty seconds at a time. Like the Super Stars, you're often given other Morph Bubbles in these particular sections to keep the form for a little bit longer but if you run out of time before finding one or coming across a Yoshi Block, which automatically turns you back into your normal form, signifying the end of the section where the other form is necessary, you'll be flung back to the location of the first bubble you touched and revert back to your normal form there. Sometimes you'll have the option to try again if you didn't make it to the Yoshi Block or get everything that you were going for but other times, you'll only have one shot at whatever you're trying to do; fail and you have no choice but to continue on through the level. Helicopter Yoshi can fly around a section and grab items that you couldn't normally reach but the downside is that if you hit an enemy, which tend to be in your path during these instances, you'll fall uncontrollably for a little bit, which can lead to losing a life if you're above a death pit when it happens. Mole Tank Yoshi can dig through soft ground, fit in small spaces where Yoshi can't enter in his normal form, and can even climb up walls and along ceilings without falling. Unfortunately, I often find this form to be difficult to control, especially when you're in an upside down section, which seems to mess up the controls and causes me to go in directions I don't want to, wasting time in the process. Submarine Yoshi not only allows you explore underwater sections that you normally can't since Yoshi can't dive but you can also firing homing torpedoes at the enemies you come across down there. But, getting hit in this form has the same effect as it does when you're Helicopter Yoshi: you fall and this can either waste time or cause you to lose a life if it happens when you're swimming very low in an underwater section where there's no bottom. Car Yoshi's function is that he can move faster than normal Yoshi, he can stretch his wheels upwards in order to avoid enemies on the path ahead, and can even go up walls if you use that technique while near one. And finally, there's Train Yoshi, which is by far my least favorite of the forms. You use this form to move along train tracks that are drawn on the walls in specific sections of some levels in order to reach items that are found there. Unfortunately, chalk drawings of enemies that are also up there come to life while you're doing this and if they hit you, you temporarily lose control of the train and lose time as well. Even worse, you're absolutely helpless in this state, with only the ability to go faster in order to outrun those enemies. And turning on to different tracks here can also be a little difficult to do since it depends on how you're positioned in relation to them. It's especially hard when you're busy trying to keep from getting hit by an enemy by going as fast as you can.
 In some of the snow stages awaiting you are sections where you must enter a small hut and come out wearing some skis to use to get through these parts. The controls are as you would expect: you press forward to go faster and press back to slow down. These sections are characterized by the special items found in them to be very hard to get due to the myriad of slopes, hills, and pitfalls that, along with how fast you're traveling, can impair your jumping and timing. Getting a perfect score on levels with these skiing sections took me many, many tries due to their sheer difficulty. And if you get by an enemy (which, typically, don't get directly in your way but rather bomb you from above) or slam into one of the stones that tend to be in your path, you'll end up rolling into a snowball and you'll either continue rolling until you break out of the ball or fall off a cliff due to your inability to jump in this state. As you can tell, I'm not a big fan of the skiing and, as we'll see, it plays a part in what could possibly the most evil stage in the entire game.


 If you're running low on eggs, your best friend is the Egg-Plant, which is found in almost every level and continuously spits eggs up into the air until you get your full inventory of six; after that, they only shoot pockets of air. They normally only spit out one at a time but if you pound the ground near one, they'll either shoot out several at once or start spitting them out more quickly. In addition, if you have four of five eggs and are looking to complete the set, you have to wait a little bit because the plant will spew several pockets of air before finally spitting out some eggs. And finally, in later levels some of these plants will spit out cactus-balls, which can hurt you if touched but you can swallow them to produce eggs yourself and like the normal Egg Plants, they stop shooting them once you have a full compliment of eggs. Other useful plants that are quite common in the game are the big red tulips that spit out six stars when you either throw an egg or an enemy into them (depending on where a tulip is positioned, it's often easier to throw an enemy instead of trying to curve an egg into its open top). Chomp Rocks are a common object that can be both a helpful tool and an annoying hindrance. You can push them, using them to mow down enemies that are in your path, and you can use them as stepping stones to reach areas that you normally can't but, at the same time, they can also be obstacles that you have to get around. Not only do they have a tendency to block your path in a given level but they can either appear out of nowhere or be pushed by certain enemies to roll towards you. While the rocks can't harm you directly, they can push you off ledges if one is behind you when a rock rolls into you. One useful tidbit is that gray Chomp Rocks will go back to where you originally found them if you walk off the screen or accidentally push them off a ledge; brown ones, on the other hand, won't. Taking the place of the classic "?" Blocks in this game are Winged Clouds, which must be hit with an egg or other projectile in order for them to expel their contents. They contain virtually everything that you can think of, from stars and flowers to watermelons, extra lives, and some will trigger staircases that allow you to progress through a level; some do contain enemies, though. Similar in function are the crates that you come across in many levels, which often expel five stars when you pound them to bust them open but can also contain other objects like keys. As you might expect, keys are necessary to open locked doors that you come across. Some open up bonus rooms that come in the form of small huts with locked doors but in other instances, they open up doors that you need to go through in order to complete a level. You also find Red Switches, which serve one of several functions: they create temporary red blocks that you can use to progress through a stage or reach items, they make outlined coins visible and able to collect, and they point the way to special, hidden areas that contain a multitude of coins as well as some of the special items needed to get a perfect score. Arrow Clouds aim you egg-shots in whatever direction the arrow is pointed, allowing you to hit certain objects with extreme precision. Some rotate constantly, forcing you to time your shots at exactly the right moment. In many levels, you come across balloons (which are officially called Baron von Zeppelins; figure that one out) floating up in the air that are attached to items that fall towards you when you walk under them. While they do carry useful stuff like coins, keys, and extra lives, they can also carry cactus-balls, bombs(!), and even enemies that will drop down on you. Another balloon that can be either friend or foe is the Mock Up, which appears in a scant few levels and inflates when you get close to it. If you manage to swallow it before it pops, something I didn't know you were supposed to do, you'll get the 1-Up that it promises on the front. If the balloon does pop, however, a Fly Guy will come out and fly away laughing at you while you've taken a hit if you got too close. You really better be glad that these things are as rare as they are because, while they can be helpful, I don't think they're anything less than annoying.
 As with all Mario games, you can find a diverse multitude of platforms here. One type, known officially as a Flatbed Ferry, is color-schemed and the colors determine how fast a particular platform moves, either when it's moving around when you first come across it or when you step on it: green ones move nice and steadily, yellow ones move a little bit faster, and red ones take off like freaking rockets, making them the trickiest when it comes to timing your jumps to get off at certain points. Like in Super Mario World, you often come across platforms aligned in rotating, pinwheel formations. As you've come across in past games, there are also platforms with numbers on them that go down after you jump off of one. When the number reaches zero, the platform disappears. Arrow Wheels are round with an arrow on the front that rotate constantly until you jump on them. Once you do, the wheel will carry you in whatever direction the arrow is pointing and you can change the direction in mid-air by jumping repeatedly. You can also carry the wheels around in your mouth if you need them in a specific spot. They come in two colors, light brown and blue, and the difference between the two is that the blue ones will eventually disappear if you don't ride on them for a little while. One castle level has a platform sitting on the head of a large ghost that you must ride throughout the level. Every once in a while, the ghost will stretch upwards and while this does allow you to reach items that are up there, you have to be on guard because he could also be stretching you near hazards like instant-death spikes. A couple of levels offer a bunch of large, multicolored balloons as makeshift platforms you can use to make your way upwards. However, you have to jump repeatedly while riding these balloons because just standing on them will make them drift upward at a snail's pace and they'll actually disappear out from under you if you do so for too long. Another type of balloon platform appears in a couple of levels and actually needs to be inflated before it can be put to use. After this balloon is inflated to its maximum size, you can jump on it and ride it throughout the area as it gradually deflates. You have to make sure not to jump on the balloon before it becomes as big as it can or you'll risk not being able to reach all of the items it allows you to get. In addition, by the time it reaches the end of its path, it'll be so small that you're barely even standing on anything, making it easy to fall off, and it'll also be so low as to make it hard to reach items that are fairly high above it.
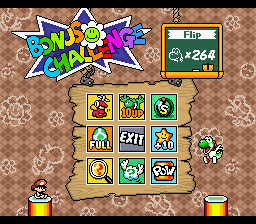


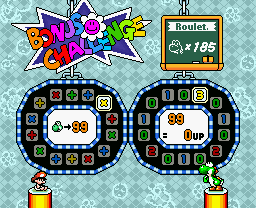
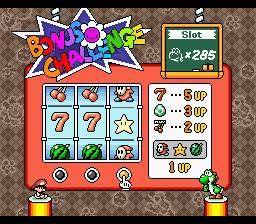 As I mentioned earlier, when you jump through the goal at the end of a level, you have a chance to play a bonus game. If the spinning, roulette wheel-like goal lands on a flower (again, finding all five flowers in a level increases your chances of the wheel doing so) after you jump through it, you will be able to play one of six different bonus games where you can win extra lives as well as prizes. Scratch and Match gives you seven blank cards and you must choose three to scratch. If you get a picture of baby Mario, you get an extra life (you get five extra lives if all three of the cards you scratch are baby Marios); get a Toady and you get nothing. As you can probably guess, winning at this game boils down to pure luck but here's some advice: be careful about scratching the two top cards and one of those immediately below it because that often leads to at least two Toadies. Flip Cards is similar in that winning or losing comes down to luck. You're given nine cards to throw eggs at in order to flip them over: six (in some cases, five) have items on the their undersides, two either have a picture of a Toady or Kamek, and the middle card is the way to exit the game if you're satisfied with what you've already won. Sometimes, it's best to take that chance because if you end up getting Kamek, the game immediately ends and you lose any of the items that you received beforehand. Getting a Toady doesn't do anything, though, and there is an incentive to trying to get all of the items without hitting Kamek because if you do so, you'll receive a 10-Up from flipping the one card that's left. However, this isn't always possible because, every once in a while, the game tries to trick you by putting two Kamek cards in the deck so sometimes, it's also better to quit while you're ahead. Again, it's about luck. Drawing Lots is similar to Flip Cards except that here, you're only allowed to draw one of the six that you're given. This game almost always seems to screw me over because, while sometimes there'll be one Kamek in the deck, other times there'll be three and I seem to always end up getting one of them and receiving nothing as a result. It's no big deal but when you're desperate for an item, it can be frustrating for that to happen. Match Cards is probably my favorite. It's a memorization game where you're shown 14 cards and you have to remember where the items were located in order to match up the pairs and win the items. While I can't remember where every single item is, I still love this one because I always memorize the location of the items I'm really desperate for and after I've gotten them, I try my chance at getting some more. You get two tries but even if you fail, you still keep the items that you did win. And if you correctly choose six pairs, the last two cards will 10-Ups so, like Flip Cards, it does pay to go for broke in this game. Roulette is a complicated bonus game where you bet on a number of extra lives you wish to earn. On the first circle, you wager a number of lives and the game begins. The left roulette wheel has equation symbols like + and x, obviously meaning either addition or multiplication, and the other wheel has numbers ranging from 0 to 3. The number of lives you get is the outcome of the equation here: for example, if you wagered ten lives and the wheels respectively land on an "x" and a "3", you'll get 30 lives. Of course, getting an "x" and a "0" doesn't give you anything so you just have to hope that lady luck is on your side at the moment. And lastly, there's the Slot Machine, which I hate because I'm pretty sure that it's rigged. I have never once been able to line up three of the pictures in this game. I always end up with a combination that doesn't get you anything, that is unless it's a Shy Guy, a Star, and a Watermelon, which gets you a 1-Up (I've never done that either). Just pray that you come across this bonus as seldom as possible.
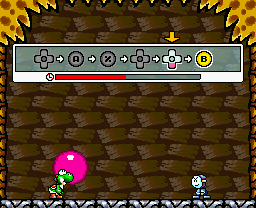


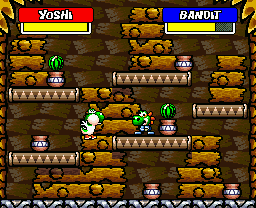 Other types of bonus challenges, known as Mini-Battles, are what you take part in after you use a key to enter a small, locked shack in many levels. They're called battles because you compete against an enemy known as a Bandit in one of four contests to see who walks off with the prize. Throwing Balloons is my least favorite because it's so tricky and the Bandit nearly always finds some way to make things harder for you. The two of you toss an ever-expanding balloon back and forth and the goal of the game is to make sure that the balloon pops when it's in the Bandit's hands. When you get it, you have to press the buttons displayed above in order to throw it back to the Bandit. This is a lot harder than it seems because, for one, you have a short amount of time to do this and two, in order to do good at it, you have to mash the buttons without taking the time to look down at the controller. In other words, you have to know where every button is without needing to look at them. While I know which buttons do what, I'm not too good at remembering what their designations are (A, B, X, and Y, for instance) and even if I am able to remember which one is which, it's still easy to press the wrong one in the heat of the game. You do get another try if you mess up or run out of time but that doesn't make it any easier at actually winning this challenge. Furthermore, the Bandit is an asshole because it takes him no time at all to run through whatever sequence he has to in order to throw the balloon towards you and when the balloon gets close to popping, he'll actually wait a couple of seconds before throwing it so you'll have little to no time to press your sequence of buttons. Granted, I don't always lose at this challenge and when I do win, it feels pretty good and getting the prize makes it even better but still, I can't help but groan whenever I blunder into it because I do lose more often than not. Popping Balloons is easier, yes, but like a lot of the bonus games you play after jumping through the goal, luck plays a large part in it. There are a bunch of balloons scattered throughout the room and the goal is to find which one has the prize inside of it. As you can see, there's not much strategy here. All you can do is stomp as many balloons as you can and pray that you find the prize before the Bandit does. Gather Coins has you and the Bandit running around, trying to grab the coins that are shot out of a cannon on the moving track above you. The goal is to get more coins than the Bandit. Sounds simple enough but the Bandit will try to cheat you by running into you, which throws you back and stuns you a bit as well as stomp on you to stun you. You can do the same to him as well, so it is a fair fight, but that doesn't make any less frustrating when the Bandit snatches a coin that you were very close to getting. The trick is to just keep at him. The final Mini-Battle, and the one I've played the least, is the Watermelon Seed Spitting Contest, which is just what it sounds: you and the Bandit spit those lethal seeds at you and whoever wears the other's health bar down wins. It sounds simply but the Bandit (who's wearing a Yoshi mask here) tends to hide behind the walls in the background, making it difficult to get a good shot at him. Every once in a while, a red watermelon will appear and believe me, you don't want the Bandit to get it because that thing does a lot of damage. Like Gather Coins, the only strategy is to never let up on your assault.

 When it comes to the game's enemies, another thing that makes me think of Super Mario Bros. 2 is the fact that Shy Guys are the most common baddies you face. As with most of their appearances in the Mario series (save for Mario Bros. 2, where they were a bit tough), they're very weak and are able to be killed by a single jump on the head and in this game, they even act as a common way for you to refill your egg supply. You often run across pipes that produce Shy Guys one after the other and you can swallow each one that the pipe expels to turn him into an egg; they stop coming after your inventory is completely filled. While one is not a threat in and of himself, you shouldn't let your guard down when there are a bunch to be found in one section because if you run ahead blindly, you'll bump right into one. There are many variants of Shy Guys to be found in this game as well. Fly Guys, their flying cousins with propellers on their heads, make their first appearance in this game and not only do they often swoop down at you or block your path but they also carry harmful objects like bombs and cactus-balls to throw at you when you pass under them. However, they also often carry 1-Ups and red coins but while some hover in place while doing so, others will fly in and hover for a short period of time before taking off permanently. They even laugh at you when you miss whatever they're carrying, making them even more loathsome. There are also some rare, flashing Fly Guys who damage you if you touch them but if you swallow one and spit him back out, he'll have turned into a Shy Guy. If you spit watermelon seeds at him afterward, coins will appear and if you hit him enough times, you'll get one or two extra lives. Boo Guys are ghostly Shy Guys who mostly appear in castle levels. While some act like regular Shy Guys and pop out of pipes, enabling you turn them into eggs, others operate booby traps, attempting to drop maces on you from the ceiling as well as operate rotating maces and throw bombs down at you after passing them along a line. Fortunately, the single ones operating the maces take a while to crank them back up after they drop the first time, giving you an opportunity to get by them and the bomb-carrying ones can be forced to drop the bomb by pounding the ground; this also temporarily stuns them. It takes them a few seconds to get over the shock and get another bomb so you can use that time to get past them. Another type of Shy Guy who uses a mace is Mace Guy, a living Shy Guy who, thankfully, only appears in a few levels. If you come across him, though, you have to watch out for the mace he's twirling around because the ball will get close to you and clobber you when you least expect. You can swallow the mace, forcing him to function like a normal Shy Guy, or you can swallow him and cause the mace to drop out of existence.


 Woozy Guys are Shy Guys who move around by doing flips in the air. While not any tougher than normal Shy Guys, these foes can be tricky because of their fast, erratic movements and can sometimes hit you in places where you'd expect to be safe. Stretch Guys are rare, tall and skinny Shy Guys who only appear in a couple of levels and cannot be defeated by jumping on them. When jumped on, they simply get smooshed down and spit out watermelon seeds in the process. While they can be defeated by other methods, their seed-spitting tendencies can be used against other enemies encountered near them. Stilt Guys are simply Shy Guys who walk around on stilts. Jumping on them knocks them off the stilts and they then act like normal Shy Guys. You can't swallow them but if you don't have room to jump on them, you can repeatedly lick them until fall into a pool of water and sink (if the water is shallow, though, they'll walk right back onto the bank). Spear Guys are tribal Shy Guys who normally can only be defeated by beaten eaten from the back or hit with an egg. They have shields that block your tongue from the front and their spears make trying to jump on them a very bad idea indeed. Some also point their spears forward so you have to watch out for that. Dancing Spear Guys can be more easily swallowed but their fast movements and long spears still make them a challenge, particularly since they often appear in groups. Their spears are so tall that hovering over them without taking a hit isn't as easy as you'd think. Fat Guys are big, bloated Shy Guys who mainly appear in one level. They act like normal Shy Guys and simply walk about, however the green variety runs and the red ones will also start running if you stand on them. Swallowing them produces enormous eggs that can create stars out of enemies and you can also use the Fat Guys to get across spikes since they walk along them without injury. Speaking of the eggs, after you've created three, all of the Fat Guys in the level will disappear until you throw one of them. Multi Guys are Shy Guys who use camouflage. They have flowers on their head and they duck down on the ground to look like a bed of them. When you get close, they spring up at you. Jumping on them turns them into regular Shy Guys. And finally, you sometimes run into a flaming variety known as Pyro Guys, who tend to come bounding off-screen at you at such quick speeds that you need quick reflexes in order to keep from getting burned. Swallowing one allows you to breathe three blasts of fire, like a red watermelon.


 Another holdover from Super Mario Bros. 2 are Snifits, those Shy Guy-like enemies who actually shoot bullets at you from their mouths. They only appear in a castle levels but when they do, you'd better be on your guard because they have some slightly erratic movements, suddenly turning to face you when you least expect it and their bullets can pass through walls as well. Fortunately, they're as vulnerable as Shy Guys. A type of enemy that's not that vulnerable, however, are Burts. These round, pink guys with striped pants always attack in pairs and their main method is jumping on you. One tends to jump on his partner, giving him a big boost up into the air, and the same thing will happen to you if you jump on one. They can't be swallowed but eggs and ground pounds (although the latter is a much tougher method) will do the trick and you'll get a couple of stars for getting rid of one. However, when you defeat one, his partner will start jumping around nonstop so you'd better get rid of him quick. Fangs are relatives of the Swooper bats that you encounter in Super Mario World. They're not hard to kill since they're vulnerable to every attack you have but their tendency to attack in big swarms is what makes them so bloody annoying. Clearing a bunch out with one egg-throw is a good method but their quick movements makes that challenging to do and even then, they often respawn. In a similar vein, while there are no Wigglers here, a winged variety called Flutters appears in one level. They act the same way as Wigglers do: jumping on, them as well as hitting them with an egg, infuriates them and they charge at you. They can be swallowed and defeated with a ground pound and while they don't really attack you when they're not angry, the large swarm of them that you encounter in this level can be hard to navigate without taking a hit so it's best to clear them out anyway. While there is a type of enemy in this game known as a Fuzzy, it's not like the Fuzzies you typically encounter in Mario games. These white fuzzballs float around in enormous swarms in a few levels, making it virtually impossible not to touch them. Doing so or accidentally eating one causes Yoshi to start tripping balls, as if he just took a lot of LSD. The background starts flashing and swerving around as if from a drunk POV, Yoshi stumbles around, can't aim for crap, and even when you're not touching the control pad, he still falls over his own two feet. That's what sucks about it because, even while you're trying to stand and wait for the effects to wear off, which can take a while, you're still in danger of falling off a cliff or bumping into enemies. Best advice is to clear out Fuzzies as best as you can with eggs as you travel through their section, duck when one gets too close, and if you get hit, try your best to get past them and wait for the effects to wear off while avoiding pitfalls and other enemies.


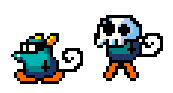
 Some cave levels feature an enemy known as Harry Hedgehog, whose quick speed and prominent blue coloration is no doubt meant to drum up images of a certain other blue hedgehog who was the mascot of Nintendo's biggest competitor at the time. Unlike that character, though, Harry's biggest defense is not his speed but his spines. When you get close to him, he swells up to a much bigger size and his spines jut out. When he's in this defensive posture, he can't be swallowed. Otherwise, he's quite a vulnerable enemy, especially when he's in his normal, small form, but he's so fast and so hard to attack that I typically just jump over him and continue on. Also appearing in (but certainly not confined to) cave levels are enemies whom you virtually have no choice but to avoid: Lava Drops. In fact, once they're introduced in World 6, they become a real nuisance throughout a majority of the levels. The only way to take these things out is to use a Winged Cloud item on them or jump through a Middle Ring that's near them. Otherwise, you have to jump around and while I wouldn't say that's difficult, their movements, which can be back and forth in either direction, and their tendency to appear in cramped spaces can be annoying to deal with. A couple of levels feature a fairly vulnerable but nonetheless hazardous type of enemy known as Kaboomba. They're walking cannons that fire cannonballs that explode a couple of seconds after being discharged, never minding if they actually hit something or not. An egg or a ground pound will make short work of them (jumping on them allows you to actually ride them without being hurt) but you still have to watch out for those cannonballs, especially when you encounter them in cramped spaces. Mildes are small, pink, marshmallow-like enemies that are just as easy to defeat as you might think. They're vulnerable to all attacks but stomping on them really works to your advantage because they pop they make when smooshed will throw back any enemy that's nearby. A much larger and rarer variant can also be found and these take a ground pound to pop; otherwise, they're no more difficult than their small cousins. Little Mousers are black bandana-wearing mouse enemies who quickly scamper around various levels and actually attempt to steal one of your eggs and run off with it; some of them will also try to run off with baby Mario too. And some actually hop around while wearing skulls on their head, which you can easily break by jumping on them (these Mousers don't steal your eggs). In some levels, they actually run from the bottom of the path you're walking on to the top, becoming an obstacle that you must either avoid or jump on before they hit you. They're not a hard enemy or anything but like a lot of the small ones, big numbers of them can be annoying, and their constant squeaking can drive you to distraction. A type of enemy that is actually more helpful than harmful are little ant-like creatures called Melon Bugs. They hop up in a section but when you get near them, they roll up into a ball and head towards you. However, getting hit by one doesn't do anything more than nudge you a little bit. In fact, you can slurp them up and spit them out as projectiles to be used against other enemies, killing both in the process, and to knock open Winged Clouds.


 An enemy that only appears in one section of a single level are floating fireballs called Piro Dangles that look very much like similar enemies you've encountered in Mario games. All these things do is rotate around platforms in the room you find them in and they can't be destroyed at all. All you can do is jump around and avoid them in order to explore the room. Ravens are big, black bird enemies who can found circling around floating globes, often in the path of a platform that you need to ride on in order to get through a level. They can't be eaten but they are vulnerable to eggs and being jumped on. Of course, if your platform gets to them when they're hanging off the side of their globe, it's to either throw an egg or just avoid them as best as you can. When you don't have any eggs in those situations, they can be a nuisance. Mini-Ravens, on the other hand, can be eaten, although Yoshi swallows them before you can turn them into eggs. Like the bigger Ravens, they're fully capable of climbing up walls and along ceilings. They only appear in a few levels and I've never had that much trouble in dealing with them, even when they're in fairly large numbers. Toadies usually only appear once your Countdown Timer reaches zero after baby Mario has been knocked off your back but a couple of solo Toadies do appear in certain levels, waiting for an opportunity to take him themselves. I've found that a green Toady will actually head towards you and try to take Mario by force while a dark pink variety waits off-screen until Mario gets knocked off by another enemy and quickly swoops down to grab him. They don't immediately take off with baby Mario after they've grabbed him but actually fly around with him until the timer runs out or you get him back. These Toadies, though, can make it hard to get Mario back due to their movements. Like a lot of enemies, they're mostly a nuisance than an actual threat. Speaking of annoying enemies, I absolutely despise Tap-Taps, those little-spiked balls with legs and an ever-present stupid grin on their faces. They're just a pain with how they either walk or jump right in your path (there's one level very late in the game where they really aggravated me to no end) and the added fact that they can't be hurt by most attacks. An egg or other projectile will send them flying backwards and they'll pop if they hit another but even if you manage to create a chain reaction with a long line of Tap-Taps, there'll still be one left after all of the others have been dispensed with. Your tongue can only lick them off of platforms in order to get them out of your way, which sometimes helps but other times, is quite futile. Red and blue watermelons can also take care of them but the trick is having one at hand. Yeah, not a fan of these baddies at all.


 While there are Goombas in this game, they only appear in one level, and like the Goombas that appeared in Super Mario World, they can't be taken out simply by jumping on them. They flatten when jumped on but they can still harm you even in this state. Eventually, they do revert back to their normal form. They can be defeated by every other attack, though. While the classic Koopas and Paratroopas appear more frequently, their presence is still not as constant as Shy Guys and they actually don't even become a semi-regular foe until late in the game. The same traditions apply to these classic enemies: jumping on one knocks him out of his shell (they actually walk around wearing boxers after being de-shelled here) and doing the same to a Paratroopa literally clips his wings. And while Super Mario World had many different varieties, only the typical red and green ones appear here and in this game, neither of them walk off ledges. Unfortunately, Lakitus are back again and they're quite common in this game, too. While they act the same way as they always did, fly around on clouds and attempt to hit you with Spiny eggs, their attack methods are a bit different here. They actually use a cursor, much like the one you use to throw your eggs, and the Spiny eggs simply explode on contact rather than sprout the actual Spiny enemies. While the eggs can be avoided despite the Lakitus' new throwing accuracy, it's their ever-constant throwing and juking around in the sky that, as always, makes them a nuisance. You can still steal a Lakitu's cloud and use it for your own benefit. Like the Shy Guys, there are many variants of Lakitus to be found in this game. The Fishin' Lakitu from Super Mario World makes a return appearance but this time, rather than attempt to bait you with a 1-Up, he gets straight to point and uses an actual fishing rod to snatch baby Mario at a given chance. Again, he's so fast that he can be hard to avoid and the low-hanging hook makes it doubly difficult. Even if you defeat him, he will re-spawn so you'd better accomplish your task quickly and move on. Wall Lakitus are a type that you can find perched behind background walls in some levels. Like their cloud-riding cousins, they throw Spiny eggs at you when you get into range but since they're sitting in one spot, they're much easier to defeat. A big group of them, however, can be a problem. Aqua Lakitus are an even rarer variant that poke their heads out of bodies of water in order to fling their Spiny eggs at you. Needless to say, you can only attack them when they stick their heads out of the water and it's best to use eggs against them as well. The rarest of all, the Thunder Lakitus, which only appear in one level, act like the Sumo Bros. in Super Mario World, shooting out lightning balls that set the ground ablaze. It's a good thing they only appear in the one level because, while you do get a lot of warning when they attack, those fires can still be hard to avoid if you're in a confined section or are dealing with other enemies at the same time.
 The Chomps from Super Mario Bros. 3 also make a return here, although there's only one true Chain Chomp to be found at the beginning of one of the castle levels. If you defeat him with a POW Block or a Winged Cloud item, you'll be given access to a room where you're told a code that you can enter on the level select screen, giving you carte blanche to play the game's Mini-Battles whenever you want. While that's the only classic Chain Chomp in the game, there are two sub-species that appear more frequently. One, just called Chomps, are fundamentally Chain Chomps without the chain. They leap at you from the distant background and attempt to crush you, often breaking big holes in the ground when they do. While you won't lose baby Mario if you're hit by one, it's still better to avoid being caught under them because you're likely to be pushed down into the pit and lose a life. Chomp Sharks chase you across the screen, destroying platform after platform in an attempt to eat you alive. When one of these guys is after you, you'd better run like crap or risked getting munched. You also have to watch what you're doing when you're jumping across the floating platforms while trying to escape because one slip and you'll fall to your death. Chomp Sharks can't be defeated by you, so don't even try, and they make backtracking in their sections impossible. The only thing you can do is keep moving until you reach the end of the path and the Chomp breaks his tooth on the solid platform you reach at the end, effectively ending the chase.


 Bullet Bills, albeit colored green instead of the typical black, are to be found here too. Fortunately, they're not the most common of enemies and even when you do encounter them, they can be defeated in any way possible. A yellow-orange variant called Bouncing Bullet Bills appears very rarely in the game and, while it can be taken out as easily as the normal Bills, it's also able to bounce off of walls and any other surface it runs into. If you catch one in your mouth and spit it back out instead of turning it into an egg, it'll behave like a normal Bullet Bill afterward. Spikes, those lizard enemies from Super Mario Bros. 3 who pull spiked balls out of their gullets to throw at you, can be found in one level here. They're smaller here than they were originally but don't let that fool you because the balls they pull out now are much bigger than their bodies. Boos reappear in the castle levels and, as with Shy Guys and Lakitus, there are several different kinds here. The normal Boos are the very small kind that you come across and, like before, they'll follow you when you turn your back on them. However, you can defeat them in this game by looking away from them and bouncing an egg off a wall at angle where it'll hit the Boo in the face. The same rules apply to Big Boos, however they give you stars when they're defeated. Boo Balloons are Boos that take the form of balloons and fly around the screen while trying to damage you, not caring if you look directly at them or not. Hitting them with an egg makes them inflate and after three hits, they pop and actually do special things like make coins or red switches appear. Boo Man Bluff is a rare variant who is blindfolded and homes in you by using sound, mainly when you're collecting coins. There's no way to defeat him so all you can do is avoid him while trying to accomplish your task. You really have to be careful of Boo Blahs, which are slimy variants that stick to floors and ceiling and jump up every now and then. They can only be defeated with special items but, if you don't panic, they can be easily avoided. Stomping on them briefly stuns them and you can bounce off of them as well. Lava bubbles resembling Podoboos (they're much smaller, though) typically jump out of lava pools but they can actually be eaten and as you might expect, you get fire breath when you do so. Piranha Plants are also to be found but instead of popping out of pipes, they're actually rooted in the ground and stay in a miniaturized form until you get close. That's when they spring to life and chomp at you. If you get too close, they'll eat you and spit you out, causing you to lose your eggs as well as baby Mario. They can't be jumped on or eaten so egg-throwing is your only option. There's also a tougher green species that spit cactus-balls at you and actually take three hits to defeat, making them a major obstacle when you come across them. Another variant, known as Hootie the Blue Fish (ugh, these puns), can be found in one castle level. That said, they're hardly rare in this one level and they travel around set paths, often in pairs. They tend to travel on the same path you need to and the cramped tunnels of this particular level often force you to wait until they move on. Like the Piranha Plants, getting too close will result in you getting eaten and spat out a few seconds later. Unlike Piranha Plants, not even eggs work on them (although they do briefly stun them). They can only be defeated with special items and even then, they tend to respawn very quickly. Young versions of Piranhas known as Nippers, which first appeared in Super Mario Bros. 3, appear here, often sprouting from small spores that float down to the ground. They're very weak enemies, vulnerable to being eaten and stomped, but, as with small enemies, a large number of them can be a handful to contend with. You can also eat the spores before they reach the ground to prevent them from sprouting Nippers but you don't get any eggs from it.


 Boos are far from the only ghostly enemies you face. One that attempts to block your path when you come upon it is a Caged Ghost. They come out of grates in the floor of tunnels and either block your path by swelling into a large, rectangular mound or by snaking their way through a narrow corridor in the tunnel. Once they appear, they spit Shy Guys at you as an attack but they're actually giving you an opportunity to make eggs (if you don't already have some) and use them against as weapons. While you can't defeat these ghosts, you can continuously hit them until they recede enough to where you can get by them. Once you've caused one to retreat as far as it can go, don't dawdle or it'll start growing again. A cousin to the Caged Ghost is the Dangling Ghost, which hangs from castle ceilings and swings back and forth like a pendulum, attempting to either hit you or take baby Mario from you. They can be annoying, especially when you're rushing ahead and slam into one. However, like Caged Ghosts, hitting them with an egg puts them in their place. But, also like Caged Ghosts, once you've clocked one (these only take one hit), you'd best take that moment while it's stunned to get by or it'll come at you again. Cloud Drops are little ghosts that appear in areas where you can become Helicopter Yoshi, often getting in your way by flying around in packs in horizontal or vertical lines. They can be hard to get around in those instances but hitting them on the head causes them to plummet to the ground. And when you're normal Yoshi, they're as vulnerable as can be. Gusties are a similar type of ghost enemy that appear in outdoor levels where the terrain is hilly. They always travel in swarms and while they do make for a lot of opportunities to create eggs, they can be annoying due to their numbers and the fact that in some spots, they endlessly spawn. Not much else to say except all you can do when you come across a big group of them is to power through and make as many eggs out of them as you can. Lantern Ghosts are lantern-carrying specters whom you find in the darkest of levels, mostly in caves. They function in much the same way as Shy Guys in that they just walk back and forth and often can be found popping out of pipes instead of Shy Guys in some levels. As a result, they also make for a great way to get some eggs if you're running short. Grim Leechers are ghostly enemies that appear in one level of the game and they attack not to take baby Mario from you but rather to take his place. They wait for you to pass by and once you get close enough, they hover over to you, kick baby Mario off your saddle, and attempt to ride on you instead. What's more, the controls get reversed when one's on you, making it hard to get baby Mario back in order to get rid of the Leecher. Once you've done so, best whack him with an egg before he can do it again. Finally, a Spooky is an enemy that you find in a couple of levels that isn't really a ghost but rather another enemy disguised as one, using a very obvious bed sheet with eyeholes and a mouth cut out. For the most part, they just "float" and hop around, actually coming to a stop when they reach a wall instead of just turning around. You can ride on one but you also have to be on guard because some, which are later revealed to be Bandits when you slurp off their disguise, will hop on you and steal baby Mario if you get the chance; otherwise, the enemy underneath will be revealed as a Shy Guy.

 Georgette Jellies are slimy, blob enemies that cannot be killed. You can't turn them into eggs, stepping on them splatters them but they eventually reform, and eggs just bounce off of them. If you slurp one up and spit it out, it'll come out as ball that can be used as something as projectile but it's not as accurate or effective as throwing eggs. Other slimy enemies include Lemon Drops, which are little yellow balls of goo that appear in only a few levels and are featured most prominently in a castle level where they drop off said level's boss. They're not at all hard, though, and can be taken out by any means necessary. The same goes for Sluggies, which are pinkish-white slugs that actually have some hair on their heads and also appear in just one castle level. They can be jumped and stomped on but they can also be slurped up and turned into eggs.
  Of all the enemies that made their first appearance in this game, the most prominent ones are the Bandits. I absolutely despise these guys. They're very annoying for several different reasons. One, the minute they see you, they chase you to try to grab baby Mario, sometimes putting a Shy Guy on your back in his place, and they're persistent as hell. After running from them for a bit, you may think that you've eluded them and then, before you know what happened, the pursuing one comes out of nowhere and grabs baby Mario, so you have to keep your guard up until you're well out of the section they're inhabiting. Second, when they grab baby Mario, they can be tough to chase because of how fast they run and their tendency to jump on and across platforms in their attempts to evade you. And once you get one baby Mario back, they start chasing you again and continue you to do so until you kill them. However, that's the third point: they're not easy to take out. You can't eat them and it takes six eggs or watermelon seeds and three jumps to finally KO them. Stomping on them works the best because that kills them in one hit but you still have to get above them in order to do so, not easy due to their constant running. And finally, these guys pop up when you least expect them. They hide behind bushes and walls, waiting for you to walk by so they can snatch baby Mario. There's one level in particular where a Bandit is hiding behind a bush right before the goal. I've been ambushed by that guy on a number of occasions because I tend to forget that he's back there and when you're going for a perfect score and he grabs baby Mario right before the goal when you don't have a special star item, you get pretty pissed. In other levels, Bandits even come out of balloons and Winged Clouds, which makes you really paranoid about the most mundane-looking objects you come across. Most Bandits have a blue color to them but there is a rarer, pink variety who always carry red coins with them. If you try to get a coin from one of these Bandits, he'll run away from you, making you work for it. Once you do get the coin, though, you have to be prepared to fight because now the Bandit will try to get revenge by taking baby Mario. And, as I've already described, there's that Yoshi-masked Bandit that appears in the Watermelon Seed Spitting Contest so, in short, these enemies plague you both in the actual levels and the bonus ones.
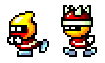
 Like the Shy Guys, Bandits have some variants. The most common are Green Gloves and Sluggers, which respectively act as baseball pitchers and batters. Throwing eggs at Green Gloves is useless because you're only providing them with ammunition to use against you. While getting hit by eggs (whether it be some you threw at them or from their own supply) from them doesn't damage you, it can still knock you back and cause you to fall off any platforms you might be standing. The same goes for Sluggers and not only can they bat eggs at you but Chomp Rocks as well. Neither of them can be eaten, although they can be killed by ground pounding or repeatedly stepping on them. They also be helpful in getting items like coins and flowers because an egg hit from them on a item goes into your score. Another Bandit variant, which are known as Grunts, only appear in a few levels. They're red-colored with yellow faces and wear spiked helmets on their heads, making it a bad idea to jump on them right away. They don't openly attack you, though. They just sort of skate back and forth, often doing so on spikes (doesn't it irritate you when you see a character walking on something that means instant death to you if you touch it?), but can sometimes get in your way, forcing you to remove them from your path. But, unlike the tough Bandits, they're quite vulnerable. You can eat them to turn them into eggs and you also knock their helmets off with eggs, making them vulnerable to jump attacks (watch how panicked they become when they lose a helmet). However, another variant is even tougher than the normal Bandits. Zeus Guys are a rare sub-species who don't appear until very late in the game and when you first encounter them, you'll be glad that's the case. Dressed for karate, these enemies charge up balls of lightning and then fire them at you a la Dragonball Z style! They first time I ran into them and saw what they could do, that was definitely a, "Holy shit!" moment on my part. What's more, like I said, they're very tough to take out. The only thing that can defeat them are red and blue watermelons and a POW Block. If you don't have any of those items on you, then you can only temporarily stun them with an egg or jump attack to by you time to make your escape.
  In many of the tropical-themed levels, monkeys known as Grinders actually come out of the woodwork to make your life miserable. Their methods of attack are quite varied. Some just come straight at you and grab baby Mario, fleeing with him after doing so. Like the Bandits, they're very fast and they jump a lot after having grabbed the baby, making it a bit difficult to catch them. Sometimes, a group of them will form a living vine and swing down at you from the treetops in an attempt to grab baby Mario. You can't hurt them when they're in this formation so all you can do is wait for them to swing towards you, duck when they get close, and run before they come back for another pass. Other times, Grinders actually use projectile weapons. They throw cactus-balls, dump bombs on you from above, and even chomp on watermelons and spit seeds at you. Fortunately, Grinders don't attack you but instead, just observe you and skip away when you get close. You can use them to make eggs but, again, they can difficult to get ahold of because of how fast and agile they are. Speaking of which, other than turn them into eggs, the only other way to get rid of them is to jump on them, which stuns them for a bit, and then walk over them to kick them off the screen. You can't hurt them at all when they're swimming around in water, which they can do.


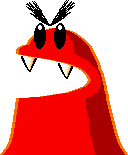
 Blarggs, the lava-dwelling monsters from Super Mario World, make a return appearance here, although they look different than they did originally. They look like blobs with very big mouths and mean, black eyes but they attack in the same way that they did originally: charging out of the lava in an attempt to bite you. Throwing eggs at them does make them retreat but they come back a few seconds later; a POW Block, on the other hand, gets rid of them for good. Besides the normal-sized Blarggs, there's also an enormous variety that not only appears in castle levels but in one, water-filled level as well, being appropriate colored blue in that instance. Both of these giants rise out of the lava/water and attempt to block your path by just sitting there. Like the small Blarggs, hitting them with an egg makes them sink back down but they come right back up after a few seconds. In fact, you really have to be careful of the water variety, known as Nep-Enut, because if you jump over him before he rises out of the water, he will chase you across the lake. The giant Blarggs can't be defeated by a POW Block either. Hot Lips are a Blargg-like type of enemy that also pops up out of lava pits. When they pop their heads out of lava, they spit a stream of lava at you that kills you instantly if you're hit (somehow, I've always managed to stand in the exact spot to avoid getting hit when these things appear). Other than using a POW Block, there's no way to kill them, although eggs will stun them and give you enough time to get by.


 This game might not have the normal Cheep-Cheeps but it does have a larger cousin of theirs known as Flopsy Fish. These fish can be irritating in levels that take place near water since they often swim around and then jump out at regular intervals in an attempt to whack you. Sometimes, they repeatedly jump out of the water, traveling in a path with their teeth bared as they attempt to bite you. Like a lot of enemies, it's pretty irritating when you're running ahead at full speed and you run into one, which is why you have to watch it. They are vulnerable to all attacks, which is good, although eating one will not give you an egg. Jean de Fillets, which are basically just renamed Fishbones, are skeleton fish that stick their heads up out of water or lava in a couple of levels and then jump out. An egg-shot will instantly defeat one. Lunge Fish serve the same function as Boss Bass did in Super Mario Bros. 3 (although they're infinitely uglier): they wait for to pass by and when you're within biting range, they come at you and swallow you whole. Thank God they're rare because I've lost quite a few lives to them, especially after I've ended up falling into the water with them, and the only to hurt them is to hit them with an egg, which doesn't last very long at all. If you see one stick his head out of the water up ahead, you can get the drop on him and hit him with an egg, giving you time to get by him before he recovers. A much less dangerous enemy than Lunge Fish, but certainly no less irritating, is a Spray Fish. These fish pop out of water-filled areas mostly in castles and shoot a stream of water at you that acts as a barrier that you can't get past at all. You either have to wait for the fish to sink back down after spraying or smack it with an egg to prematurely end its activity. While their spray doesn't hurt you, the fish themselves can if you touch one. Clawdaddies are red, foam-covered crabs that rush at you upon spotting you and enlarge one of their claws before either pinching you or twirling it around in front of you, blocking your path. Egg-throwing and ground pounds can defeat them but you'll often find yourself using the former method since they usually appear in cramped areas. Frog Pirates are a particularly annoying enemy that appear in the marshy levels of the game. These big, green frogs hop up onto the platforms or ledges that you're standing on, obnoxiously croak at you, and, before you least expect it, use their long tongues to grab baby Mario and hop off with him. Granted, they only strike if you get too close but since they tend to stand in your path, you have no choice but to face them. They're immune to jump attacks (all they do is stun them for a couple of seconds), so swallowing them yourself or throwing an egg is your best bet on taking them out but you have to get within a close range in order for both of those attacks to work, forcing you to dodge the frog's tongue while doing so. I'm glad they only appear in swampy levels because they are annoying as crap.

 In the few instances where you have to transform into Submarine Yoshi in order to get through a section, you will encounter some different aquatic enemies. Piscatory Petes look very much like the classic Cheep-Cheeps, although if you more closely, you'll notice that they're smaller. As with their bigger cousins, they can taken out easily, in this case with a torpedo. Rip Van Fish pop up too, although they behave exactly like Piscatory Pete by just swimming back and forth, trying to hit you. A single torpedo is all that's needed to put them down as well. Preying Mantas are jellyfish enemies (then why are they called mantas?) that simply move up and down in a fixed area and, like the other fish enemies, can be exterminated with a torpedo. The toughest of these enemies is Loch Nestor, a red puffer fish that inflates after being hit with a torpedo and then proceeds to chase you around. Two more torpedoes will cause him to burst but by that time, you've probably already panicked by the fact that you just made your enemy bigger and ran past him as fast as you can, as I did until I realized the secret to defeating him.
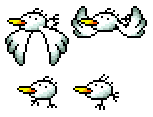


 The most common bird enemies in this game are Goonies, which don't look imposing and can actually be used as rides and to reach high platforms but the thing is, they always travel in groups and a lot of them in one spot, coming at you from both sides can be quite a challenge. Besides the normal flying Goonies, there are also flightless types that run along the ground, often in big lines, which make for easy ways to get eggs (although, you'd want to get out of the way first); eating a flying Goonie and spitting it out turns it into this. Bowling Goonies are fat Goonies who roll around on the ground and attempt to roll over you. While you may laugh when you first see this, make no mistake, these Goonies can hurt you and can come out of nowhere from off-screen to slam into you. They can only be defeated with a stomp. Very Goonies are the winged variety of these but because of their enormous weight, they can do little more than merely hop across the ground. If you swallow one and spit it out or hit it with an egg, it'll turn into a Bowling Goonie (how come you can't swallow the Bowling variety?) And in the game's later levels, you come across a skeletonized, undead type that basically serves as this game's version of the Dry Bones enemy. The difference is that these enemies can be defeated by jumping on them (jumping on the flying ones turns them into flightless ones). However, the flying variety of these skeleton Goonies often carry bombs to drop on you and because of how fragile their bones are, they can't be ridden like the normal Goonies.
 Another type of bird enemy that's found in the game's snow levels are Bumpties. They look like little fat, blue penguins but they can actually fly if they need to. The good thing about Bumpties is that they don't actively attack you but rather just walk or slide along the surface of the areas you find them in and they can't hurt you and make you lose baby Mario. That said, though, running into one can bounce you back quite a ways and if there's a pit behind you, it's a good chance you might fall in. Also, if you lose baby Mario in some other way and there's a Bumpty around, he'll actually act like a Bandit and run off with baby Mario, forcing you to give chase (they're not that fast, though). And while you can put one in your mouth, you can't turn him into an egg and because of their rubbery nature, jumping, stomping, and hitting them with eggs doesn't work either. A red watermelon or spitting them down a pit or into water is about your best bet. They're not a hard enemy, per se. They can just be irritating when they're in your way. Dr. Freezegoods are fez-wearing snowmen that can be found either riding ski lifts in some levels or actually skiing down snow-covered hills. Like Bumpties, they don't actually attack you and getting hit by one doesn't hurt you but you do get bounced back a bit, making them potentially hazardous when you have to jump across the ski lifts. They also can't be eaten but they are vulnerable to a few jump-attacks in a row as well as egg-throws.
  Not all of the creatures that you encounter in the game are enemies. Some are actually friendly and helpful. The most notable one is Poochy, a dog-like creature who makes his first appearance in the game's first extra stage and appears in the bonus sections of a couple of other levels. He's useful in that he can run across hazardous terrain and obstacles that would otherwise instantly kill you like spikes and lava and he can also mow down enemies that are in his path. It's necessary to ride him in order to get through these otherwise impossible areas and he's pretty easy to steer: you just jump on him and face the direction you want him to go. He'll also automatically jump over walls and hills, taking you with him, but if he comes to a small space that he can't squeeze through while carrying you, you have to get around it while he goes throw it. He follows you wherever you go so you don't have to worry about losing him in those instances. The only downside to Poochy is that his movements are very hyper and can be erratic as well, making it difficult to jump back on him when you have to momentarily leave him. I'm not going to lie, trying to fall down on his back has caused me to fall into lava or spikes because he moved when I didn't expect him to. This can be really frustrating and lead to a lot of people despising Poochy but otherwise, he's really a helpful character. The same goes for Huffin' Puffins, flightless white birds which appear in a few levels. There's always an adult with a couple of young ones and if you jump on the adult, it'll run away and the chicks will follow you if you walk by them. They act the same as eggs in that you can throw them at enemies but in many ways, they're better in that they act like boomerangs and fly around in a circular pattern before eventually coming back to you. If a Huffin' Puffin bounces on a surface more than three times, though, it'll fall off-screen. If that happens, you can return to where you first found them get a replacement. Needless to say, it's a good idea to take advantage of these birds when you come across, which isn't very often.
 As with Super Mario World, Yoshi's Island is a very visually stunning game; in fact, in terms of the graphics and level and character designs, it's much, much more impressive than its predecessor. You can really see the advancements that gaming technology had made when if the five years since Super Mario World when you compare the two games. In fact, there are two distinct reasons why the game looks the way it does and one simply is the progress of technology at that time. The game was one of several that made use of a highly advanced chip that not only allowed for more impressive sprites and such but also created some early computer effects. The result is a look that is obviously more advanced when compared with other Super NES games of the time. The reason for the game's actual art style came out of necessity. The original demo of the game didn't go over well with the heads of Nintendo due to it looking very old-hat when compared to the impressive, pre-rendered graphics of Donkey Kong Country. Shigeru Miyamoto was encouraged to make Yoshi's Island more in line with the look of that groundbreaking game and he responded to this by instead making the game's graphics look much more cartoony, as if it had all been drawn by crayons and felt-pens. Some of the cutscenes do feature pre-rendered graphics but they're done in a way that's so similar to those of the actual game that, unless you have a very trained eye, it's unlikely you would notice. While it wasn't exactly what they expected, the committee at Nintendo nevertheless approved the game after seeing Miyamoto's alteration of the graphics, no doubt realizing that they gave the game a fairly unique look. I'm glad they did too because, as with any good Mario game, it's a feast for the eyes as well as being a very fun and addicting game to play.
The music that Koji Kondo composed for this game was one thing that I didn't really care for when I first played it as a child. While I don't exactly love it now either, it doesn't bug me as much as it once did. That said, I don't think it's one of his strongest video game scores. I guess since the game's look and feel was more child-like and cartoony than any of the Mario games that had come before, he felt he should write the music accordingly. While some of the themes are childish, others just feel a little... off. I don't quite know how to explain it but to me, this music is just downright strange in some aspects. The most common level theme, which is known as Flower Garden, has a slow, harmonica-like sound to it that is nice, I guess, although, believe me, it doesn't fit at all when there's a lot of pandemonium going on in a stage. The same goes for the music that you hear in the game's first level, which serves as nothing more than a training course. Again, okay music but I don't find it particularly memorable or satisfactory to listen to. Before we go on, let me make it clear that none of this music is bad in my opinion. I just think some of it's a little unusual. Other themes I like quite a bit, actually. I think the storybook theme that plays over the visuals of the game's story about how baby Mario ended up on Yoshi's Island is very appropriate and nice and the theme that plays during your final battle with Bowser is just awesome (it actually feels like it was made for a completely different game) and, again, fits it like a glove. I also kind of like the music you hear on the map-screen as well as the island-like beat that plays on the title screen once you've reached the final world and the music that plays when you battle the second boss of a world. The theme known as Athletic is also catchy but man, it's often played during the game's hardest and most insane levels, ones that you die on quite a bit and so, I've almost gone stir-crazy due to having to hear that theme over and over again. There are some themes that I just plain don't care for, though. The music for the underground levels isn't terrible but it's just not my thing. I don't think it's as appropriate for those mysterious levels as the underground theme for Super Mario World was. I feel the same way about the music for the castle levels. Again, not bad music but I don't think it's as well done as those same themes that were done for the previous game; in fact, it kind of gets on my nerves after a while, especially when I keep dying and have to listen to it again and again. Ultimately, I think a big reason why the score for Yoshi's Island isn't talked about that much is because there isn't much variety. When playing the game, it doesn't take long for you to realize that you're hearing the same handful of themes over and over again. It's not until you get into the game's final battle and the last few cut scenes and credits that you hear some new music, which is a breath of fresh air by any means. Mr. Kondo, you're a great video game composer, but, overall, I don't think this score is one of your best pieces.
Going back to what I said earlier, progressing through the game's various worlds is much simpler than going through the complex map screens of the past couple of Mario games where you had several different paths you could take to reach the next one. Other than the single extra and bonus stages that can be unlocked in every world by getting a perfect score, there are no deviations to the path. Every world has eight stages, two of which are castle levels where you fight a boss (the first one can be thought up of as a warm-up boss whereas the second is the true big bad you have to get past in order to move on), each world has a theme to it like jungle, snow, mountains, etc., and, as to be expected, the levels, enemies, and challenges get more difficult as the game goes on. I must say that, while I enjoy being able to explore and find hidden levels in games such as Super Mario World, I much prefer the more linear design of this game. I just like it better when a game says, "This is what you can do and where you're going to go, so get to it." Now, let's get to the walkthrough.
 World 0: Welcome to Yoshi's Island: The game's first level is something you can only play when you start a new game. It's nothing more than a tutorial of the game's basics, where you learn about baby Mario, collecting coins, and using the Expansion Block (blocks that look like regular, albeit purple-colored egg blocks but momentarily become much larger when hit). There are only a couple of Shy Guys walking around here so it's highly unlikely that you'll have much trouble; heck, you're given infinite lives for this first, brief bit of the game so it should be a piece of cake (if not, you're really in for a world of hurt later on when the game really starts getting serious). By the way, have you ever noticed how the very start of this level looks like the Yoshi's House "level" of Super Mario World? I guess this is a prequel to that game. Anyway, once you jump through the goal here, the game truly begins.
 World 1: Taking place mainly on a grassy plain, the first world continues the tutorial started by World 0, introducing you to and allowing you to practice the essential concept of making and throwing eggs, as well as letting you experience the various kinds of levels that you'll be playing, albeit in a rather easy way, of course.
 Make Eggs, Throw Eggs: Like I just said, this level continues tutoring you about the basics of gameplay, mainly about using Yoshi's eggs to your advantage. You're also taught how to get a perfect score on each level by collecting the special items. As a result, this stage is very short and sweet, as well as quite easy. The red coins and flowers are all very easy to find, the same goes for the bonus rooms and secret areas that lead to more goodies, stars are in abundance here as well, and the enemies, consisting mainly of Shy Guys and Fly Guys but also including Piranha Plants and Crazy Dayzees, are not at all hard to deal with. By exploring every part of the level and hitting every Winged Cloud that you see, you should be able to find everything. (Can you imagine how boring these levels must be for game designers? It must drive them crazy to have to hold back when creating the levels for the first couple of worlds, waiting for the point in the game when they can really get creative in coming up with challenges and obstacles for the player. That might explain why many of the later levels are so insane, as we'll see.)
 Watch Out Below!: I'd say that this level is as easy as the first one, which is what you'd expect, but surprisingly, when I played through the game again in order to do this review, I got my ass handed to me during the first section! You have to dodge a bunch of Chomps as they jump from the background and attempt to squash you, creating pits in the process. Even though this is only the game's second level, I had a hard time dodging the Chomps. They're pretty unpredictable in terms of trying to figure out where they're going to land and once you've realized that one is going to land on you, it's usually too late to get out of the way and you end up getting pushed down the pit that the Chomp creates. I don't know if I just suck since I hadn't played this game in a long time or what but I lost quite a few lives during this first section. It was shameful! And it's especially tough when you're trying to grab the special items while dodging the Chomps. That said, the rest of the level was pretty simple. The middle section has you journeying through some tunnels in the side of the hill in order to find your way to a Morph Bubble and, again, if you're going for a high score, you'll have to thoroughly search every one of these tunnels (it's not that difficult, just takes a little while). The Morph Bubble turns out into Helicopter Yoshi and you must use this form in order to fly through the rest of the section in order to reach the Yoshi Block at the end. You can get through this part without becoming a helicopter, but it's more difficult and you won't be able to get all of the special items that way. Getting the items is so time-consuming that you'd best expect to have to transform several times in order to get everything. Once you reach the end of this section, it's just a brief bit with another Chomp (I didn't get killed here) before the goal.
  The Cave of Chomp Rock: The first cave level of the game is a bit maze-like but it's not that difficult. You might be alarmed at how, when you first go down the pipe in order to enter the cave, a Chomp Rock immediately rolls at you but the truth is, it can't hurt you (it can push you into enemies, so you'd still better jump behind it as soon as possible, but the rock itself is harmless to you). It's after this first section with the Chomp Rock that level becomes a bit of a maze but, again, it's not difficult to navigate and find all of the coins, flowers, and stars. The enemies are mainly Nipper Plants who sprout from spores as well as Piranha Plants, Shy Guys, and Lantern Ghosts but they're hardly a problem. This is also the level that introduces the mini-game huts that you can unlock by finding a key that's hidden somewhere (a Fly Guy has it, in case you're wondering); the prize for winning the game is a 1-Up. After finding your way out of the cave, you have to walk through a small field with a couple of Piranha Plants and a Fly Guy, who's holding a 1-Up, to reach the goal. Hardly a difficult level.
 Burt the Bashful's Fort: The game's first castle level is another extremely easy stage and leads to an even easier boss. There are obstacles such as falling walls, lava pits housing Blarggs (one of them being a giant), and Boo Guys operating rotating maces but I've never found them to be that difficult. As far as enemies go, aside from those already mentioned, there are Shy Guys, Piranha Plants, and, most notably, Burts, foreshadowing what you're going to be facing at the end of the level. Getting the special items isn't too hard and there are many opportunities to collect coins in order to earn 1-Ups. Most notably, if you look up at the ceiling in various spots, you'll notice cracked bricks which you can smash with eggs. After jumping through the holes that you create, you can run across the top of the ceiling and collect a truckload of coins. As you get closer to the boss, you'll have to find a key in order to unlock a door that you come across but, compared to some of the stuff you'll have to do in later boss levels, this should be a cinch. In the room before the boss, you have to take care of a couple of more Burts and if you enter one of the doors here, you'll arrive in a room where you can earn the level's last flower by taking out all four of the Piranha Plants here. You also get a chance to refill your egg supply before entering the boss room (there's always a way to get more eggs during the actual boss battles, though). Upon entering the boss room, you'll come across the scenario that occurs in all of these types of levels: a single enemy approaches you, Kamek comes in, says some stuff to you, and then sprinkles magic dust on the enemy, causing him to grow to a gigantic size (it clearly touches you as well, so I don't know you stay the same size). In this case, it's a Burt who becomes big enough to take up a good 80% of the space in here. Despite his size, he's ridiculously easy. Six egg-shots defeats him, with each shot causing his pants to shrink until he's butt-naked and he deflates from embarrassment. His only means of attack is jumping, which he can't do very well due to his enormous size, although his girth does sometimes make it hard to avoid taking a hit. In addition, he jumps faster after every hit and when he does take one, you might want to watch for the recoil effect it has on him because it can inexplicably bump him towards you instead of away from you. Otherwise, he's easy to defeat in order to continue on through World 1.
 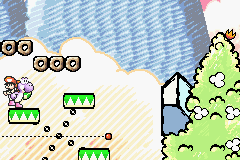 Hop! Hop! Donut Lifts: The first scrolling level, this one, while not extremely difficult, can be tricky at points due to how the stage curves around at several points and the fact that you often must choose whether you'll take the Donut Lifts (which fall after you stand on one of the sections for more than a couple of seconds) or take the moving platforms and Paddle Wheels (those four-platform vehicles that you must repeatedly hop forward on in order to get it to move) to progress through the stage. Getting the special items can also be a little tough, especially when you have to act quickly in order to grab a red coin from a Fly Guy and there's one flower where you have to momentarily drop on the lower path and pluck it before the screen crushes you. The latter half of the level scrolls upwards to the Middle Ring, forcing you to use Expansion Blocks as well as platforms and Donut Lifts, and after that, you must use another Paddle Wheel to make it to the last section, which is a series grass-covered platforms you must climb up in order to reach a Donut Lift that leads to the goal. And while you're doing this, not only must you stay ahead of the scrolling screen but you can't try to get too far ahead of it either since you won't be able to go far and can fall to your death in doing so. This is one of those levels that takes patience and a cool head to get through unharmed.
  Shy Guys on Stilts: I think it goes without saying that this level marks the first appearance of the Stilt Guys. In fact, this stage constantly leads from the typical grassy plain environment to cave areas and vice versa. That said, though, it's not too hard. However, if you're going for a perfect score, you should be aware of the Flashing Egg containing one of the red coins that you can find behind a door in the first section. The second section is a small cave and after you get out of there, you end up on another grassy plain with more Stilt Guys and a red switch that leads to a bonus area where you become a Mole Tank in order to grab two red coins (you've only got once chance to get them, though). The last section is another cave that's filled with Stilt Guys, Lantern Ghosts, and introduces you to Fangs, which aren't nearly as annoying here as they will be later on. And in case you're wondering, there are Piranha Plants and Baron von Zeppelins in this stage as well. Overall, a pretty simple and straightforward level.
 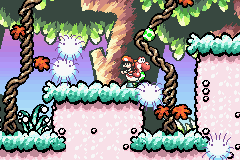 Touch Fuzzy, Get Dizzy: This level introduces you to all sorts of new enemies. Besides the Fuzzies, which you encounter after the Middle Ring, you also come Mildes, Melon Bugs, Eggo-Dils, and the ever-annoying Tap-Taps. But, this is another level that isn't all that hard. The first section has quite a few enemies in it but they're not hard to deal with and if you search through the blocks of dirt that you find here, you'll find a key to a mini-game hut. This is the level that introduces you to the watermelons, which are also quite useful in shredding through the blocks of dirt. After the Middle Ring is when you run into the Fuzzies and, try as I might, I've never been able to avoid getting hit by one here since they're so numerous, even while trying to clear them out with eggs. Fortunately, there aren't any pitfalls in this part save for a couple near the end and even then, you'll probably have overcome the LSD effects of the Fuzzies by the time you reach them. It's more of a nuisance than anything else since it's hard to get the special items to be found here while Yoshi's tripping balls. The last section leading to the goal is simple enough, with platforms that sink down when you stand on them, which you can also destroy with a ground pound, but there's a spring ball leading to a bonus area that's easy to miss. In fact, I only found out about it recently. You have to stand on the tip of the branch jutting out of the ground and jump up to make the ball appear (this could take a few tries). The last few red coins can be found up in that bonus area but while you're exploring, you'd best watch out for the Eggo-Dil up there, who can easily take away some of your stars, which isn't what you'd want right before the goal.
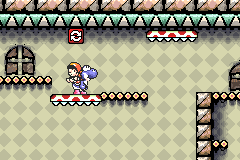
 Salvo the Slime's Castle: This castle is a bit more complex than Burt the Bashful's. It introduces new obstacles like platforms that spin when you stand on them, spiked platforms that can be turned upside down by hitting their switches with eggs, and Arrow Lifts as well as new enemies like Spray Fish, Lemon Drops, and marks the first time where you encounter Bandits outside of the mini-games. The first room contains those spinning platforms as well as lava and a Paddle Wheel and, in stark contrast, the second room is filled with water that contains an annoying Spray Fish and a helpful ghost platform whom you can use to reach a flower you couldn't get earlier as well as the room with the Middle Ring (which also has some red coins). The third room contains those spiked platforms and while there are instances where you might be tempted to hover across or underneath one without hitting the switch, it's often smarter to just play it safe and do so. You also have to push a flower pot in the middle of the room in order to acquire a key needed to head into the next room. There's a Bandit in the lower right section of this room but there's no need to deal with him. The last room leading to the boss has an Arrow Lift that you must use to get to another Middle Ring and the red boss door. Like Burt the Bashful, Salvo the Slime is a pretty easy boss. He's a Lemon Drop whom Kamek turns into a big, bouncy blob using his magic. His main course of attack is to bounce into you and push you into the pit of lava at the end of the room. That said, though, his enormous size makes him easy to dodge and getting touched by him doesn't even hurt you. As you hit him with eggs, Salvo gradually disintegrates and a bunch of Lemon Drops that make up his body fall to the ground. These can hurt you but they also make for a way to replenish your egg supply if you run out before defeating Salvo. As expected, Salvo bounces around at a faster speed as he gets smaller but this mainly makes him harder to hit rather than more dangerous. If you're going for a perfect score, it's a good idea not to stand too close to Salvo when you hit him because a Lemon Drop might fly out of his body and hit you. Finally, once you finally defeat Salvo, keep in mind that you'll meet up with him again in later levels.
  Poochy Ain't Stupid: The first extra level, this one lets you know what you're in for when you attempt to play these levels: extremely hard, one might even say insane, challenges that will make you want to pull your hair out. And, wouldn't you know it, this is one of the easier ones! It's a scrolling level where you have to ride on Poochy in order to make it across large streams of lava while also dodging a seemingly endless array of enemies consisting mainly of Fangs and Bullet Bills. You really have to get the hang of maneuvering Poochy in order to succeed here, especially if you're going for a perfect score. When riding Poochy, you have to keep him from getting ahead of the scrolling screen. If he gets too far ahead and runs into the right side of the screen before it's scrolled, you'll get pushed off and most likely, fall into the lava. There are many instances where you have to make Poochy go back and forth while waiting for the screen to catch up and that's hard to do when you also have to dodge Bullet Bills and Fangs. There are also sections where you'll have to jump up onto a platform and then jump down in order to land back on Poochy because staying on him will mean instant death. The first one of these is very difficult to do and if you want the special items, you have to bounce off a Bullet Bill in order to reach them. And as before, waiting for the screen to catch up with you makes that more difficult. The enemies are extremely annoying here, especially the Fangs. This is when you first see just how irritating they can be. They come in from off-screen in just endless swarms and you'll almost certainly take a hit if you get too close to the right side of the screen before it's scrolled. The Bullet Bills are quite aggravating too and the last section is especially sadistic, with a rotating mace above another stretch of lava. Trying to maneuver Poochy across the lava while avoiding running into that is nerve-wracking as all get-out and after that, you have to take a blind drop and then Flutter Jump to the goal (the Flutter Jump is something else you must master here); one wrong move and you're dead, meaning you'll have to go through the entire level again. And yeah, there's no Middle Ring here either. Are you really surprised? Very frustrating, anxiety-filled level and believe me, this is only the tip of the iceberg when it comes to these extra stages.
 World 2: This world has kind of the same feel as World 1 did, with the difference being that a lot of the outdoor levels here take place in mountainous and hilly areas. There are a fair amount of caves to be explored here too and as you might expect, the game starts to tweak the difficulty a little bit here. The levels get longer and more complex, the special items become more well hidden, and newer, tougher enemies start to show up as well. There are some pretty tricky and downright annoying aspects to these levels so you'd better have practiced enough in the first world before deciding to take this one on.
 Visit Koopa and Para-Koopa: The is the only instance I can think of where the Paratroopas are called Para-Koopas. Maybe it has happened in other games but I've never heard this before now. Despite that, I'm going to continue to call them Paratroopas since I already have in this review and, again, that is their name. In any case, besides those two enemies, this level also introduces falling rocks that slowly fall from the sky to crush you and they make getting the special items more than a little difficult since, if they cover a red coin or a flower, you won't be able to get them unless you exit and re-enter the level or die and try again. The section where the screen scrolls upwards while you dodging the falling rocks that fill up this chasm that you're in is particularly nerve-wracking, although the only item you have to concentrate on getting here is a flower; none of the coins are red. There's another section near the end with falling rocks but I've never found it to be as difficult. You also have to jump across some floating rocks in certain sections of the level and some of these will fall after you've stood on them. There's one section where you can ride on a couple of these falling rocks in order to reach some Fly Guys carrying red coins but if you miss one of the coins (which is possible due to the annoying Eggo-Dil sitting on the platform above you) after using both of these rocks, you'll have to try again using the Flutter Jump. This is also the first level that contains a section where baby Mario can become Superstar Mario in order to reach some coins and a flower and Poochy makes a brief return in another section where you can ride him across some spikes in order to reach a key that will unlock a mini-game hut right in front of the goal. Not exactly a hard level, just one that's a little tricky.
 The Baseball Boys: Now, this one can be a bit of a headache. This level not only introduces Green Gloves and Sluggers but you're also acquainted with Blow Hards and both varieties of Mousers. When I was a kid, I used to love the first section where you go through a small corridor with two Green Gloves and a Slugger because I would use my eggs to try to have a makeshift baseball game. It would never get very far for obvious reasons but it was still fun doing what little I could (although, their obsession with catching and batting your eggs is much less amusing when you're trying to get items, which does occur in this stage). After this section and another that contains such diverse enemies as Shy Guys, Blow Hards, and Mildes, is a section where you have to climb upwards only to drop down and grab a star to use Superstar Mario to get back up there and cross a bed of spikes in a narrow space that Yoshi can't get through. After the Middle Ring are some platforms with Green Gloves and at the end of this section, you have to throw an egg into a section where a Green Glove is walking around on spikes in order to get some red coins. Your aiming has to be really good or otherwise, the Green Glove will catch your egg and throw it back at you. Getting the Winged Cloud behind him is even harder and when I finally managed to hit it, I wasn't too happy to find out it was an extra life, which I didn't need. The last half of the level is made up of two sections with tunnels that are filled with Mousers, some of which come out of small holes in the wall, that are easy to run into due to their sheer numbers, causing you to lose some stars in the process. These tunnels also have a lot of branching sections you must explore in order to find all of the special items. There are also Blue Watermelons to help you with the more difficult enemies you run into, like the Piranha Plants and Blow Hards, and the last section has a Mole Tank section with some red coins. Like I said, this level does have its annoying aspects.
  What's Gusty Taste Like?: I'd say pretty good, seeing as how you can make a lot of eggs from swallowing Gusties. Actually, while this level begins in a forest area filled with Gusties, a good chunk of it takes place inside a cave where there are none of these enemies to be found. This first forest section is fairly short and, like I said, you can use the Gusties to make the eggs you'll need. There's also a dirt patch containing a red switch that makes some coins appear. The level really begins once you use the pipe at the end of this section to reach the cave area. The cave section isn't hard, it just has a lot of sections that branch off that you must explore in order to find everything. There are a lot of dirt patches containing items including a flower and a red switch leading to a bonus room with some red coins (there's a Nep-Enut down there as well), a segment with a super star, and another segment where you can become a Mole Tank in order to reach a key that unlocks a mini-game you passed by on the way down. None of the enemies in the cave, which mainly consist of Lantern Ghosts, Fangs, Mildes, and Tap-Taps aren't particularly hard to deal with, although you have to watch out for big lines of wingless Goonies that can come out of nowhere and run right into you if you don't have a Chomp Rock to get behind. Another level that's not hard per se but just has some annoying aspects here and there.
 Bigger Boo's Fort: As with the second castle level, this one is a bit more complex than what you've encountered so far. The first section is simple, with a red switch you must activate to create blocks necessary to cross over some lava while avoiding some Boos. The next room, however, is a little complex because you must explore it while entering and exiting the various doors in order to find everything but at the beginning of the level is a staircase you have to activate in order to make it to the main part of the room that blocks off the section you need to walk through in order to continue on. This is why you must explore the other doors that you come across because it's only then that you will eventually end up in a spot where you'll be able to jump to that section without using the stairs. You also pick up some red coins and stars along the way and there's also a room where you must defeat two Boos in order to get a flower. If you don't know what you're doing, this room can be confusing but if you just thoroughly explore every inch of it, you'll find all of the items as well as the path you must take. The other two rooms are pretty straightforward. One starts out with rising and lowering stones where you have to jump across rotating firebars and leads to a spot where you ride on a log across some lava why keeping some Boos at bay in order to reach the pipe that leads to the next room. This last room before the boss has several Boos, one of which is a Big Boo with three regular Boos trailing behind him, and if you look carefully, you'll notice that one of the last parts of the ceiling has cracks in it. Hit it with an egg and you can make your way to a bonus room that houses a flower and also has some Boo Balloons who, when shot with eggs, release switches that make the outlined coins in the room solid (watch out for the Boo Man Bluff, though). The boss himself, Bigger Boo, starts out as a Big Boo but then Kamek makes him much bigger than normal. You fight him by bouncing eggs off the wall while your back is turned to him. Each time an egg hits him, Bigger Boo actually grows instead of shrinking, eventually getting so big that he explodes. You might think that would make the battle harder but, actually, the Fangs that come flying in from off-screen are more of a threat than Bigger Boo is, even if they allow you to replenish your eggs. They're what makes it a bit tricky to finish the level with a perfect score. Otherwise, though, this isn't a hard boss fight at all.
  Watch Out for Lakitu: Very appropriate name for this level. Not only does Lakitu make his first appearance in this game here but he's also extremely irritating while doing it. The first section, where you have to make your way across a bunch of platforms made out of dirt, isn't too bad, even though Lakitu immediately shows up and starts throwing crap at you. Here, it's not too hard to swallow Lakitu's cloud and temporarily dispose of him while you continue moving forward, dealing with Shy Guys and coming across a flower and tulip on your way. Near the end of the section is a crate that you must push over onto the solid wood platform next to the dirt one before smashing it. It contains a key that opens up a door leading to the first time where you can change into a train to collect a flower. The second section of the level also starts out okay, with a part where you can use a beanstalk dropped from a Winged Cloud to make your way up to a ledge with another hidden Winged Cloud that takes you to a bonus room filled with coins. However, once you get out of that bonus room, you enter hell while trying to make it to the goal. This last leg of the level is filled with ever re-spawning Lakitus, Shy Guys and Fly Guys, Bubble Dayzees, and the first appearance of Cactus Jack; in short, it's complete insanity. You'll be trying to defend yourself against one enemy when another one will pop up behind you and if you run blindly ahead, you'll blunder into them for sure. Of course, Lakitu is constantly throwing Spiny eggs at you, making it hard to concentrate on defeating all of these enemies. You might not think the Bubble Dayzees would be all that bothersome but when you're trying to focus on one or two enemies at a time, it's very easy to get blindsided by one of the bubbles those flowers shoot. There are also Fly Guys holding red coins here that you better grab before they fly off, which is also difficult to do given all the crap that's going on here, including dirt walls that you have to smash your way through with eggs. And if you manage to make it through this section with thirty stars, watch out for that bush right before the goal because there's a Bandit behind it who's waiting to snatch baby Mario. I always forget about him and end up having to chase him while baby Mario continuously screams, which I'm not in the mood for after all the craziness I just went through.
  The Cave of the Mystery Maze: Fortunately, this level isn't as annoying as the previous one. It starts out in an aboveground area that leads to a patch of dirt on the ground that you have to pound through in order to continue onward. You're continuously pounding through the dirt in this section, coming across small tunnels here and there that lead to red coins, a flower, a 1-Up, and a key at the very bottom that will come in handy. There are some Multi Guys and Lantern Ghosts here as well but, obviously, they're no problem. Eventually, you find the door that leads into the actual cave. The first section of the cave has a Winged Cloud containing a door that leads to a room where you can defeat four Lantern Ghosts for some red coins and a flower and after that, you come to a cavern that tends to curve around as you attempt to find the door leading to the next area. This is another instances where it's best to explore every nook and cranny to make sure you've found everything. There are some special items to be found here and there is also a mini-game hut that requires the key you found earlier. You have to smash weak parts of the ceiling in the lower section in order to make your way up to these goodies and one of the tunnels up top leads to the door to the next area, although you have to get around some Kaboombas to get to it. The door leads to a small room with a Middle Ring and after that, you must hop across some platforms while dodging some Cloud Drops and Cactus Jacks to reach the spring ball that leads out of the cave and to the goal. The part leading up to the goal has some numbered platforms and a Spray Fish you have to get around but it's not a major problem, which is what can also be said about this level in general.
  Lakitu's Wall: This is a very wide open area, which means you'll be spending a lot of time exploring in order to find everything. You have to be careful about which part you attempt to explore first because you could possibly end up in the next section of the level with no way to go back to the one you just left. This is the level that contains the Fat Guys, who not only provide you with enormous eggs that turns all nearby enemies to stars but you can also use as makeshift trampolines to reach high areas. The first section has an upper level that you can only reach by jumping off the first Fat Guy that you see and up there, you can find a flower, some red coins, and a mini-game hut. There are some Bullet Bills and Mildes to be found here as well as a hidden red switch that makes some coins appear. After this first section, the level becomes a myriad of different sections, like one where you have to use some Fat Guys to get over a series of spiked pits, another where you have to get across some falling platforms to reach the pipe, and the next to last section has you going down the sloped inside of an area that contains a bunch of Wall Lakitus, which is the only time where this level's title comes into play. The last section of the level has you become Car Yoshi as you drive through the area while raising up over enemies to reach the goal. There's one point here where you can reach a Morph Bubble that will turn you into a helicopter but, save for allowing you to skip the enemies on the ground, it doesn't lead you to anything special.
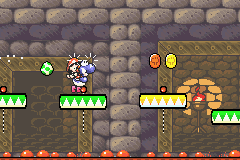
 The Potted Ghost's Castle: This castle level isn't exactly difficult but, as with the one before it, it has a lot of different sections that branch off. The first two sections are fairly simple: the first one has you jumping across some platforms to get over some lava and the room after that is filled with thorns and has an Arrow Lift that you must use to get through here without getting killed. There are two pipes in the latter section. One leads to a room where you become Train Yoshi to grab some special items and the other leads to the next area of the level. There's a sewer-like section next where you have a couple of different paths to choose from. You'd better take the lower left path first because it leads to a long room that has a key in a potted plant at the end of it. There are Boo Guys dropping bombs on you from above and Dizzy Dandies in this room as well so you have to watch it. The right path in the sewer section leads to the next room, which has some spiked balls that you must lift up by hitting them with eggs in order to get by them (once you see them, you'll know exactly what you must do). After them is a locked door that needs that key you found in that one room and behind it is another sewer section. Two alternate paths in this section lead to a Middle Ring and a room where you can defeat a couple of Burts to earn a flower, while the correct path leads to another room with those spiked objects. You have to ride an Arrow Lift up a vertical shaft at the end of this room and when you get up there, there's a thorn patch that must destroy to uncover the door. The room after this is particularly annoying because it's full of Bandits and you're tasked with trying to find a key in one of many potted plants to be found here. Even if you know where the key is before you enter the room, it's still very hard to keep all of these Bandits at bay while you try to push the potted plant containing it off the ledge and then run to the locked door on the other side of the room. Expect for baby Mario to get snatched more than once here. After another corridor containing a Middle Ring and some more potted plants, you make it to the boss. While he may look intimidating when he rises out of the flower pot, the Potted Ghost is actually pretty easy. All you have to do is push him and his pot off the side of the platform that the two of you are standing on. There are a couple of Shy Guys on the other side pushing against you but they're hardly a challenge since they can just barely push the pot back. The ghost does swipe you away from the pot at times (doesn't hurt you, though) and you will have to avoid some blue fames he spits out but other than that, he's virtually incapable of defending himself. Pushing him off the platform shouldn't take more than a minute.
 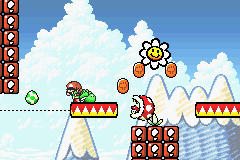 Hit That Switch!!: I must confess, I've never gotten a 100% on this level. I've tried, God knows, but this level is so freaking difficult that I don't think I'm exaggerating when I say that the odds of making it to the end of the level with all of the special items is 1,000 to 1. This stage is all about precise timing involving red switches. Once you press the first switch that you come across, you must quickly travel along the paths of platforms and red blocks while constantly pressing other red switches in order to make it to the end. What makes this so difficult is that the level doesn't give you much of a margin for error. If you dawdle around for just a couple of seconds or take one second longer to hit a switch than you should, odds are you won't make it to the next switch before the timer runs out. If the red blocks turn transparent again, it is possible to Flutter Jump your way back to the first platform to start all over but if you got very far in the level when the timer ran out, you probably won't be able to sustain the Flutter Jump long enough to make it. The most annoying section is the middle one where you have to duck underneath some low hanging red blocks and then immediately jump over some Piranha Plants. You can't jump too high, though, because you'll miss the red coins and flowers hanging above the Piranha Plants, which makes it easy for the enemies to momentarily swallow you and cause you to lose time as well as some stars. Actually, if you're going for a perfect score, you might as well kill yourself if you get swallowed by a Piranha Plant because there's no chance for stars here unless you manage to Flutter Jump back to the pipe at the beginning that contains all 30 of the stars needed (the crates there don't regenerate). But the worst part about the entire thing is that at the end, the level takes advantage of the frantic mindset you're in by that point. When you use a Spring Ball to get to the top of the last tall row of red blocks (those Spring Balls are something else that can cause you to run out of time if you don't jump high enough the first time), you have to wait until the timer runs out before jumping on the last platform. If you don't, you'll get pushed off by the low-hanging red blocks in your path (you can't duck under them) and fall to your death. Now, that is just evil on the part of the developers! As you can see, I'm not a fan of this stage. If you've managed to get a 100%, bravo! You're a better gamer than me. I, on the other hand, am just not able to do it.
World 3: The levels in this world are mainly jungle-themed, with lots of sections where you have to cross over some water (you're also introduced to the Morph Bubble that turns you into Submarine Yoshi). A lot of these levels are pretty annoying as well, with irritating enemies like Grinder monkeys, Nep-Enuts, and Lunge Fish plaguing you at every turn. And top it off, the boss at the end of the world is pretty tough if you don't know what you're doing. In short, this is where the game officially begins to get hard.
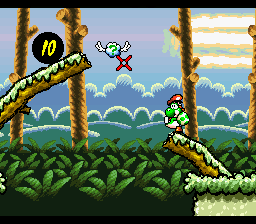 Welcome to Monkey World!: While this world does become difficult, this first level attempts to lure you into a false sense of security by being relatively easy. You're immediately introduced to the Grinder monkeys and while they don't really come out in full force until the middle section, even then they're not that difficult to deal with. Granted, you shouldn't get careless around all of these monkeys but at the same time, they're not as difficult here as they will be later on. Also, the special items are not that hard to find or get to (several of the red coins can be found by pounding the wooden stakes you find into the ground). In the last section leading to the goal, a swing of monkeys will come down from a tree in an attempt to grab baby Mario but you can easily duck to avoid them. Like I said, not a hard level but don't let it fool you, because this world won't stay this easy for long.
 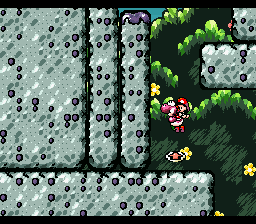 Jungle Rhythm...: Another level that's not exactly difficult but can be more annoying than the previous one. At the beginning of the level, you're introduced to both types of Spear Guys and they make getting some of the special items here a little tricky. When you run into this lower section to get the items down there, it's possible to get cornered by the Spear Guys and since you can't eat them when they're facing you, all you can do is repeatedly lick them until they're out of your way. The Dancing Spear Guys can also be hard to get around without taking a hit, especially when you're going for the red coins amongst them. Their long spears even make it difficult to Flutter Jump across them without getting hit. This part introduces some checkered blocks that turn into small platforms when you touch them, which you can use to cross over the Spear Guys more safely. After that, while there is an invisible Winged Cloud that contains a switch leading to a bonus area where you ride on Poochy to get across some water while collecting coins (none of them red), taking this will place you at the very end of the main level when you exit and you'll have to backtrack a little bit in order to get everything. At the end of this first section, you have to make your way up using rotating and horizontally-moving platforms, which can be a little difficult since you can't quite jump that far without activating one of those checkered platforms, which in itself is difficult to reach. After making your way up there while dodging more Spear Guys, you find a rotating paddle that you can use to access a hidden area in the treetops (finding it can take a couple of tries since you have to be precise with your Flutter Jumps) with red coins and a mini-game hut requiring a key you can find earlier in the level. The last lag of the level can be a bit hard since you have to deal with Dancing Spear Guys on some more narrow rocks as well as a Fly Guy carrying a red coin, a Piranha Plant, and a Tap-Tap. Trying to get that red coin from the Fly Guy before he flies away is what can get you killed. Once you make it past this part, you're home-free.
 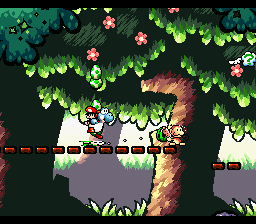 Nep-Enut's Domain: Now, this one I find to be really irritating, mainly due to the title enemy. There are many Nep-Enuts to be found in this level and while all you have to do to defeat them is thrown a single egg or enemy at them, they naturally come back just a few seconds later, usually rising up from underneath you when you're Flutter Jumping over the water while trying to grab items. It's not so bad when the water sections are really small but when they're very long stretches, that's a very different matter. Even if you manage to elude a Nep-Enut when it rises out of the water, it'll still chase you across the lake if you manage to get ahead of it and often in these sections, the only platforms you have to jump across are small treetops that are hard to stay on when you're frantically trying to outrun the big blue monster (the coins that tend to be underneath make it even easier to fall into the water). If you do fall in the lake, you're doubly screwed since you can't swim very fast and it's hard to get baby Mario back if you take a hit. There are a lot of Grinders in this level as well, including a fair amount that come bounding right towards you when they see you in an attempt to grab baby Mario as well as those that throw crap and spit watermelon seeds at you. They can even be a hazard if they wall in the water with you because they can swim a little bit faster than you can. The sections that don't involve Nep-Enuts aren't as bad but you've still got a lot of enemies like Grinders and Shy Guys, as well as new ones like Frog Pirates and Clawdaddies, making things difficult for you. The good thing is that the useful Huffin' Puffins make their first appearance in this section. There's also a submarine section that is especially annoying because you've got a bunch of fish enemies, rotating maces, and Boo Guys dropping bombs on you from above. I've never been able to get through this part without trying at least twice because I run out of time due to the hazards and have to start over. Finally, as you've no doubt noticed, this level is quite long. It's one of the longest yet and the annoying enemies just make it feel even longer. Yeah, needless to say, I'm not a fan of this stage.
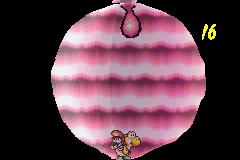 Prince Froggy's Fort: This castle level isn't exactly hard; it's just a bit complex. The opening section outside of the fort is relatively easy, with you dealing with Grinders, Shy Guys and Spear Guys, and Flopsy Fish, eventually coming across a small barrier of thorns that contains a Winged Cloud that houses a door. The door leads to a Submarine Yoshi area where you can navigate around a rotating mace to get some coins, with a couple of them being red. After exiting the outside section, you enter the main part of the fort where you have to cross over a body of water, first doing so while avoiding spaces with rotating maces and annoying Spray Fish that can cause you to take a hit from said maces and then, using a Paddle Wheel to cross the rest of the water while dodging some bombs being thrown down at you by Boo Guys. You also find two doors along the way that lead to rooms housing red coins and flowers but also contain Grinders, Flopsy Fish, and Clawdaddies. After the main section are some cramped tunnels housing two Clawdaddies which you'll have to jump over if you run out of eggs to throw at them and after this, you have an area filled with thorn pits that you must cross over using bridges activated by hitting some Winged Clouds. There's a flower above one of the pits that forces you to jump across without activating the bridge in order to throw an egg at it from the other side. A corridor with some Frog Pirates and a Dizzy Dandy lead to the battle with Prince Froggy. This battle is unique in that Prince Froggy, who's just a normal Frog Pirate, stays the same while you're the one that gets sprinkled with Kamek's magic dust. This causes you to shrink and Froggy then proceeds to swallow you whole! The battle actually takes place inside his stomach. Apparently after he swallowed you, Froggy went on a feeding frenzy and started swallowing Shy Guys left and right. As the Shy Guys, which appear larger than normal due to your shrunken state, drop down at you, you have to turn them into enormous eggs and throw them at Froggy's uvula. It seems easy enough but you have to watch out for the drops of stomach acid as well as keep the Shy Guys from falling on you. There's not much room to move around in here so it's advisable to stay right beneath the uvula while moving to the left or right to dodge the acid drops, which increase infrequency as the uvula takes more hits. After enough hits, Froggy will come down with a bad case of indigestion and you'll be able to escape his gut (I'm afraid to find out how you did so) and grow back to normal.
 Jammin' Through the Trees: Grinders, dirt paths suspended in mid-air, and platforms don't make a good combination but here it is and you've got to face it. The first area of the level is an aforementioned dirt path suspended up high in the air so you have to be careful not to destroy the very ground you're walking on. The enormous amount of pesky enemies here include Grinders, Potted Spiked Fun Guys, and Gusties. The Grinders you really have to watch out for are the ones that throw bombs because they can easily destroy the dirt path, leaving you with very little walking space. The section after this involves using a Paddle Wheel and moving platforms to get special items while dealing with Grinders and avoiding falling down, which either leads to an instant death pit or a bed of spikes depending on your location. There are a bunch of rock platforms near the end of the section that also contain more Grinders and items, including a flower that you must get by bouncing an egg off the opposite-facing bit of stone. The third section has you jumping across some treetops and introduces you to the seed-spitting type of Piranha Plant that will now become a regular enemy as well as more Grinders and Shy Guys as well as some Woozy Guys and a Fly Guy. Leading up to the goal, it's possible to take a higher route for more coins, including some that can be activated by a red switch, although you have to be careful about backtracking to the main path because you could easily fall to your death.
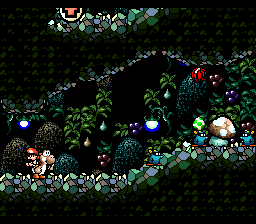 The Cave of Harry Hedgehog: While you start outside in another jungle area with Grinders, the main part of the level does indeed take place inside of a very large cave. There are two entrances to the cave: one on the ground at the bottom of this first section and another than can be accessed by jumping across the treetops. It's best to take the higher entrance because it leads you to a flower as well as some red coins and a key that you'll need to actually exit this area (it is possible to get the key by coming through the bottom entrance). There are a lot of spaces to explore in this cave, including a spot where you can become a Mole Tank to get some red coins and when you reach the end of this spot, you come upon a Spring Ball you can use to reach more items located on these extremely high mushroom platforms. There are a lot of Mousers and Lantern Ghosts but the most irritating enemies are the Harry Hedgehogs themselves. They're so small and dart around so quickly that it's very easy to blunder into one and take a hit from his quills. The good news is that there are plenty of red watermelons that you can use to fry all of these enemies and near the end of the cave is a Lantern Ghost-spitting pipe that leads to a bonus area with a lot of coins that can be activated with a red switch and a flower. The locked door on the one mushroom in the cave leads outside and to the goal.
  Monkeys' Favorite Lake: Yeah, but it's not mine. There are a lot of annoying enemies here and, as has been the norm for the majority of this world, they're mostly Grinders. You actually also deal with Stilt Guys and Flopsy Fish while crossing the water in the first part of the level and when you get to the part with a Paddle Wheel, you have to watch out for the swinging line of monkeys that hang down from the trees. At the end of this section is a hidden Winged Cloud with a red switch leading to a submarine area where you can collect more red coins. The next section of the main level has more Grinders as well as Shy Guys and Clawdaddies, the latter of whom can be hard to deal with due to the thin platforms they tend to appear on. There's a hidden Winged Cloud here that sprouts a beanstalk (it's actually a huge sunflower but everyone calls these things beanstalks) that you can use to reach an area in the treetops that contains more red coins and a flower as well as watermelons. After the bonus area, you start running into enemies, mainly Spear Guys, who are perched on top of small, narrow treetops which can make them harder to contend with. Eventually, you come across more Spear Guys guarding a flower that you must reach by pounding down a big stake and Barney Bubble makes its first and only appearance at the bottom of this spot as well. There's also a Middle Ring that you can only reach by performing a very high jump off a Spring Ball and then Flutter Jumping like mad, which isn't easy. The last section of this level is the hardest because this lake is infested with Lunge Fish who can gobble you up and kill you instantly. There's one last flower that you have to get swimming underneath a rock, which leaves yourself very exposed to one of the ravenous fish. It's best to hit him with an egg when you see him stick his ugly mug out of the water before attempting this. There's also a mini-game hut in this spot with the flower. If you can survive the Lunge Fish and the other baddies that populate this last area, you'll make it to the goal.

 Naval Piranha's Castle: The majority of this level takes place in a series of sewer tunnels that you have to fully explore in order to find everything and eventually reach the boss. These tunnels are often very cramped, full of rushing water that pushes you in a specific direction, and there are tons of enemies. You run into both types of Caged Ghosts: the ones that block entire tunnels and the ones that become big square shapes to stand in your way. This levels marks the only appearance of the Piranha Plant-like Hootie the Blue Fish, whom is almost impossible to kill and is best to avoid as much as you can, and you also run into normal Piranha Plants, some of which are actually caught in the streams and are being pushed right towards you when you come across them, seed-spitting Piranhas, and some Nipper Plants. Every once in a while, you run into some Mini-Ravens and there are Aqua Lakitus to be found lurking here too (somehow, they're able to duck into the very shallow, moving streams of water in the tunnels), ready to spring up and throw Spiny Balls at you. Weirdly enough, with all this water, there are no fish enemies here. In any case, finding most of the special items is as simple as exploring every nook and cranny of the tunnels but some take a little more skill to get, forcing you to bounce eggs off a wall in order to get them. There are some Piranha Plants that can only be taken out by some precisely thrown eggs, which also require you to stand in just the right spot. That takes a fair amount of trial and error to get right. Eventually, after making your way through these enemies, you enter the room where the boss, Naval Piranha, is waiting for you. If you don't feel like fighting this boss (which is understandable because she's pretty tough), you can jump on the very edge of the platform where she sits waiting for you and kill her with one egg shot before Kamek can turn her into a monster. Kamek actually yells, "OH, MY!!!" in absolute horror and then leaves, allowing you to easily move on to the next world. If you want to play fair, though, you're in for a pretty difficult fight. This boss had me stumped for a very long time when I was a kid. Hitting her on her big forehead with eggs doesn't hurt her at all and while I did quickly realize that her weak spot is the bandaged bellybutton, I wasn't adept at bouncing eggs off walls so I couldn't hit it. Once you enter this battle, it doesn't take you long to figure out why so much of the actual level involved egg-throwing because you needed the practice. While it only takes three hits to beat Naval Piranha, she doesn't make easy for you by constantly charging at you in-between hits, forcing you to jump over her head. You have to be careful, though, because she catches on to what you're doing and will sometimes stop in mid-charge in an attempt to trick you into jumping on her head and taking a hit. If you run out of eggs, don't fret because Naval Piranha will shoot some Nipper spores out of her mouth and you can use the plants to make some more eggs; you've just got to avoid being hit by them on this narrow platform. With a lot of patience and practice, you'll eventually defeat Naval Piranha.
 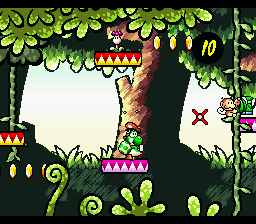 More Monkey Madness: This level sucks, plain and simple. Madness is an apt title because that's exactly what this stage attempts to inflict upon you. It starts out okay, with you dealing with a couple of seed-spitting Grinders while grabbing some red coins but once you begin jumping across the platforms in the treetops, all hell breaks loose. You have to try to grab the special items while contending with rotating Paddle Wheels that go clockwise against rows of bricks, forcing you to make short jumps in order to hop on the platforms and then jump against them in order to get the items, and an abundance of annoying, seed-spitting Grinders (there's one section where there's a ton of them) and hopping Tap-Taps who often get in your way while you're trying to jump on those Paddle Wheels. The seeds the Grinders spit are such a nuisance because they're so tiny and have a tendency to blindside you from off-screen, often causing you to fall off the platform you're on. While you can knock the Tap-Taps off their perches with eggs, they'll respawn if you go off-screen and then come back, making backtracking harder than it should be. And if you take a hit in most parts of this level, a Toady will come down and grab baby Mario, forcing you to chase him in order to get the baby back. Of course, try doing that amongst all of these platforms with long spaces in-between them and Grinders spitting seeds at you. And there's one red coin that's being held by a Fly Guy that I swear forces you to take a hit from the Tap-Tap that's in your path in order to get it. I was never able to get to this Fly Guy when I took the time to hit the Tap-Tap so I always just Flutter Jumped across him, took the inevitable hit, and tried to grab both the coin and baby Mario before it was too late. Unfortunately, the latter is really tough as well since the Fly Guy hovers in a spot where there's nothing underneath him to catch the coin, so you have to get rid of him and grab the coin before it falls into oblivion while also trying to keep yourself from falling into oblivion. Finally, this level has one additional red coin in addition to the normal twenty but it's really hard to get because it's right underneath the center of a rotating Paddle Wheel. It's almost pure luck for you to manage to drop between the rotating platforms and hit the stake. I've managed to do it twice... and both times, I got killed immediately afterward. I tried to get it a third time but I kept missing so I eventually just said screw it and moved on. And when you get to the goal, don't immediately jump through it or you'll miss two last Fly Guys with the final red coins as well as the last flower, which is right behind the goal. So, yeah, this level is frustrating as all get-out.
 World 4: For some reason, this world has a sunset theme. Every single level, no matter how different one is from the other, has the orange color of a setting sun, which you can see in the background, to it. Anyway, this is where the game officially gets hard. There are challenges in some of these levels that will absolutely make your heart stop when you come across them. And remember, we still have two more worlds after this one to go so you'd better strap yourself in.
 GO! GO! MARIO!!: The instant you start this level, you might notice some characters that you haven't encountered yet in this game: Goombas. Yes, the most recognizable of all Mario enemies make their only appearance in this level and, as I described in the enemy section, they're a bit tougher than they have been in the past, able to continue walking in a flattened position after being jumped on (and they waggle their eyebrows before jumping off objects, for some reason). In any case, the first part of this level isn't too bad, with enemies being the typical Koopas and Piranha Plants along with the Goombas but there is an awful bonus area here where you have to make your way up this cave that's filled with Bandits who hide behind the big crystals here, waiting to grab baby Mario and put a Shy Guy on your back (even if you can see the Shy Guys waiting for you behind the crystals, don't attempt to jump on them because that doesn't work). Back in the main level, you eventually run into an enemy you definitely don't want to see here: Fuzzies. Yeah, those psychedelic-episode-inducing fuzzballs are back and this time, it's not as funny to take a hit from them because they appear in an area with a number of pitfalls and platforms you have to jump on, which isn't easy when Yoshi's acting stoned. Fortunately, if you can get beyond their area, the Fuzzies' effects wear off and you can move on. The last section of the level involves you transforming into Superstar Mario in order to climb up the extremely sloped walls of this place, collecting a bunch of special items on the way. As you near the goal, you run into a swarm of Flutters, the butterfly equivalent of Wigglers who also become enraged when jumped on or hit with an egg. Fortunately, they're not that hard to dodge because they fly in a rather slow manner.
 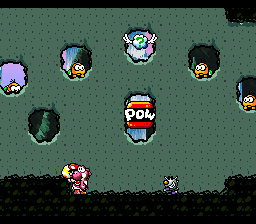 The Cave of the Lakitus: Not a name you want to see for a level, is it? Like the Cave of Harry Hedgehog, there are two ways to enter this place from the starting section that contains a bunch of pipes. If you go down the very first pipe, you'll come to a spot where you can earn an extra life by mowing down a bunch of Koopas with a shell before moving on to the heart of the level (this section isn't necessary to get a perfect score). Besides Koopas, there are quite a few Wall Lakitus but, fortunately, some of these sections contain big POW Blocks you can use to defeat the enemies all at once (one of them is hidden in the ceiling and can be reached with a Spring Ball). There's a bonus area activated by a red switch early in the level that is a little tricky because you have to Flutter Jump down a very deep chasm while trying to gather five red coins out of the dozens of regular ones you find floating in mid-air (a Magnifying Glass really comes in handy here). You can enter the place again if you mess up. Back in the main level, there's a flower that you can get hitting a Koopa with an egg, causing him to ricochet towards the flower and pluck it for you. Other special items that you can get include another flower you must pluck with a Koopa shell, a red coin found in a pipe that you must Flutter-Jump under some stairs to reach, a flower you must reach by hovering across some spikes in a space with a low-hanging ceiling, and a final red coin and flower that you must get by using some arrow clouds. There are a bunch of Wall Lakitus during the last quarter of the level and there are no POW Blocks to be found so you have to deal with them yourself but it's not that difficult.
  Don't Look Back!: Oh, God, this level. The challenge here is that a lot of it takes place up in the sky, where you have to use Balloons and Numbered Platforms for the most part to journey on. And of course, you've also got enemies like Fly Guys, Paratroopas, Bullet Bills, and seed-spitting Piranha Plants to make it all the more challenging. There's also another lone Toady who will grab baby Mario if you take a hit here (I've gotten killed a few times by falling to my death while frantically trying to reclaim Mario). What's worse is that a lot of the special items force you to either Flutter Jump high up in the air or, in the case of a couple of red coins, are held by Fly Guys who will fly off if you don't grab them in time. As with More Monkey Madness, there's one Fly Guy who is virtually impossible to hit without taking a hit yourself from the enemy he's behind, which is a seed-spitting Piranha Plant in this case. Getting through this first section in one piece takes a bit of practice and a lot patience with all of the enemies and other hazards like the unreliable platforms you have to deal with. The latter section of the level is fairly easy, where you inflate a large red balloon at the top of a very tall structure and then use the balloon to travel across the sky while grabbing a bunch of coins as well as the last flower and red coins, the latter of which are all lined up together at the very end. If you fall off the balloon, you'll still be able to complete the level since this one has two goals but if you didn't get all of the special items up there, you're out of luck. Trust me, it does pay to reach the upper goal because you can also get three 1-Ups that are being held by Fly Guys right before the goal.
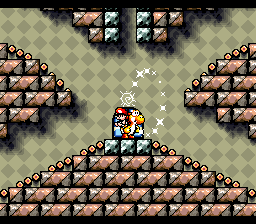
 Marching Milde's Fort: This level begins like a typical outdoors level, even playing music different from the castle theme. There are Chomps and Chomp Rocks to be dodged and outrun here and after that is when you can reach the pipe leading to the center of the fort. The main hub of this level is a room that branches off into four directions with a locked door at the center. Each of the four corridors leads to a separate room that's filled with obstacles and hazards leading up to a key. The first room has a lot of lava and some Hot Lips; the second is full of Bandits, Snifits, and Bullet Bills; the third has a lot of thorns and a fair amount of Grunts; and the fourth is full of a bunch of plant enemies. None of these rooms are extraordinarily difficult or anything but some of them curve around when you follow their paths and may take a few tries. After you get all four keys, you can go through the locked door at the center of the main hub and then gradually use the other three keys to make your way to the battle with Marching Milde. She's a surprisingly easy boss for being fairly late in the game. All you have to do is continuously ground pound her, splitting her into two in the process, until she's reduced to nothing more than a big line of Mildes that you can easily stomp with no problem at all. From here on out, none of the bosses are this simple.
 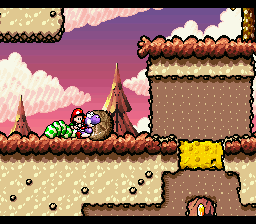 Chomp Rock Zone: It doesn't take much to describe this level. At the very beginning, you're given a brown Chomp Rock that you can push throughout the majority of the stage, using it as a weapon against all of the enemies in your path. While this level can certainly be completed by leaving the Chomp Rock behind, you won't be able to get all of the special items without it. Plus, given the protection it affords you, it's best to just take it. However, there is another side to taking the rock with you in that you constantly have to clear its path whenever it gets caught behind stakes in the ground and other such obstacles. At the end of the first section, you have to really make a path for the rock by pounding some stakes into the ground so that they're level with the outlines of these red blocks before you hit the switch that activates them. And by the way, this is a brown Chomp Rock we're talking about here: the kind that doesn't come back if you lose it. That's hard to do, granted, but I somehow ended up doing that one time, making me feel like a complete jackass. Going back to that bridge made of red blocks, if you want to get a perfect score, you must use the Chomp Rock to reach the door at the end of it. If you take the lower door, you won't be able to get the second rock that allows you to get all of the special items in this latter section of the stage.
  Lake Shore Paradise: This stage is bookended with eponymous lake shore sections with a cave area in-between. The lake shore sections are filled with Koopas and Paratroopas, Flopsy Fish, and all manner of Shy Guys, including a fair amount of Fly Guys carrying red coins and Woozy Guys. The first section has some spots with special items that can be accessed by swimming right underneath the pieces of land they can be found in (some of them have an easier way to the items), Winged Clouds that create bridges to make crossing over the water less hazardous, and at the end of it is a mini-game hut that can be accessed via a Spring Ball on the ground. It's possible to trigger a bridge to cover the ball but if that happens, you haven't blocked yourself from the hut because you can jump right through the bridge; you just have to make a smaller hop onto the ball. The cave section not only has more Flopsy Fish and Shy Guys but also some Clawdaddies and some Egg Plants that spit cactus-balls instead of eggs so you'd better be sure of what one of these plants is spitting before trying to grab it. The latter half of the cave section has a secret area filled with spikes where you have to use a type of lift that's similar to the familiar Arrow Lifts but whose direction you can change from up and down to left and right by hitting it with an egg. It also tends to go in one particular direction if you jump off of it, which means you might have to catch it if it gets away. You can explore some parts of this room without the lift but it's necessary in acquiring everything and doing so without getting killed. The last section of the level has a spot containing a flower and a Fly Guy holding a red coin that can be accessed by creating a bridge... but I can never figure out how to do that correctly because there are two Winged Clouds and you need to hit one in particular first in order to make it work. If you do it wrong, you'll just create a short, useless bridge in this one section and while it's not impossible to get to those items without the bridge, it's not easy either since you have to jump off a Stilt Guy and hope that your Flutter Jump can reach them. The last leg has more Stilt Guys that get in your way, Woozy Guys who flop around in the shallows like fish, and seed-spitting Piranha Plants, one of which is the last obstacle before the goal. You know what to do.
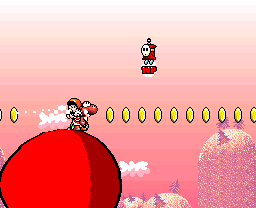 Ride Like The Wind: The minute you hear that Athletic theme when you enter this stage, you should know what you're in for. This level starts you off with a tricky flower that's located in a pit where there are a couple of Paratroopas hovering underneath it. While you can get the flower by just bouncing off of the Paratroopas, you have to time when you jump on them just right or you'll end up getting rid of them in a spot where you won't be able to make it up back and you'll fall to your death. You can use a shell from a nearby Koopa to get it as well but, again, this is tricky because you must be standing in the correct spot in order to make it work. After that, in order to move forward, you must use a Spring Ball to jump up past a Piranha Plant, walk around this upper curved section to reach a platform, ride it back around and over the Piranha Plant (better hit it with an egg before it can grab you), quickly jump up to a small cranny in the ceiling before the platform drops off, and finally jump on another platform to reach the next part of the level. There are more useful Huffin' Puffins to be found in the vertical, Koopa-filled chamber that leads to an open plain filled with Gusties. However, if you throw an egg straight up when you reach the top of said vertical chamber (Puffins can't reach up far enough), you'll find a hidden Spring Ball that allows you to reach a bonus area with another big red balloon. Here, you can earn a lot of coins to get some extra lives and after you exit, you fall towards a Helicopter Morph Bubble that allows you access to some more coins. That open plain with Gusties has some special items in it so after exiting the bonus stage, you'd best backtrack a little bit. The next section of the level starts out with a series of hidden crevices in the walls which contain a Middle Ring and other goodies like a Winged Cloud filled with stars and a crate with a key to a nearby mini-game hut; what isn't so nice is the Bullet Bill blaster that's in one of the crevices. After this bit, you find a large, green Paddle Wheel that leads you to a series of very fast-moving platforms that forces you to be very nimble when jumping from one to the other (there's also a crevice containing a flower that you also have to be very light on your feet to get), eventually leading you to the goal.
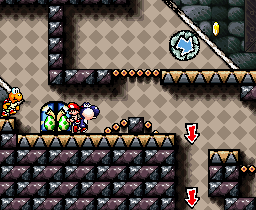
 Hookbill The Koopa's Castle: This is another castle level that is quite maze-like and is very easy to get lost in if you don't know where to go. After an opening lava bit that involves Hot Lips, rotating maces, and Koopas (the latter of whom make getting the nearby flowers much less hazardous), you reach some Boo Guys who attempt to drop maces down onto you and you have to destroy some weak bricks in order to get by them in the first place. Here's where you enter the maze. In the main part of the level are several doors, each of which leads to a room whose central hub is a vertical section with a rotating mace and another mace being dropped by a Boo Guy. You can also enter some off-shoot areas that often block you in with those oversized pinball flippers, forcing you to go back to the main level and try another door. While you'd want to try every door to get all of the special items, the door you really want to go through is one you can only access by triggering a flight of stairs with a Koopa shell in the lower section of the main level. This leads to a Middle Ring and a key to a door that you can only get by riding an Arrow Lift across a thorn-filled section of the main level. The thorny section has a bonus room you can access by smashing a weak brick in the ceiling and the object is to kill the Mildes you find there, which start off big but become smaller as you pound them, to receive a single red coin instead of a flower like usual. The locked door leads to a vertical room where you must get some special items while dodging a very annoying Fishin' Lakitu who tries to grab baby Mario and after that is another vertical room filled with multi-colored blocks that take a bunch of egg hits to smash (your eggs bounce around like crazy in here as a result). After destroying them all, you gain access to an Spring Ball that allows you to reach the boss door. By the way, in the area behind the door leading to the boss, there's a Middle Ring so, if you're running low on stars, don't do what I once did and waste a star power-up right before you see that ring. The boss is a Koopa whom Kamek makes ten times bigger (and uglier) with his magic. The trick to this guy is that you have to hit him right in the head four times to knock him over on his back and when he's momentarily helpless, ground pound his stomach. While you only have to do this to him three times, he recovers each time by pounding along the path with his shell, threatening to flatten you. You can dodge him well enough but you better be careful not to corner yourself on the edge of the screen when you pound his belly or you'll be trapped with nowhere to run. And if you take too much time in hitting him with an egg the first time, he'll charge and then attempt to flatten you with a belly-flop and you definitely don't want to be cornered for that. And if you run out of eggs, jump on his head repeatedly to make him cough more up (apparently, he has a real taste for Yoshi eggs). All in all, Hookbill isn't an extremely difficult boss but he is one where you have to watch it while fighting him.
 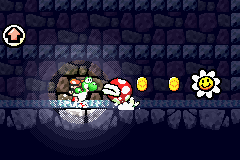 The Impossible? Maze: While not impossible, it is definitely the trickiest maze level in the game. And unfortunately for your ears, the music to that level is that grim, "Dun, dun, dun," music that plays during the lead-up to the major boss of a world looped over and over again. There are no words to describe how sick I was of that theme by the time I finally finished this level. In any case, finding out where you're supposed to go in this level can take a lot of exploring and trial and error. The main section is a brightly light sewer section with tunnels that lead to one of several entrances to a very dark sewer section. The trick to getting where you need to go is to use some crates that you find placed here and there throughout the level to reach some tunnels that you normally can't get to because they're placed a few feet off the ground. Going into different tunnels allows access to different crates that you can push to reach other tunnels that you couldn't with the crates that are normally found in the main level (I hope I'm making sense; if not, then all I can say is that you can play the game itself to see what I mean). An annoying feature of this stage are streams of water that sometimes push you down tunnels you didn't want to go in and since you can't fight against the current, your only option is to come back around and hope that the next time, you'll make it into the tunnel you were trying to enter. There aren't many enemies here. Most notably, Grim Leachers, those little bastards who throw baby Mario off you back to take his place, reversing your controls in the process, make their sole appearance here as well as Jean de Fillets (this game's equivalent to Fishbones) and Piranha Plants, some of which are caught up in the currents and head towards you. The best advice I can give for this level is to stay patient and explore every nook and cranny. If you do so, you'll eventually find your way out (it took me a while to find the way to the exit so don't get discouraged if it takes a long time).
 World 5: Here comes the snow world. All of these levels take place either on a frozen mountaintop or in the sky surrounding it. Expect a lot of slippery ice and snow and some treacherous obstacles like moving ski lifts you have to hop across and annoying enemies like Bumpties and Dr. Freezegoods. And the extra level in this world will probably leave you crying like a baby, especially when going for a perfect score. Obviously, since we're nearing the end, the game is going to stop having mercy on you so must prepare yourself for what lies ahead.
 BLIZZARD!!!: This level starts out looking like it doesn't belong in a winter-themed world but once you start moving, the snow begins to come down like crazy. You're also immediately introduced to the very rare and deadly Thunder Lakitu, who momentarily sets sections of the ground ablaze with his lightning bolts and you also run into Spike, the classic Mario enemy who pulls spiked balls out of his gut and throws them at you. Both of them only appear in this stage. The first section starts off feeling relatively simple enough, despite those enemies, but once you start jumping up some platforms to be faced with two seed-spitting Piranha Plants, the latter of whom can be tricky to hit due to where he's placed, you start to realize it's going to not as easy as you thought. It also doesn't help that there's a Toady waiting to grab baby Mario when you take a hit. After that bit, you have to jump up some rather curved slopes to get to a vertical section housing some Wall Lakitus and up top, you can find both a mini-game hut (it's Throwing Balloons, though, so enter at your own risk) and a pipe leading to a bonus area where you can become a helicopter to collect five red coins amongst an enormous of regular ones (you only get one shot at it as well). The second section takes place inside an ice cave filled with Lantern Ghosts, the newly introduced Bumpties, Fangs, and low-hanging stalactites that you have to get out of your way by using egg-shots. Some of those stalactites also fall when you get close, forcing you to be careful, and, as with the other levels involving it, the ice makes it very easy slip into enemies or into pits. Fortunately, there are blue watermelons here that make taking said enemies out a lot easier. The last section of the stage again takes place outside, where the ground is now covered in snow and you now must face more Bumpties, both types of Piranha Plants, Fly Guys carrying red coins, some cacti playing with Needlenose cactus-balls, Dizzy Dandies, and the return of the Thunder Lakitus (the Toady come back as well). Yeah, they throw a lot of baddies at you during the last stretch towards the goal. Weirdly enough, there's a random regular watermelon to be found at the beginning of this area and there's also a pipe leading to a bonus area that can only be reached by stealing a Lakitu's cloud. The last bit has some red coins suspended over the outline of red blocks whose switch is hidden nearby. You can get them by just using eggs but the Bumpties flying in the same spots make that harder than it should.
 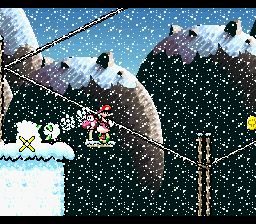 Ride The Ski Lifts: This stage, like the last one, starts off looking like it's going to be a breeze, giving you an ever-growing snowball that acts like a Chomp Rock in its ability to mow down enemies. But when you reach the middle section, it becomes much more difficult than you could have imagined. This is where the eponymous ski lifts come in and while you might not think it would be hard to just ride them like the level's name says, it is so when you've got Lakitus throwing crap at you and flying Bumpties that can knock you into oblivion. There is a hidden red switch at the beginning, as well as one in the middle of the area, that activates some blocks you can use to get through here without using the ski lifts but if you're going for all of the special items, you'll undoubtedly run out of time before you make it to the other side. What sucks about the ski lifts is that if you miss one, you have to wait a really long time for another one to find you since there are so few and are so spread out on the line. The third part of this level marks the first time you come the skiing snowmen, Dr. Freezegoods, and you eventually come across a tricky bit where you must activate this Expansion Block that's above a sole ski lift in order to reach the ledge necessary to continue on. You have to be careful about how you smack that thing from the bottom because you can easily knock yourself past the lift and down the pit. The ledge you get to leads to a section where you have to ride on the ski lifts to get over the mountain and then zig-zag down the side of and away from it, at some points jumping from one section of the lifts to another, to reach the goal. Not only do you have to worry about the deadly drop but there are also Bumpties and Dr. Freezegoods using the lifts as well that can knock you to your death if you run into them. This stage definitely takes a lot of precise jumping and sure-footing.
  Danger - Icy Conditions Ahead: You start off in a very icy area with streams of water and you must jump across some icy platforms, as well as use a bridge, to get across them, including a fairly long, Spray Fish-infested stream. The good thing is that this level gives you a red watermelon that you can use to not only fry enemies but also release frozen goodies from the blocks of ice they're trapped in. After the first ice/water bit, you come to another where you have to shoot a bucket down with an egg and use it to cross over a stream that has some Flopsy Fish in it. That part leads to a part where you must use a Paddle Wheel to get across a mid-air section to reach the next part of the level. You get another red watermelon to use to melt a couple of ice blocks that are in your way as well as get some red coins that are surrounded by ice blocks. Doing the former is slightly tricky because you have to back the Paddle Wheel just enough away from the blocks so you can get both of them without wasting a blast of fire, which you'll need to get the red coins. If you mess up in melting these blocks, you're pretty much screwed because it's nigh impossible to reach the ledge on the other side of this space with a Flutter Jump. The next section is also full of ice and fortunately enough, the first Winged Cloud you see has a red watermelon that can use to access both a Middle Ring and a Super Star. As Superstar Mario, you can not only breeze through this part with no problems whatsoever but you can also reach a section beyond the door at the end that leads to a bonus area where you become a helicopter to collect a bunch of coins. Like before, you've only got one shot at this bonus area and to add to it, you have to get around the Bumpties that are flying amongst the coins. The pipe at the other end of the bonus area takes you to the same spot that the door back in the main level, which has a scenario that should look familiar: Dr. Freezegoods and a series of ski lifts that you have to ride, although to be fair, these don't go on for as long. After jumping across some ice blocks, getting past a small batch of thorns, and going through some more snow-covered hills with Dr. Freezegoods, you come to the last part of the stage, which is the game's first skiing segment. And as the first skiing segment, it's rather unforgiving, with a bunch of stones in your path, special items that are hard to get (there's one flower that took me a number of tries to get), and a long line of Baron von Zeppelins and a couple of Skeleton Goonies that drop bombs down on you. If you're trying to get the special items, be prepared to try this part a few times before finally being able to get the goal.
  Sluggy the Unshaven's Fort: Right off the bat, you'll notice a door to the left of where you start in this level. It leads to a room that contains the only normal Chain Chomp to be found in the game and killing him, which isn't easy, gives you access to a secret code you can enter on the map screen to play the mini-games whenever you want. Back to the main level, you're also introduced at the beginning to a very common and annoying type of enemy in this stage: Dangling Ghosts. These guys are so annoying because they're always getting in your way and either grab baby Mario or block access to coins that you're trying to get by hitting them with eggs. It's very irritating when you're trying to get some coins and a Dangling Ghost sticks his ugly mug in the path of your shot and stays there for a few minutes with that stupid look on his face, blocking the coins. You have to be careful about activating staircases in this stage because if you trigger the wrong one, you'll end up blocking off some areas that are filled with special items. There is a trick that you can use to reach a seemingly inaccessible area if you mess up. If you do it right, you can go through the bottom of a flight of stairs but, that said, it's a little tricky to do. There are plenty of thorns in this level, often with special items trapped behind them that force you to watch your jumping when trying to get them, and there are some odd yellow platforms that Yoshi sinks a few inches into when he stands on them. These can really hinder your jumping and may cause you to jump right into the thorns in one section where you have to go into a thorny area to get a flower. There's another section where you can ride a Chomp Rock-like platform to get some coins, including a red one, that are hanging above a pit of thorns but I suggest using an egg shot to get them instead because I've rarely attempted that without falling on the floors. That's another thing about this level: there isn't a Middle Ring until quite a bit into it so for a long stretch, you'll have to start from the beginning if you get killed. At one point, there's a fork in the road, each of which allows you to grab some coins, although none of them are red. The path on the left is interesting because it leads to a friendly slime creature that allows you to sit on its head and bounce along some spikes to reach some coins. Just don't do what I stupidly did one time and jump off right next to some spikes.
 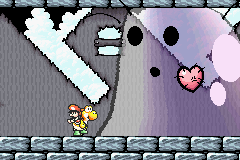 The last two rooms lead to the boss are also interesting. The first one is pretty irritating because it's filled with Dangling Ghosts and Fangs and the last part of it forces you to Flutter Jump underneath a ghost and right into the path of some Fangs in order to get over some thorns. I've never been able to do that without taking a hit from the Fangs or getting knocked into the thorns so my only advice is to take the hit and then get baby Mario back when you reach the other side. The second room has you riding on a ghost with a platform on his head often stops and stretches upward, sometimes towards items and other items in the path of hazards like thorns and Mace Guys, meaning you have to be careful of what part of the platform you're standing on. And when you momentarily get off the platform to get items, you have to do it quickly or the ghost will move on without you, leaving you stranded. After a long, narrow corridor filled with Sluggies, you enter the room to face the boss. While Kamek boasts that Sluggy the Unshaven (is that not a disgusting name?) has no weak point, he actually has a very obvious one right in the middle of his transparent body: his heart. You have to throw a series of eggs at the heart to push through Sluggy's jelly-like flesh in order to reach it. You have to be precise with your aiming or you'll run out of eggs before you can reach the heart and while the eggs can be picked back up after bouncing off Sluggy's skin, the boss starts putting his flesh back into place after it's hit so you have little room to dawdle around. There is an Egg Plant at the left edge of this platform where Sluggy intends to push you off to your doom, which will happen if you take too much time in beating him. He also takes four hits instead of the usual three so you have to keep that in mind as well.
 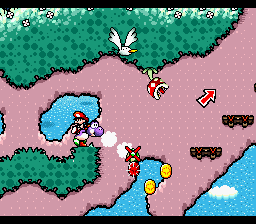 Goonie Rides!: This and the next two levels have the Athletic music theme to them, letting you know that they're going to be rather crazy. That's what you get right at the beginning of this level. Not only are you faced with all the different types of Goonies, save for the skeletons, but you've also got a myriad of Shy Guys, Multi Guys, and Crazy Dayzees. You have to be careful at one point because a line of Flightless Goonies come running off of a raised platform and right next to it is a pipe leading to a bonus area that you must ride on a passing Goonie to reach. After Flutter Jumping through a bit with Piranha Plants, Bubble Dayzees, and Multi-Guys, you enter the next section, where you must become a helicopter and navigate through a sky full of Goonies. Getting around them isn't quite as difficult as it could be but when you reach the end with the seed-spitting Piranha Plants, you have to go up in order to get a flower that you could easily miss. The last part of the level has you making your way upward with the help of some red switches and the red blocks they activate while dodging more enemies. Like that bonus area in the first section, the last flower here must be reached with the aid of a Goonie before you head for the nearby goal. Overall, not an extremely hard level, I must say.
 Welcome to Cloud World: Like the previous level, you're immediately bombarded by a plethora of enemies here, including Gusties, Piranha Plants, Woozy Guys, and Lakitus, which at one point in this section actually start attacking in pairs! The difference, however, is that this first section automatically scrolls, significantly adding to the challenge. When you get about halfway into the section, you run into more enemies like Green Gloves and Sluggers and Baron von Zeppelins that drop cactus-balls down on you. While there are some Huffin' Puffins that show up here, I've never ended up actually getting them because at this point, I'm so busy trying to avoid getting killed. The second section doesn't scroll, thankfully, but you have to make your upwards, first using a balloon to get to the top of some very tall pipes and then reaching another area where you have to get across some platforms that have spikes on them. To turn them over, you have to bait some Green Gloves on the other side of the large pipe you're standing next to into throwing eggs at the switches. The last bit before the goal has you Flutter Jumping over some spiked pits while collecting some red coins in order to reach the last series of pipes and clouds leading to it. While preparing to hover across those spiked pits, watch out for the Gusties that are present here because I've been hit from behind by those enemies and knocked right into the spikes, much to my frustration. I've never really hated Gusties before but here, they are a major pain. And when you get past those spikes, you also have to watch out when you jump to a rather tall platform because one time I ended up missing it and falling to my death. Just get rid of that pesky Piranha Plant that's in your way here and head for that goal.
 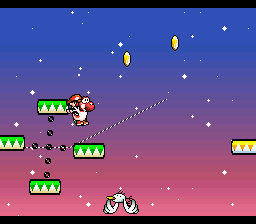 Shifting Platforms Ahead: Another fairly short level but this one is by far the trickiest out of these latter World 5 stages. You head to the left at the beginning, jumping over Bumpties and then riding and jumping along platforms, some of which fall after you touch them, while avoiding enemies such as Goonies, Ravens (who are difficult to deal with due to their size, invincibility to being swallowed, and their habit of walking around in a circle on their little planetoids), and Tap-Taps jumping on tiny platforms made of dirt. When you reach the top of this part, you can ride a Goonie to reach a bonus area where you can get a lot of coins and a flower while jumping across falling platforms and using red blocks to run across a bed of spikes. Back in the main level, you must use a Paddle Wheel to reach some platforms that will take you through the rest of this section but it's hardly easy since you have to dodge Ravens, Tap-Taps (there are some near the end of this part that are very hard to avoid since they stand right next to your platform's path), Goonies, and Bumpties, as well as jump across some falling platforms. After this part, you have to get through a bit where Baron von Zeppelins carry Shy Guys (as well as a crate) and then use platforms to get around more Ravens before reaching the second part of the level. The second section begins with a seed-spitting Piranha Plant but make sure you have a full stock of eggs before defeating him because right after him is a section filled with dirt that you can clear with eggs in order to reach a flower. The last part leading to the goal is full of falling platforms you have to run across as well as avoid getting squished by and you also have to make sure you reach some before they fall too far or you won't be able to get some items. After a Bullet Bill turret at the end of this section, you find the goal.
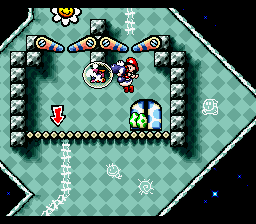
 Raphael the Raven's Castle: Like previous castles, you first have to get inside and this involves jumping across some rock platforms, one of which falls over when you stand on it for too long, and then ride some red platforms up a vertical shaft while dodging some Goonies (which I can never seem to avoid) and some cactus-balls being shot by a couple of Blow Hards to reach the door. Once inside, you once again make your upwards, bypassing some Mace Guys, in order to head to the right past some more Blow Hards to reach a turret that fires Bouncing Bullet Bills. You have to go up, using the Bills to reach some special items, before finally heading left, past another Mace Guy and two Kaboombas to reach the next room (there's a Middle Ring here that you can reach by leading a Bullet Bill here and bouncing off of it). After reaching a room where you have to clear the way of some blocks with eggs so you can travel upwards with an Arrow Lift, you come to a pipe that leads to another vertical room where you have to go up using an Arrow Lift. You also have to contend with some Goonies and Ravens on the way. The pipe up there leads to a room with some large, rotating slabs of wood that you must use to cross over a deadly pit. However, if you Flutter Jump to below the latter platform, you'll come across a hidden door that leads to a bonus room where you become a train to collect a bunch of red coins and a flower. The downside to this room is that it's irritating with the large amount of space you have to explore and with those chalk drawing Shy Guys chasing you at every turn. After exiting the bonus room, you Spring Ball up to several more rotating platforms and come across another vertical area filled with ledges as well as a lot of Flightless and Bowling Goonies waiting to smack into you when you least expect it. The boss door is at the top of this section. The battle with Raphael the Raven is unique in that after Kamek uses his magic on him, you get whisked away onto a very small planet where Raphael follows you and proceeds to chase you around. To injure him, you have to bait him to the side of the planet that's opposite of one of those two posts you see sticking out of it and then ground pound it when he's standing there, causing the post to jut out the other side and jab him. While it's possible to do this to him when he's walking over the spot, it's better to just until he's standing still. With each hit, Raphael becomes angrier and faster and also starts jumping on the planet, creating shockwaves that zip towards you from either side. As with most bosses, it just takes three hits to put Raphael down for the count.
 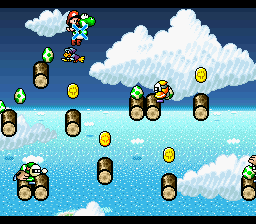 Kamek's Revenge: Get ready to cry. In my humble opinion, this should have been the final extra stage in the game instead of the next-to-final one because this one is an absolute nightmare, especially for when you're trying to get a perfect score. I somehow managed to achieve that goal but, trust me, it wasn't easy! The gimmick here is that, for 90% of the level, Kamek will come zooming towards you from the left in an attempt to ram you. You can see him in the background when he's moving into position and he makes a distinctive noise right before he charges, which you can use to time when you should jump to get out of his way (that doesn't always work, though). Of course, trying to avoid him while doing what you have to do in this stage as well as contend with the other enemies here is easier said than done. I'm so glad I didn't get to this stage when I was a little kid because I would have been screaming so much that it would have broken the sound barrier! The first section starts with you jumping across some very small and narrow floating logs, one of which has a key to the side of a Chomp Rock, to reach a large walkway to the right. Of course, to get that key, you have to stand on the rock to nudge it off the log, being careful not to fall off with it, and after, if you're going for a perfect score, you have to Flutter Jump amongst all of those other floating logs... while getting bombarded with eggs from Green Gloves and Sluggers. Yeah, expect to knocked into oblivion a fair amount of times before you clear this part with all of the items in tow. After that, you must activate a bridge of red blocks to cross over while trying to get a flower that's hovering in mid-air as well as get some red coins from two Fly Guys before they fly away, all while racing against the switch's time limit and avoiding Kamek. Again, you might not succeed in this part for quite a while. After finishing that part and jumping across some rock and cloud platforms with avoiding both regular and Flightless Goonies, you might be thinking about how horrible that was. Oh, that was just a warm-up. Up next, you have to ski while dealing with Kamek! Fortunately, you get a Middle Ring before enter the ski hut (which requires that key which was a pain to get) but still, this part is infinitely worse than the first one, especially when going for all of the special items, which are as hard as ever to get. The stones in your path and the slopes aren't bad enough obstacles but there's also a Chomp Rock that's rolling down one of the slopes, getting in your way and making it difficult to get some of the items on the following hill. It took me a good number of tries before I finally got everything here. The section after this part doesn't have Kamek, fortunately, but you still have to time your jumps just right in order to reach some red coins and a flower. And you best jump before reaching the end of the big cloud you ski across here because for some reason, you trip and roll into a snowball there even though nothing at all touched you. I don't know if it's a glitch or what but it seems to happen every single time.
 You eventually reach the fourth section where you ski off the mountain and fall down a chasm to become Helicopter Yoshi, which you use to reach the goal. Here, you have the last five red coins and a flower to get but, unfortunately, there are Green Gloves here that slow you down by pelting you with eggs and, even worse, Kamek comes back with a vengeance. While there are several other Morph Bubbles here that you can use if to replenish the amount of time you can stay a helicopter, they're not going to be much use if the Green Gloves and the Bumpties that are flying around here slow you down to where you end up wasting all of them (you can also get stuck behind some of the small clouds here). And if Kamek crashes into you here, there's a good chance that you'll fall to your death in the chasm and have to do the skiing segment all over again. It is helpful if you can somehow trick one of the Green Gloves into hitting a red coin for you but try formulating a plan when you're so frantic here. Once you have everything here, you have to head up and go right to reach the Yoshi Block and the goal. However, Kamek is still on your tail and there are some Bumpties and walls that you have to get around, which can easily slow you down. You might just barely reach the last flower, which is to the top left of the last part where you can find the Yoshi Block. Once you return to normal and head to the next screen where the goal is, you can breathe easily and then go and pass out. What a cruel level! (On a side note, if you want to get some entertainment out of somebody absolutely losing it with this level, go to YouTube, type in Rainiac666Remade, and go down to the bottom of the Yoshi's Island playlist where there are three videos of him trying desperately to beat this level. It's hilarious stuff.)
World 6: We've finally reached Bowser's world for our final confrontation with Kamek and the little brat. As you can expect, the game stops fooling around and pulls out all the stops to be as difficult as it possibly can, with a lot of difficult enemies and hazards like spikes and lava sprinkled throughout the levels. There are many cave stages to be found here and those that don't take place in caves occur in a depressing, barren landscape that actually have bones strewn about them. And the final battle with baby Bowser looks easy at first but it takes an extremely difficult and downright monstrous turn when Kamek intervenes. Best make sure you're well versed in this game's skills because there's no turning back now.
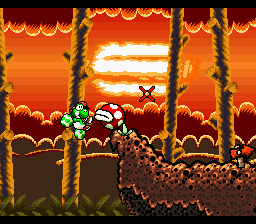 Scary Skeleton Goonies!: Kind of anticlimactic seeing as you already caught a glimpse of these enemies in a previous level but, in any case, the title should inform you that they're quite common here. There are also plenty of both types of Spear Guys here too so, as tempted as you might be to jump on a Skeleton Goonie when one is flying over them, it's best to just Flutter Jump because the weak undead bird will cause you to fall amongst them. There are also sections here where you have to use bridges to cross over some dancing Spear Guys while avoiding the tips of their spears. Pyro Guys and the very tough Zeus Guys make their first appearance here as well. If you don't have something that can easily kill Zeus Guys, like fire breath, you'd best jump over them and run like a coward. The second section starts off with a Middle Ring and you're going to need it because this is another section where Chomps jump down from the background in an attempt to crush you. You have to manipulate one Chomp into jumping through a specific spot where it will uncover a flower and you also need to watch out for some green Toadies who will try to snatch baby Mario before you know what happened and more Zeus Guys while dodging the plethora of Chomps here. The third section involves a bunch of Skeleton Goonies dropping bombs on you and you have to dodge them while getting across platforms as well as dealing with flightless ones on the ground. There's a particularly tricky flower to get here. You have to aim your egg cursor at just the right moment in order to make the egg bounce off of a bed of spikes and curve around to pluck the flower. Keep an eye on the skies while doing this because those bomb-carrying Skeleton Goonies can very easily mess you up here. There's a mini-game hut here that can be reached by pounding down a bone that's sticking out of the ground, activating the Winged Cloud with the bridge, and then hitting another cloud that contains a beanstalk seed you can use to climb up to the hut's platform. Near the end of the level is a Piranha Plant who can be tricky to get over, even with the Spring Ball that you have to use. You can either try to get over him or hit him with an egg while Flutter Jumping, neither of which is easy to do. After that is the last leg to the goal, which is an endurance round that features a bed of spikes, a Blow Hard, a couple of Flatbed Ferries you must jump across while dealing with Tap-Taps, a green Toady, and a couple of Piranha Plants, more Skeleton Goonies, and two more Tap-Taps on a very small ledge right before the goal that you must Flutter Jump to.
  The Cave of the Bandits: I don't know what level title gave me more of a heart attack: The Cave of the Lakitus or this one. While the Lakitu cave wasn't all that bad, this one is pretty annoying so I elect it as being the worst of the two. As you would expect, there are Bandits, both the normal and coin varieties, everywhere here, either walking in your path, hiding behind mushrooms waiting to pounce, or even being carried by Baron von Zeppelins. There's a lot of lava to be found here, some of which is next to Egg Blocks and as a result, some of the eggs that come out will fall in there and become unobtainable. There's an infestation of Lava Drops, which can't be killed in any way, too, and if they're not hanging around the actual lava pits, they can be found floating around the platforms that you have to jump across. Some Zeus Guys pop up here as well. The stage's second section has a lot more Bandits as well as many annoying, squeaking Skull Mousers, some Sluggers (two of which are playing with a Chomp Rock on a sloped section!), some Blow Hards, narrow platforms with Lava Drops floating around them, and a Green Glove. When you get to said Green Glove and the Blow Hards behind him, be careful about getting hit because there's a pink Toady in that section. The third and final section begins with a Middle Ring and a Super Star. As Superstar Mario, you have to run across a lot of spikes, being sure to grab the other stars in your path before your timer runs out and you die instantly. This might seem easy but there are a lot of jumps here that can slow you down just enough to where you run out of time and there are more Sluggers playing with Chomp Rocks that can slow you down even more. If you get one Super Star and then run into some of these obstacles, it's a good idea to quickly backtrack because the stars do respawn after you've left the screen. The goal is at the end of these spikes.
 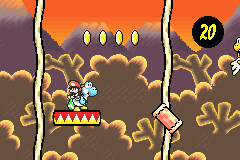 Beware the Spinning Logs: This level's gimmick is introduced right from the start. The spinning logs themselves may not look all that threatening but when you're Flutter Jumping across enormous chasms and they're in your path, they can easily send you flying to your doom. There are also instances where you must jump on them when they're not spinning and then quickly move forward before they spin again, making for some very challenging sections. The first part of the level has many more hazards than just the logs. There are Lava Drops, narrow platforms, some of which contain tiny Spring Balls that you have to use, tall mushroom platforms that you have to carefully jump across, moving platforms amidst the spinning logs and hovering Paratroopas, and, worst of all, Fuzzies. They were pretty bad in the last level they appeared in but this one, where they appear amongst a bunch of those high mushroom platforms as well as some narrow log platforms, is by far the worst. You definitely don't want to trip out here. And by the way, there's a post containing a red coin at the end of this segment. Don't do what I stupidly did one time and keep pounding it after you've got the coin because you'll eventually fall to your death. The second section has more spinning logs, the first couple of which can lead you to a coin room up in the sky, Lava Drops, and Chomp Rocks, one of which you have to push down a hill to get it out of your way; just watch out for the Slugger waiting to swing it back up towards you! The last bit to the goal is another endurance round, with more spinning logs, Chomp Rocks that you have to roll off of narrow platforms in order to get red coins, more tiny Spring Balls sitting atop the very narrow types of poles, and Lava Drops and Paratroopas getting in your path. I wasn't kidding when I said that the game isn't going to make it easy to complete the levels from here on out.
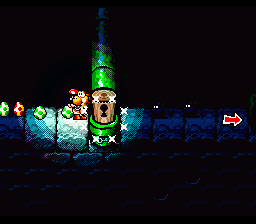
 Tap-Tap the Red Nose's Fort: This stage doesn't pull any punches at all. The first section is a very long and tricky bit with a lot of moving platforms, Boos and Boo Guys getting in your way (one Big Boo blocks a small passage and has a bunch of regular Boos trailing him), more freaking Lava Drops, lava bubbles, rotating firebars, tiny Spring Balls that you have to use to perform tricky jumps with, and a section where you have to navigate your way through moving corridors while avoiding getting crushed. After spring up to a sewer-like spot with a Piranha Plant, you come across a thorn-filled room containing some large cushions. However, when you get near one, you'll learn that it's not really what it appears to be: it's Salvo the Slime! Yes, the game's second boss has suddenly returned in the middle of another boss level. It doesn't matter, though, since he's just as easy here as he was the first time; even more so, actually, since he doesn't spew Lemon Drops when he takes a hit this time. You just have to watch out for the thorns in this room while fighting him and don't let him push you into them either. Also, be careful when you defeat him because the key that he gives up can very easily fall on the thorns, as happened to me one time, forcing you to destroy them with eggs and then very carefully jump down to grab it. After unlocking the door and going through another section, which this time has a Middle Ring and a lot of Tap-Taps, you come to a large and dark maze where you must navigate through these pipes to find special items and a key to remove a cork from the pipe that leads to the rest of the level. There are Boo Guys, firebars, and a lot of Mousers that you have to get around here. Some of the Mousers will actually run from the bottom of the screen to the top when you least expect it. In addition, there are hazards like thorns and Tap-Taps waiting in the rooms containing the items and there's one room where you have to fight Salvo the Slime again in order to get the key needed to exit this bit. While this is extremely easy since this is a small room with no thorns, if you run out of eggs you'll have to exit, get some more, and re-enter the level to fight him again. The last section leading to the boss is a big stream of lava that you must first use a Paddle Wheel and then a small, narrow log to cross while dodging lava bubbles and a Jean de Fillet at the end. When you come to the pipe at the end of this bit, you might think that you're heading into another section of the level but this, in fact, leads to the boss. Since Tap-Taps have been such a pain throughout this game, it only makes sense that Kamek would turn one of them into a boss. You can't directly injure this boss with your egg shots. You have to destroy the floor of multi-colored blocks above the lava pit in the middle of this room and then, lure Tap-Tap to the edge of the lava and hit him with an egg to knock him into it. What's difficult about this fight is that, while you're trying to smash through the floor, Tap-Tap is relentlessly chasing you around the room and despite his size, he can still jump very high. You're not even safe from him on the high platform that contains two Egg Plants. Basically, you've just got to avoid and keep out of his way as best as you can until you've made a hole in the floor big enough for him to fall through. Once you've knocked him into the lava, it's time to power through the rest of the final world and face baby Bowser.
 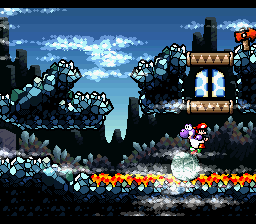 The Very Loooooong Cave: Not long, so much as rather difficult. This is a scrolling level through a very dangerous cavern that forces you to keep your guard up because you never know what's awaiting you up ahead. You've got lava, stalactites that fall down towards you when you get close, Chomp Rocks that fall from the ceiling and threaten to push you towards the other hazards, and it's full of enemies like Boo Guys, Pyro Guys, and the every-annoying Lava Drops among others. As with all scrolling levels, you can get crushed by the screen and fall into oblivion if you can't stay ahead of it when it's scrolling upwards. The scrolling nature of the level also makes it difficult to reach certain sections like lower parts of the rocks that contain items and it doesn't make it easy to spot red coin-carrying Fly Guys in time to grab their bounty either. The level doesn't just scroll to the right. It starts off doing so but then it'll dip down, start heading to the left, and then head upwards and back to the right, forcing you to keep up with it while watching for what's ahead. The vertical part near the end of the first section, with its lava pools, Boo Guys spawning out a pipe, a Fly Guy who is very easy to miss due to the scrolling, and a Chomp Rock that comes out of nowhere at the top, is particularly tricky and the same goes for the bit where you have to ride on a Chomp Rock to get across a stretch of lava to reach a door to a bonus area. When you begin the second segment, you might be relieved to see that it's not scrolling... and then you get up top of the ledge here and it begins to do so. This part is about as difficult as the first one. The first half of it has you running against the scrolling behind a line of Flightless Skeleton Goonies, trying hard to not to get pushed into them, and then you have to jump across a series of sloped ledges with Chomp Rocks that threaten to push you off to your death as the screen scrolls faster. The last stretch to the goal is a nightmare for 100-percenters because you have to pound down four posts to get the last red coins and grab the last flower before the screen pushes you past them. As you can see, "The Very Haaaaaard Cave" would have been a more apt title.
 The Deep, Underground Maze: Yep, it's another freaking cave/maze level and this one, aside from The Impossible? Maze extra level, is possibly the most complex one of all. You start out outside but you must use one of two rolling Chomp Rocks that you immediately come across to get some red coins before pounding your way through the dirt and down into the cave. When you first enter the maze, you must push a Chomp Rock down a passage that goes to the right and then snakes down and to the left, past some Lava Drops (how sick are you of these enemies yet?) and through some Tap-Taps and Piranha Plants, to reach a key that unlocks the door to the main part of the level. The good thing is that if you mess up, the enemies that you could kill with the rock won't respawn when you come through here again. After getting through here, you can use a Spring Ball (which is to the right of the game's first Spooky) to jump up and reach a Middle Ring before heading down to the door. That Middle Ring will turn any onscreen Lava Drops into stars, acting as a little payback for any grief they caused you will trying to push that Chomp Rock. The actual maze starts with another bit that you have to ground pound through. This leads to a cavern with Boo Guys and a corridor to the left that leads you to a green Toady and two Zeus Guys. Going down further, you drop down a long ways to a section where you can either go left or right. Both lead to two doors but the left corridor leads to a door with a Winged Cloud containing a flower above it, which is very tricky to get due to the bit of rock between it and the door and requires expert egg-throwing skills; there are some red coins up there as well. The right corridor leads to a space with some Winged Clouds, one of which contains another flower, above some sections of dirt. The left door leads to a mini-maze of its own, with Zeus Guys, Snifits, Boo Guys, Spookies, and another Green Toady. The doors in this maze all lead back to the main section in some way, with the door through the flippers at the very right leading to that other door to the right of the door that led here (did that make any sense whatsoever?) The trick is to find a key that's hidden up one of the holes in the ceiling of that right corridor at the bottom of the main section and then go through the mini-maze to reach a section in the main one where you can create a bridge out of a Winged Cloud that is tough to hit to reach the locked door. Again, that probably didn't make any sense but when you play the level, you see what I'm talking about. After one last bit beyond that door with a Chomp Rock and some Tap-Taps, you finally reach the goal.
 KEEP MOVING!!!!: This stage begins with a Chomp Shark segment involving some numbered platforms and after that, you eventually reach a section where you ride a couple of platforms across some spikes with another Chomp Shark above you and then run across some more numbered platforms. After that, you ride some platforms across some more spikes and then do the same by jumping across numbered platforms while dodging Lava Drops (there are some tricky red coins to get in a secret, upper section here too). This leads to a part where jump up across some rotating platforms and then run across more numbered platforms suspended above some spikes while outrunning a Chomp Shark. The second part of the level begins with some platform riding above spikes while dodging Cloud Drops but that quickly turns into a ride across a series of fast-moving red platforms, those weight-shifting platforms you encountered in a previous castle level, and red and yellow platforms that go down past some Snifits and Tap-Taps. After riding on a red platform past some more enemies, you ride upwards on an Egg Plant-housing green platform while contending with some very annoying Blow Hards, then to the left through a dirt section past more enemies like Shy Guys, Cloud and Lava Drops, and Tap-Taps, back upwards past some more Snifits and Lava Drops before jumping off and heading to the right. After getting around a large section of floating dirt that contains a key to a nearby mini-game hut (it's Throwing Balloons) as well as Snifits, you can head upwards and to the right to the next section. This section starts with a Super Star which you can use to get through as much of this Bandit-infested part as you can. Once it runs out, you have to travel through this place to an upper section filled with Bandits with has a lower part where you can drop down at various points in order to get some items, including a flower that you can only get when a Bandit stands on the side of a flipper, opening it in the process. After all of that and a lift that leads down to a bonus area filled with coins and Mousers, you go down a pipe where you plummet down along with four Bandits. Move yourself to the right to land in the section containing the goal.
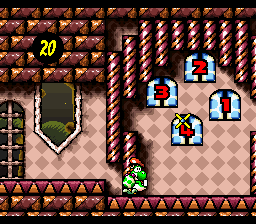
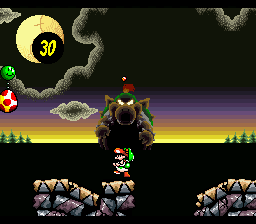 When you make it inside baby Bowser's room, you'll again be greeted by Kamek, who once again demands that you hand Mario over. Unfortunately for him, his yelling wakes up baby Bowser, who angrily stomps him as flat as a pancake and kicks him away for disturbing his nap. That's when Bowser spots you and decides that he wants to ride you the way baby Mario is. He attacks by trying to ground pound you, creating shock waves in the floor as he does so. To strike back, you must ground pound the floor and create your own shock waves to hit him. After three hits, this simple first part of the battle will end. However, Kamek intervenes by using his magic on Bowser, creating a scene transition where Bowser becomes a black silhouette that grows and fills up the screen as the room starts to crumble. You find yourself outside of the destroyed room and you watch as a gargantuan version of baby Bowser rises up in the background. He then gradually moves towards you, stopping now and then to shoot fireballs at you, while your job is to grab these enormous eggs being carried by Baron von Zeppelins and throw them at Bowser, hoping to whack him in the head. This is really difficult because he's so far away that it's tough to judge where you should aim your cursor. You may think you're aiming at a good spot but then the egg will either soar straight over his head or smack into his chest, which doesn't hurt him. At the beginning of the fight, boulders will come tumbling down from the sky, destroying a good chunk of the ground that you're standing on, and after you hit Bowser three times, he'll hurl more boulders and give you even less places to stand to make it all the harder. And if you manage to hit him a couple of times in a row and smack him back quite a ways, he'll angrily charge at you to get back to where he was beforehand. Needless to say, you're dead meat if he makes it to where you are and getting killed here sucks because you'll have to fight him when he's small again before you get another shot. I'm hardly so skilled a player that I can fight this boss and beat him in one try. In fact, it typically takes me a good number of tries before I'm victorious. The only real advice for this boss is to keep sticking at it and he'll eventually go down, leading to a cinematic where baby Mario and Luigi are reunited and taken home by the stork.
  |
| This is from the Japanese version, where Yoshi's name is pronounced "Yossy." |
I never played this until in 2000 I bought a SNES from Toys R Us and it came with it. It quickly became one of my favorite SNES levels.
ReplyDelete